Category: FAQ

  • LTL Shipping Tracking and FAQ

    LTL Shipping Tracking and FAQ

    LTL Carrier Tracking & Freight Shipping FAQS

    What is LTL Freight?

    LTL stands for “less-than-truckload” and refers to a freight shipment that consists of goods, commodities, or cargo that weights more than 150 pounds, but less than a full truckload. This type of shipment is usually shipped on pallets and, as the name suggests, is shipped via semi truck and only requires a portion of the truckload or trailer space. This type of shipping is often considered less urgent, which is why reliable shipping and tracking is so important.

    Carrier Tracking Links

    To make tracking your truckload shipping needs even easier, below is a list of LTL tracking pages with links. By clicking the links below, you’ll be able to more accurately access and track the freight shipping documents that were provided to you by your carrier. This way you can track your shipping status and you’ll be better prepared when your products do finally arrive. 

    FedEx Priority

    TForce Freight

    Numark Transportation

    XPO

    Estes Express

    YRC Freight

    R+L Carriers

    Dependable Supply Chain Services

    Central Transport

    Total Transportation & Distribution, Westset Logisitics

    SAIA LTL Freight

    Old Dominion Freight Line

    Reddaway Freight

    LTL FAQs

    Here are some common LTL questions we receive from businesses regarding their freight shipping and packaging.

    Let’s Get Started

    Made In The USA

    Full PouchCustomization

    Scalable Printing Digital & Plate

  • How to Properly Seal Your Mylar Bags for Food Storage

    How to Properly Seal Your Mylar Bags for Food Storage

    How to Seal Mylar Bags for Food Storage

    Tips for Sealing Bags

    How to Seal Mylar Bags for Food Storage

    How to Seal Mylar Bags Easily for Long Term Food Storage Custom Printed Stand Up PouchesSealing your mylar bags after loading them is the critical last step before your bulk product is ready to leave your facility and journey to your customer. If your printed mylar bags are not properly or adequately sealed, your product could fall out of its container or prematurely go stale in the pantry, neither of which is ideal for your customer.

    Types of Food Storage Sealing Options 

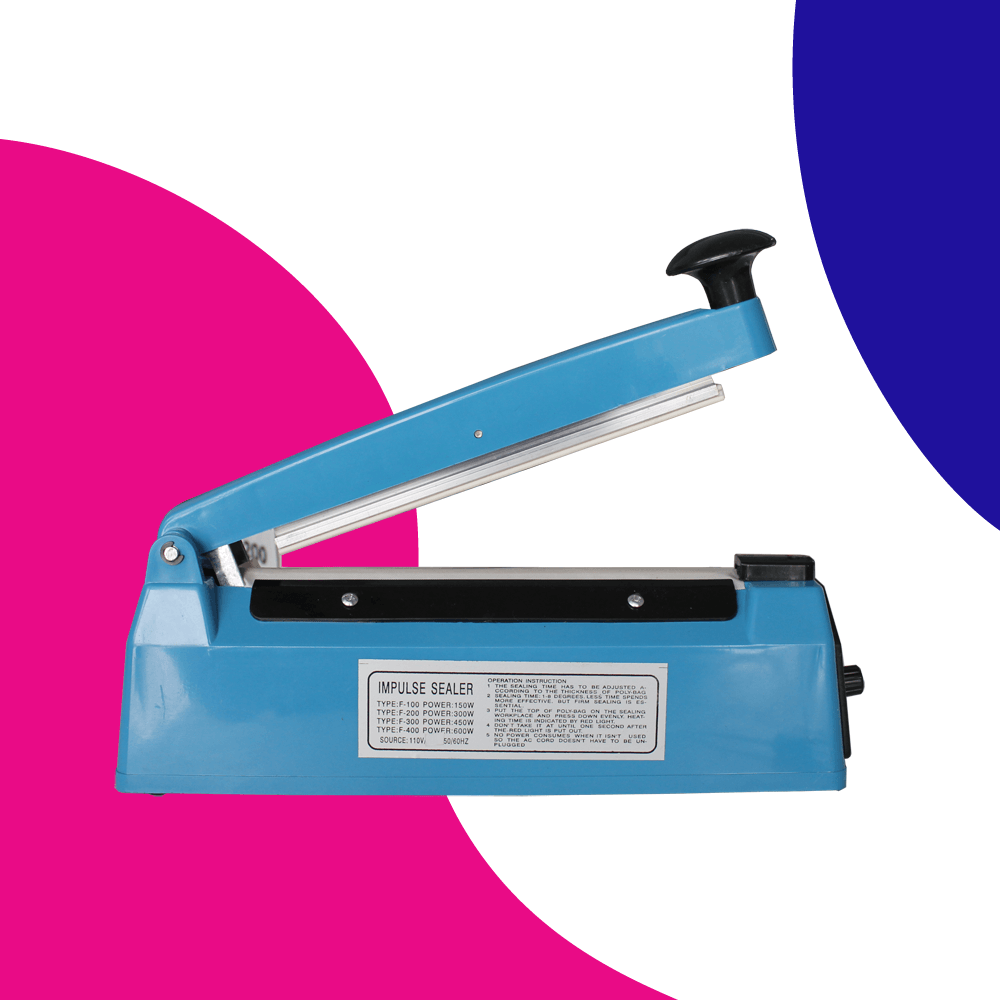
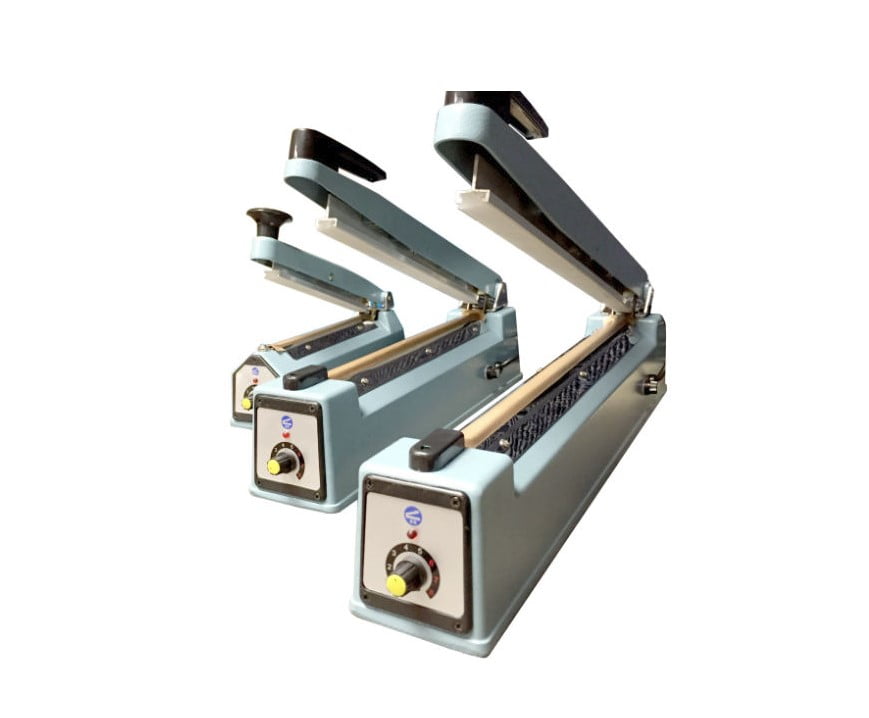
    When it comes to properly (and professionally) sealing mylar storage bags for storinglong-term, there are four different options: impulse sealing, direct heat sealing, band sealing, or chamber vacuum sealing. Each has its own pros and cons, which you can learn more about below.Manual Heat Sealing Packing Machine for Plastic Bag Heat electric sealing machine impulse sealer

    Impulse Seal

    Impulse seals are inexpensive (starting at around $30 – $100) and provide a quick seal using a pulse of energy through the seal bars. Impulse sealers only turn on when the sealing bars are lowered onto the vacuum seal rolls.

    Positives

    Negatives

    Inexpensive

    Less control that band sealers

    Instant Sealing

    Small Seal zone

    Best for occasional use

    Manual bag line up creates inconsistent seals

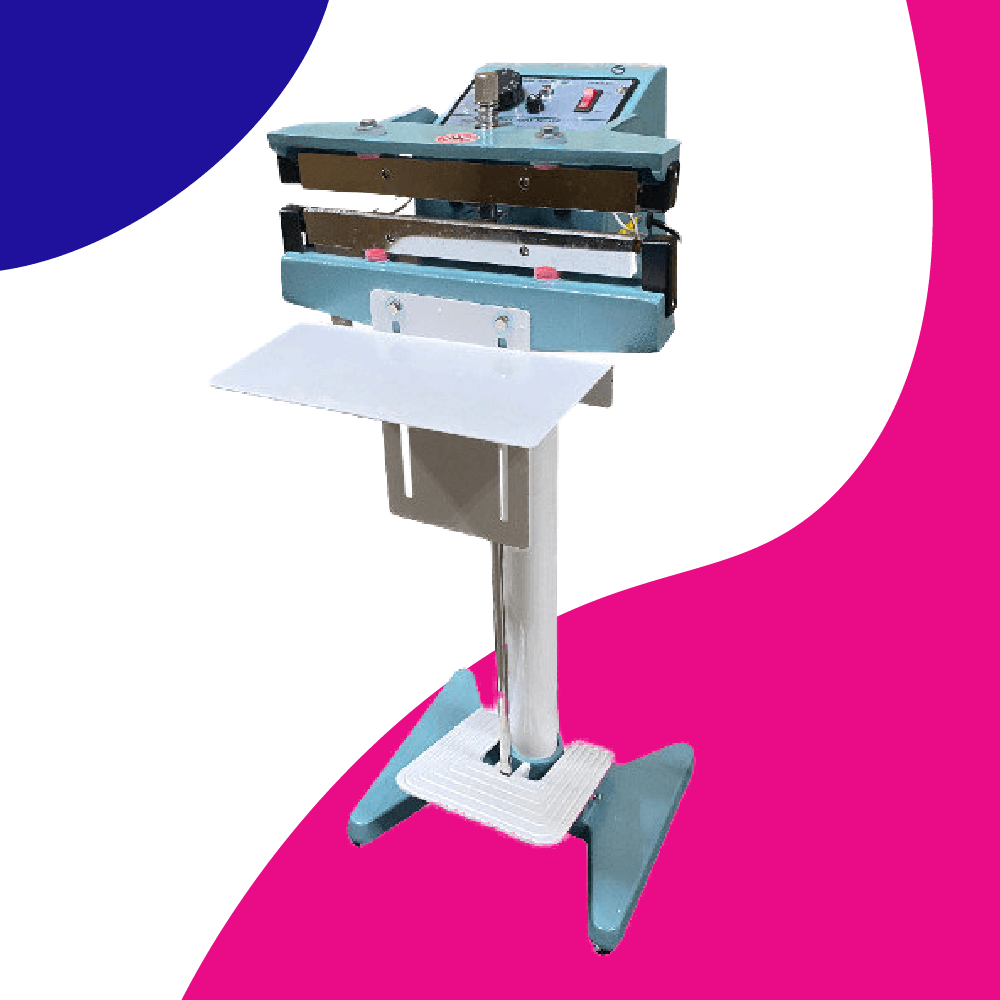
    Manual Foot Pedal Sealing Machine Direct Heat Sealer for Bags and Films with Printer and Heating Sealing Machine and Impulse Sealing Machine

    Direct Heat Manual Seal

    Direct heat sealers maintain consistent and constant heat as long as they are turned on. This can allow for better heat penetration and better seal tack.

    Positives

    Negatives

    Best for thick materials

    Cannot seal polyethylene

    Industrial bags o irregular bags

    Slower than band sealers

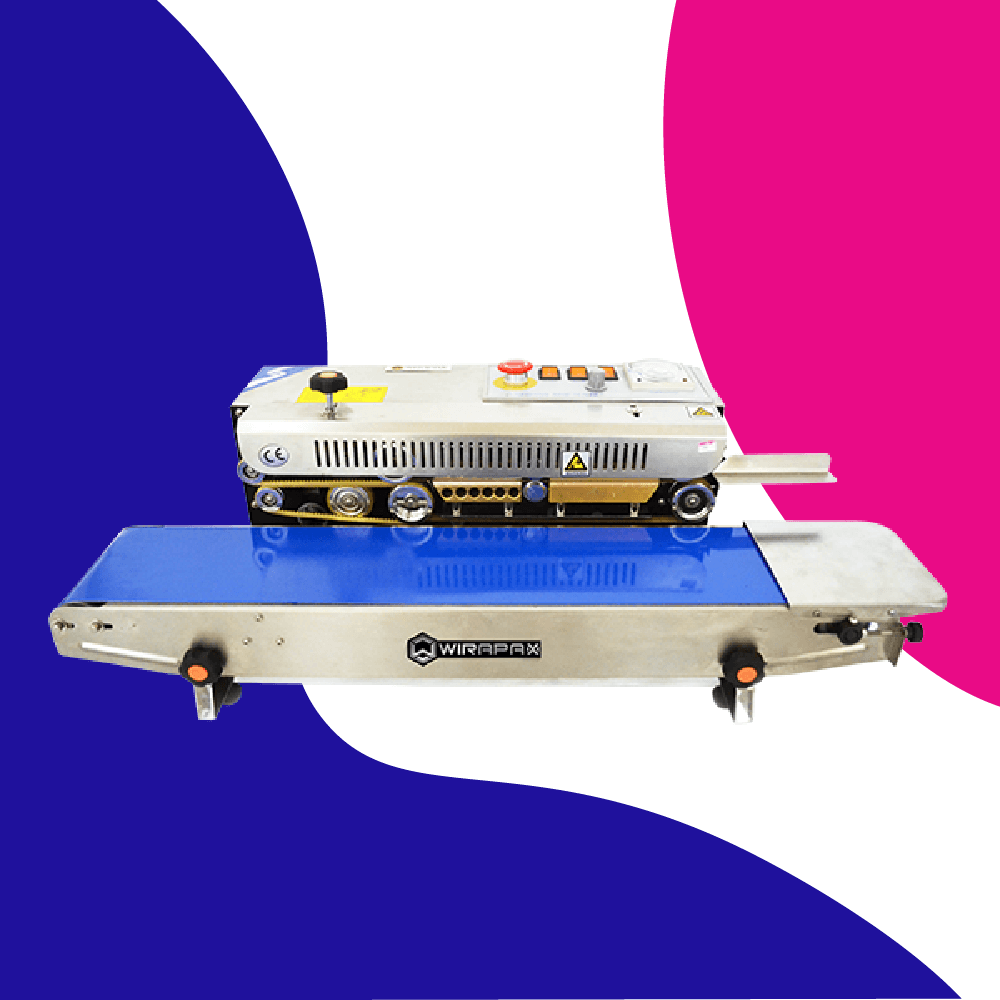
    Heavy Duty Continuous Band Sealer Sealing Machine Automatic Band Sealer Machine Horizontal Packing Machine

    Band Seal

    A band sealer is a semiautomatic sealing machine. Unlike a manual sealer, a band sealer contains both heating and cooling elements. The hot and cool elements combine to create strong, durable, and professional seals on your bags. These direct heat-style sealers typically have separate controls for both temperature and dwell time. A small conveyor with speed controls will pull your bag through the sealing mechanisms, and once set up, hundreds of bags can be processed at one time. 

    Positives

    Negatives

    Very consistent seals seal hundreds of bags in a single use

    More expensive $500+

    Accessories such as date code, serial number stamping

    Not ideal for sealing a few bags occasionally 

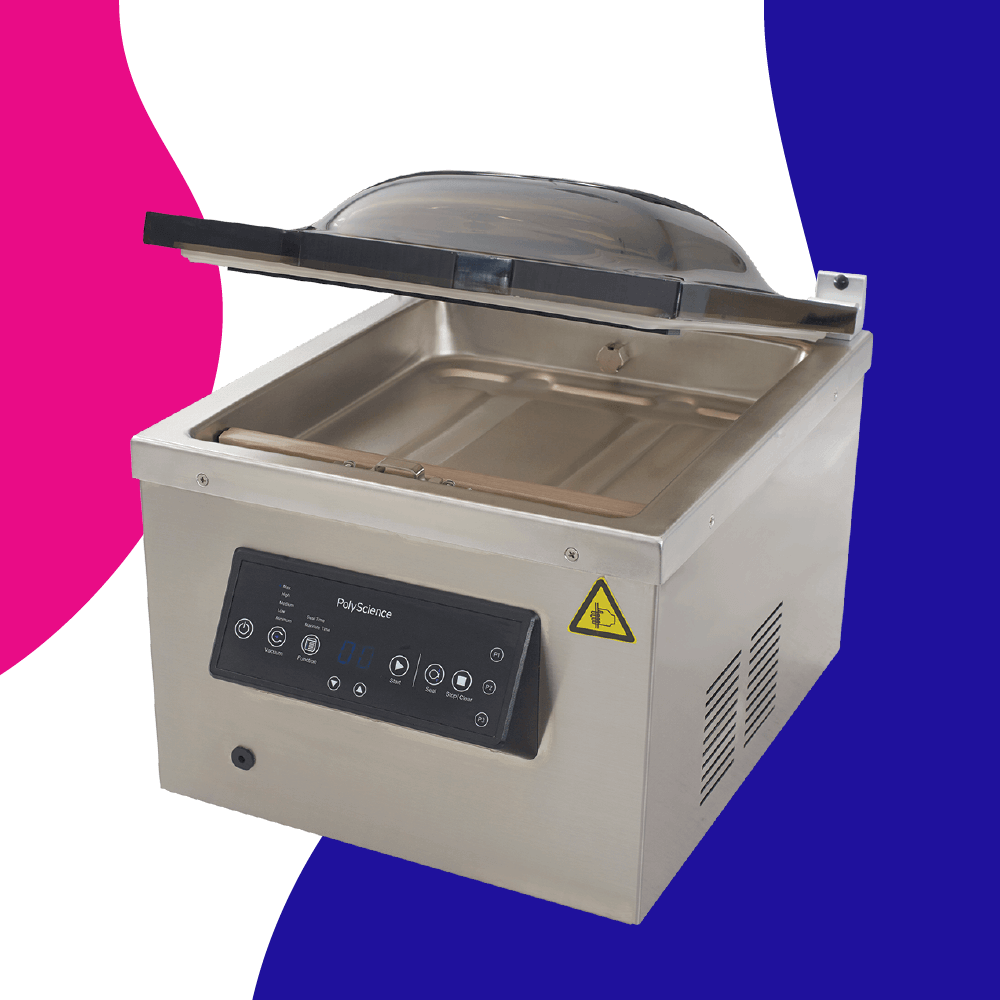
    Chamber Vacuum Sealer Kitchen Food Chamber Vacuum Sealer Packaging Machine Sealer for Food Saver, Home, Commercial

    Chamber Vacuum Seal

    Chamber vacuum sealers can be used to seal certain types of mylar bags. These machines are different than the traditional “at home” or food-saving type vacuum sealers that are used by preppers in their home kitchen to vacuum seal bags. A chamber vacuum sealer will both vacuum out most of the air from the bag and also heat seal it at the same time.

    Positives

    Negatives

    Removes oxygen from the pouch extending shelf life. 

    Not compatible with all materials. 

    Print can get distorted when the bag is vacuum sealed. 

    Quality chamber sealers start at around $850. 

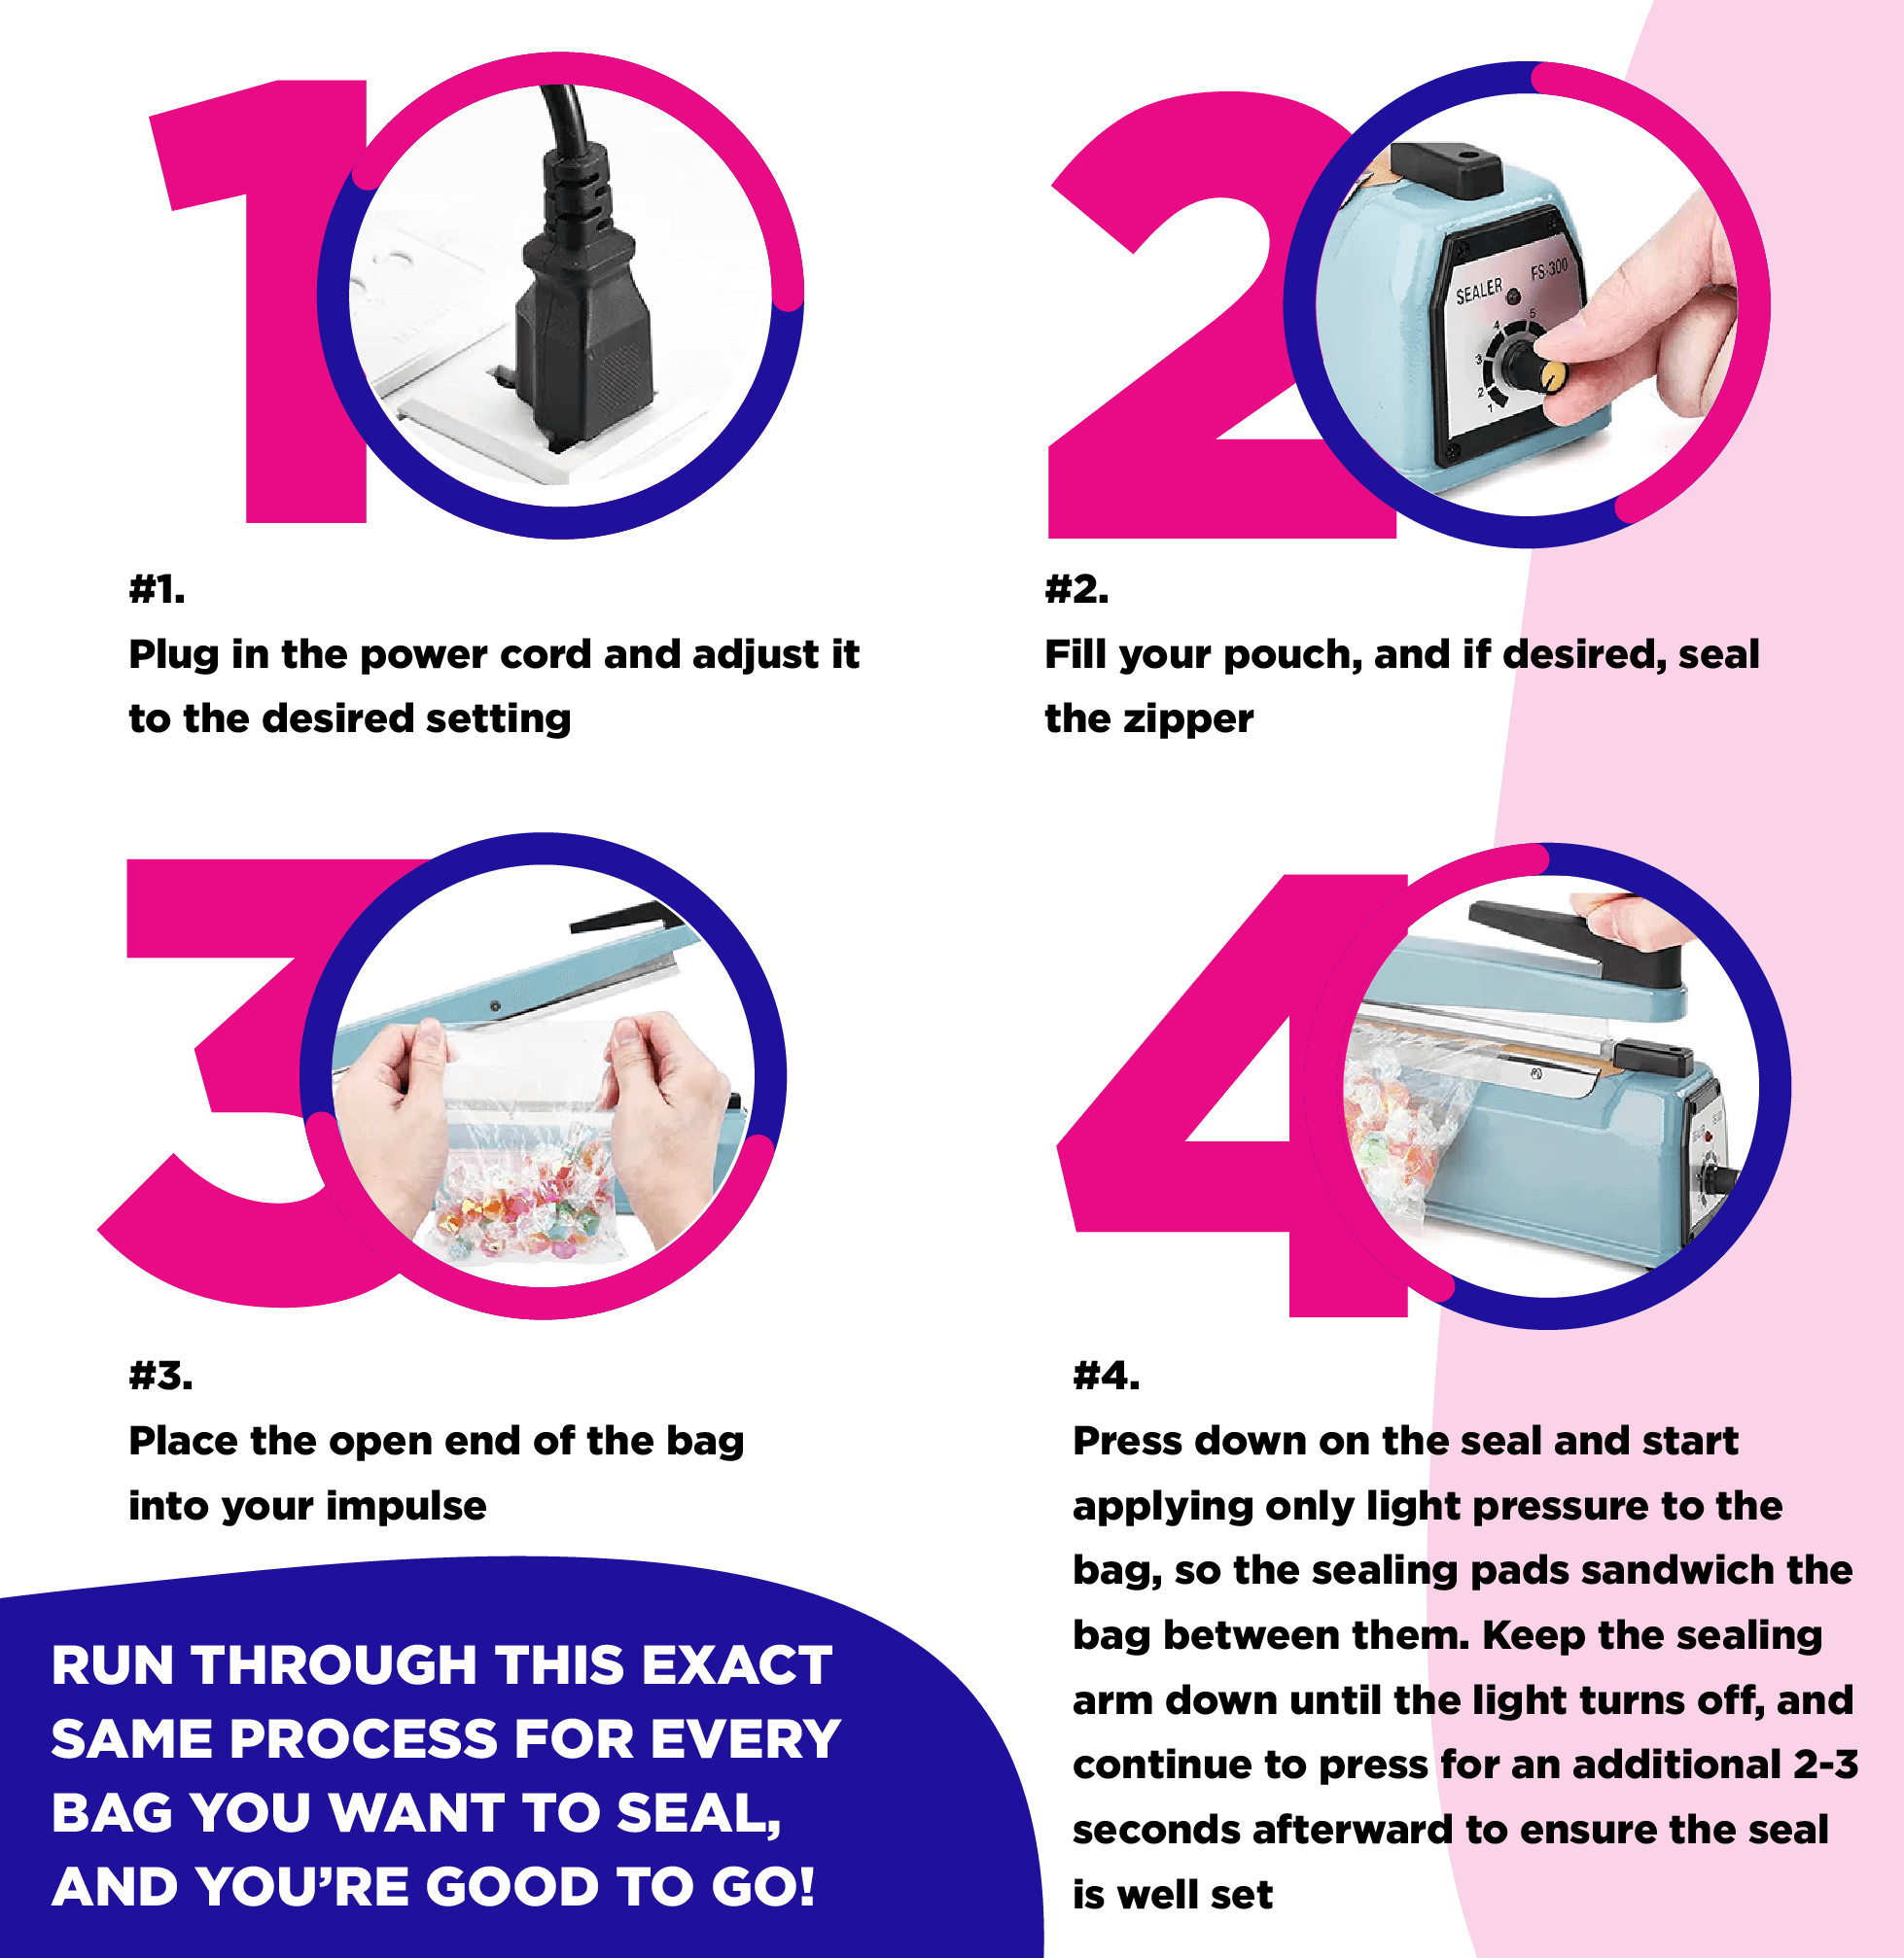
    Sealing mylar bags with an impulse sealer

    If you have an impulse sealer, here’s a visual of how you’d use it to seal a mylar bag. We’ll walk you through the process step-by-step below.Manual Heat Sealing Packing Machine for Plastic Bag Heat electric sealing machine impulse sealer

    Heat Sealer Heat Setting- Food Storage

    The question is often asked “What temperature setting do I use to seal my bags?” This question is pretty straight forward but the answer to it can be effected by many variables. Setting your heat-sealing machine to the right temperature is only one factor. Other factors include how long heat is applied to the material (dwell), and how much pressure you apply while sealing. One temperature, Dwell, and PSI setting is not uniformly recommended for each material. For example a better seal can sometimes be obtained with a lower temperature allowed to dwell longer allowing the sealant layer polymers to fully melt together.

    Material

    Temperature Setting Range

    PSI

    Dwell Time

    CareSilver (VMPET)

    350F – 400 F

    40 PSI

    1 Sec

    CareFoil (Aluminum) 

    400 F – 450 F

    40 PSI

    1 Sec – 1.5 Sec

    CareFoil-N (Nylon)

    450 F – 500 F

    40 PSI

    1.5 – 3 Sec

    CareKraft (Kraft Paper)

    400 F 425 F

    50 PSI

    2 Sec

    CareClear (PET)

    350 F – 375 F

    40 PSI

    1 Sec

    Factors effecting heat sealing settings to use

    Many customers focus on the machine settings when dialing in their heat seal settings, but all the factors below should come into consideration to get the highest strength heat seal.

    Material Type

    Seal strength, and sealer machine settings will be adjusted to the physical properties of the material  being sealed to. Clear PET based material generally will use different settings than nylon or foil based material. The material thickness, flange or surface design, physical pouch configuration, size, and feature placement will also be considerations. Some materials like Carefoil reduce the amount of heat that can get through to the sealant layer so they require more heat or long dwell time. Material Thickness can effect the overall mount of dwell that is required. 

    Dwell

    Dwell time relates to how long heat is applied to the pouch. Heat and dwell time are not independent variables, they go hand in hand and should not be evaluated separately. Dwell time requires adjustment based on the same factors that effect temperature. Some heat sealable flexible barrier materials require lower heat for a longer time to properly sell. While you can “seal” a bag with high heat for a short duration. The sealant layer may not form a high strength bond. 

    PSI

    The pressure at which heat is applied to the pouch can effect bag seal strength.The amount of pressure applied by the heat-sealing equipment will create differences in the heat and dwell settings.  Thicker materials and those which are more rigid such as CareKraft require more pressure, while with thinner materials if too much pressure is applied the heated selant layer can be pressed too thin. 

    Fouling

    Fouling can occur during the loading process particles, dust, or liquid we left in the sealing zone. If so, these contaminates can affect the settlings required on your sealing machine to seal the bag properly. Foreign material in the seal zone can also reduce the seal effectiveness. Powder products are notorious for causing fouling. Dust acts like corn meal on the bottom of a baking pan inhibiting the polymers from adhering to each other. 

    Type of Machine

    The type and condition of your heat-sealing machine will create another variable to consider.  There are several types of heat-sealing machines and how these machines apply heat. Types of heat sealers include Impulse sealers, roller sealers, platen seal.  

    External Environment

    There isn’t going to be an exact specification because proper temperature will vary widely based on the conditions mentioned in this article. But here are some of the settings that have been reported to us by customers, as well as our own understanding. 

    Tips for Sealing Mylar Bags

    If you’ve never sealed mylar bags before, here are some tips that can help:

    • The exact dial setting will vary depending on the thickness of your mylar bag, the ambient temperature, and whether there has been any fouling (foreign debris) that got into the seal area. 

    • Start with a lower setting and work your way up. You’re looking for a “just right” temperature where the inner sealant layer of the mylar bag fully melts together, but not too hot where the bag is deformed or fully melts. If the seal is too cold then the sealant layer will not fully melt together, and you’ll have a very weak seal.  

    • If you pull too much of a vacuum on your mylar bag, you’ll rip the bag. To create a high vacuum, certain types of mylar material like CareSilver-PVNP must be used.

    • Some products are very oxygen-sensitive, and exposure to oxygen causes oxidation and spoilage. An oxygen absorber can extend the shelf life of these products. 

    • An optional step to seal your mylar bags is to perform a nitrogen flush. With nitrogen flushing, the sealing machine will first vacuum out most of the air from the pouch, then replace it with.

    Mylar Bag Sealing: FAQs

    Here are a few of the questions we get a lot about sealing mylar bags for food storage. For more information, feel free to contact us directly. 

    Q: What thickness of seal should be used?

    Impulse sealers typically offer 2mm, 5mm, or 10mm seals. While thicker is usually better, you’ll want to adjust the thickness based on the type of product and bag. A 2mm seal is usually only suitable for thin polybags, most mylar bags should have at least a 5mm seal applied to it (for prospective ¼” is about 6.35mm), a 8mm or greater seal is often required to prevent bag bursting.

    Here are some typical considerations:

    1. Matching the other seals on your bag.

    2. Sealing the entire “top” of the bag is sometimes required. 

    Note: make sure that you never seal through or below the tear notch. Doing so will make your bag unable to be opened except by using scissors. 

    What thickness of seal should

    Q: Do you have to vacuum seal mylar bags for food storage?

    No, you don’t. 

    Q: What foods cannot be stored in mylar bags?

    Although most foods can be stored in mylar bags, there are some exceptions. Foods high in moisture or oil (raisins, nuts, granola, cookies, chocolate, crackers, brown rice) are not good candidates for storage in a mylar bag.

    Q: Do you need a special vacuum sealer for mylar bags?

    Yes, you’d need a chamber vacuum sealer. At-home food saver sealers cannot seal these mylar bags because they require the bag to have an embossed pattern to fill the air.

    Q: How much heat does it take to seal a mylar bag?

    It varies. You will likely need to go through a period of trial and error before determining what amount of heat is required.

    Q: Do you offer custom sized beauty packaging?

    Sealing bags for food storage is similar to sealing bags for retail. The key consideration includes investing in an inexpensive impulse sealer and adding oxygen absorbers, if necessary. 

  • Mylar Bag vs Stand Up Pouch

    Mylar Bag vs Stand Up Pouch

    Mylar Bag vs Stand Up Pouch | Mylar Bags & Pouches

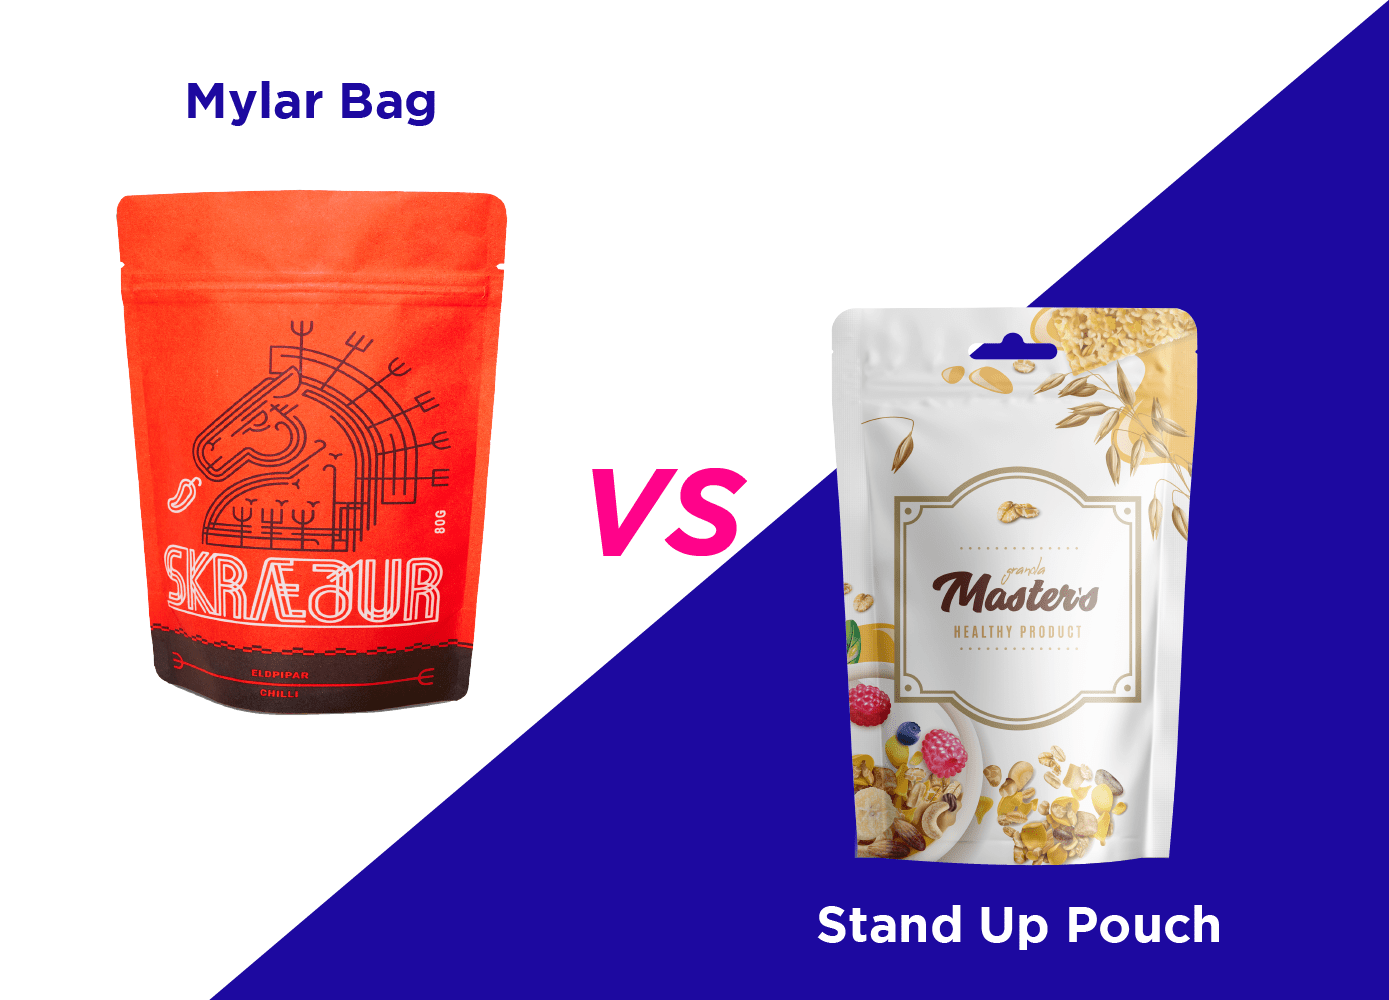
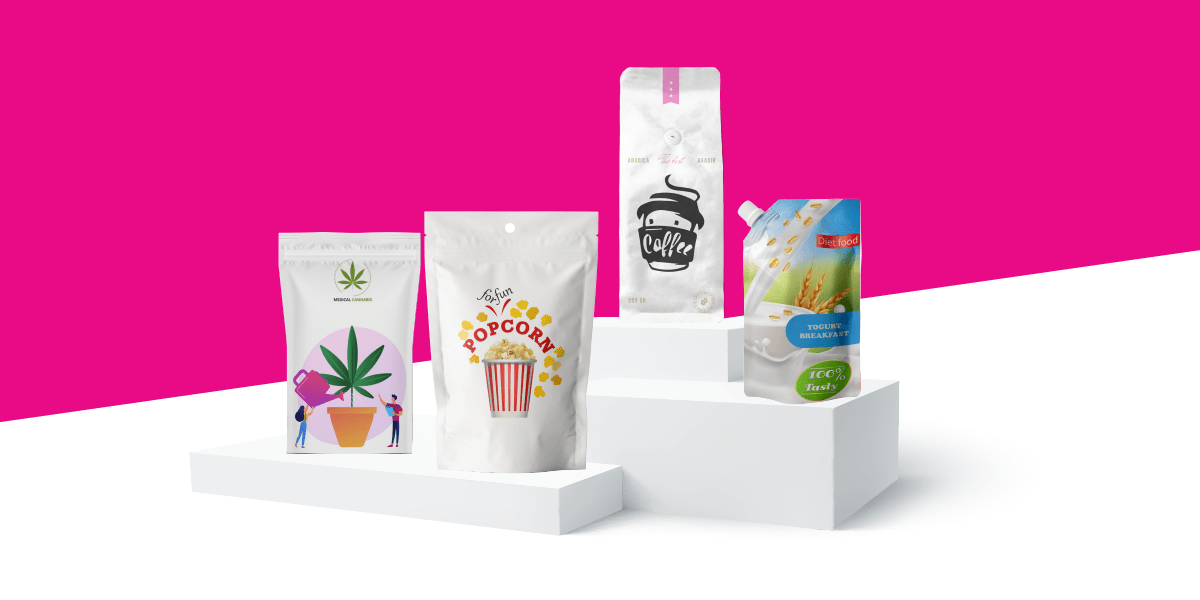
    Mylar bags and stand-up pouches are both popular packaging options for a variety of products. However, there are some key differences between the two that should be considered when choosing the best packaging solution for your products.

    What Are Printed Mylar Bags

    Custom resealable mylar bags are a popular option for packaging food products such as snacks, dried fruits, and nuts. These bags are made from a material called mylar, which is a type of vapor metalized plastic film that is known for its strength and durability. Mylar bags are also known for their ability to protect products from ultraviolet light, as well as moisture and oxygen migration, making them an ideal choice for food products that need to be kept fresh.

    One of the main advantages of printed mylar bags is that they can be customized to include your logos and graphics directly on the pouch, reducing or eliminating the need to apply labels to the bags. This can be a great way to make your products stand out on store shelves and attract the attention of potential customers. Additionally, printed mylar bags can be produced in a variety of different sizes and shapes, making them a versatile packaging option for a wide range of products.

    Mylar Bags Pros

    Mylar bags have many pros which include durability, flexibility, and cost-effectiveness.

    They are also resistant to punctures, tears, and moisture.

    They are also a great option for products that need long-term storage and have a long shelf life.

    What Are Custom Printed Pouches? 

    Stand-up pouches, on the other hand, are a broader category of packaging that has become increasingly popular in recent years. Stand up pouches can be made from a variety of different material laminations, including plastic, aluminum, and paper. They are designed to stand up on their own, making them a convenient option for displaying products on store shelves.

    Stand-up pouches can be made from vapor metalized plastic, just like mylar bags and thus can protect products from light, moisture, and oxygen. They are also great for products like snacks, dried fruits, and nuts as the gusset helps these bags hold the product and stand up on a shelf.

    The Main Differences Between Mylar Bags and Stand-Up Pouch Products 

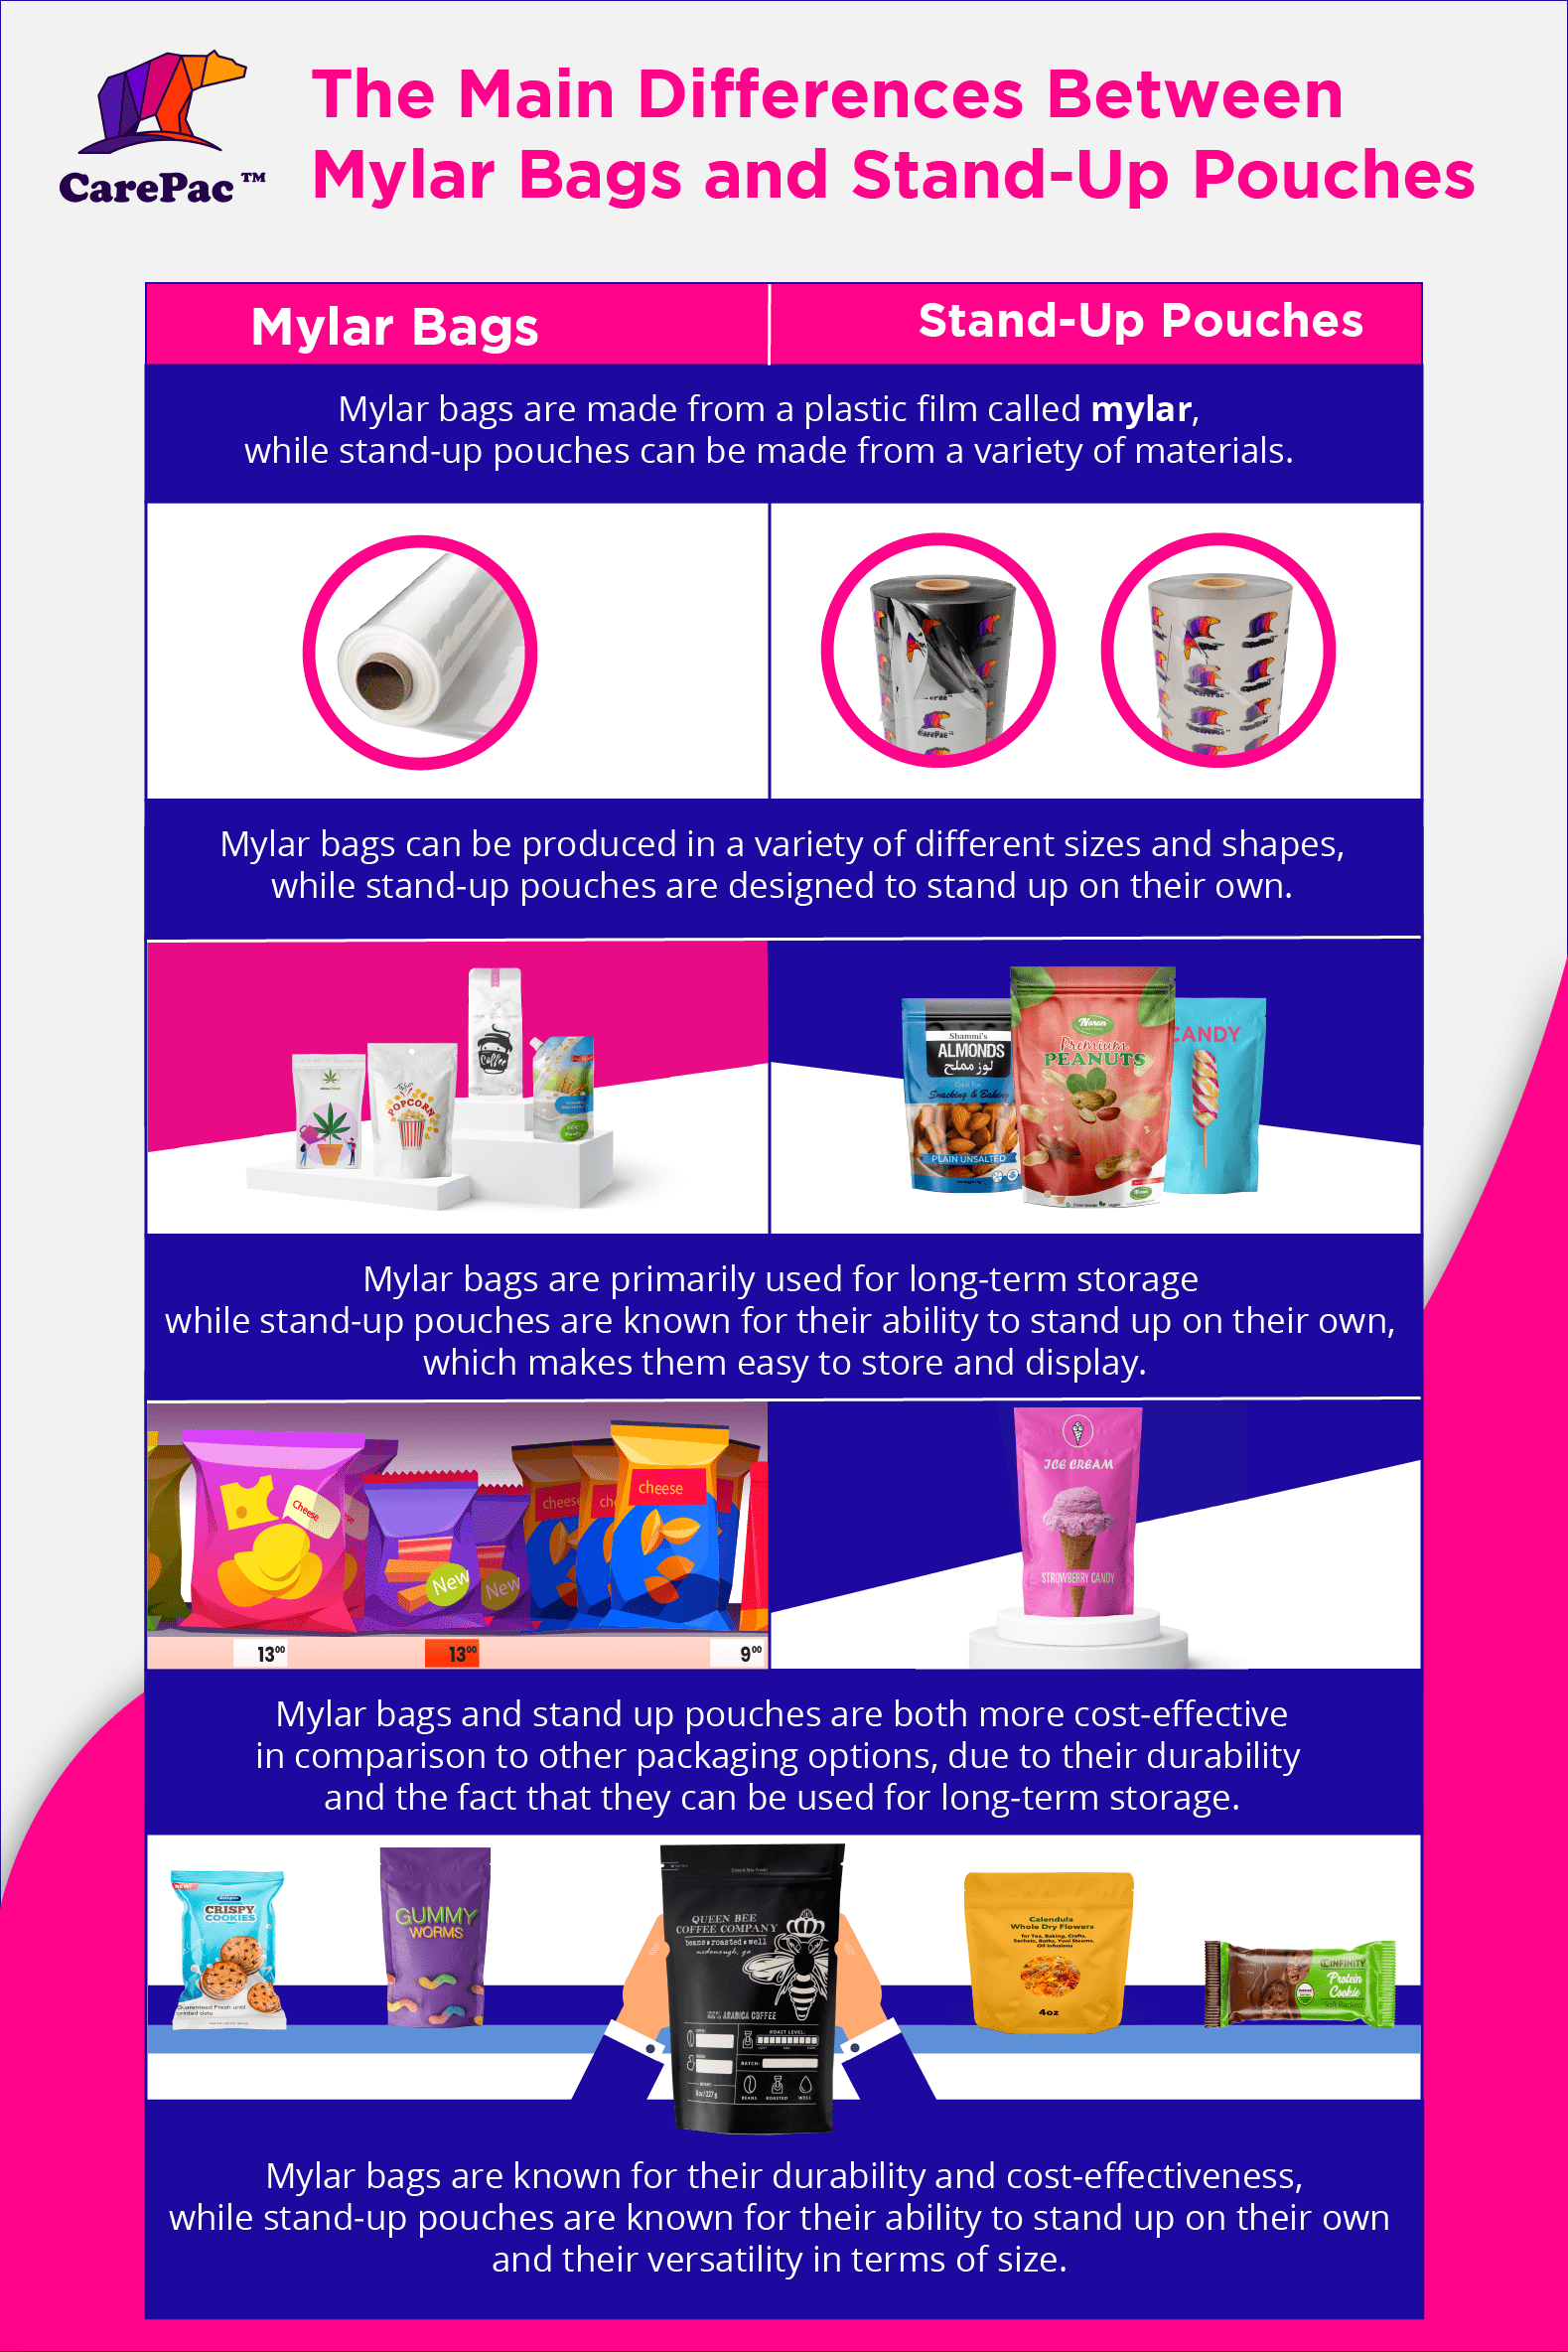
    Mylar bags are made from a plastic film called mylar, while stand-up pouches can be made from a variety of materials.

    Mylar bags are known for their durability and resistance to punctures and tears, whereas stand-up pouches may not be as durable depending on the material used.

    Mylar bags can be produced in a variety of different sizes and shapes, while stand-up pouches are designed to stand up on their own.

    Mylar bags are known for their durability and resistance to punctures and tears, whereas stand-up pouches may not be as durable depending on the material used.

    Mylar bags are primarily used for long-term storage while stand-up pouches are known for their ability to stand up on their own, which makes them easy to store and display.

    Mylar bags and stand up pouches are both more cost-effective in comparison to other packaging options, due to their durability and the fact that they can be used for long-term storage.

    In conclusion, both mylar bags and stand-up pouches have their own unique pros and cons. Mylar bags are known for their durability and cost-effectiveness, while stand-up pouches are known for their ability to stand up on their own and their versatility in terms of size. Ultimately, the best packaging solution for your products will depend on your specific needs and preferences. Custom printed mylar bags and stand-up pouches can provide an excellent solution for packaging and branding your products.

    Commonly Asked Questions:

    Q: Can mylar bags and stand-up pouches be printed with custom designs?

    Yes, both mylar bags and stand-up pouches can be printed with custom designs and logos. This can be a great way to make your products stand out on store shelves and attract the attention of potential customers. For more information about our printed pouch offerings, click here.

    Q: Which one is more durable, mylar bags or stand-up pouches?

    Mylar bags are known for their durability and ability to resist punctures and tears. Stand-up pouches also have a good level of durability, depending on the material used.

    Q: Which one is better for products that need to be kept fresh?

    Both mylar bags and stand-up pouches are good options for products that need to be kept fresh, such as snacks, dried fruits, and nuts. They both protect products from light, moisture, and oxygen.

    Q: Which one is more cost-effective?

    Mylar bags are known for their cost-effectiveness due to their durability and the fact that they can be used for long-term storage. Stand-up pouches can also be cost-effective, depending on the material used and the volume of the order. It’s best to compare the costs of both options for your specific needs and preferences.

    Overwhelmed with all the options? Buy mylar now from CarePac

  • Bag Sealing Temperatures

    Bag Sealing Temperatures

    The question is often asked “What temperature setting do I use to seal my bags?” This question is pretty straight forward but the answer to it can be effected by many variables. Setting your heat-sealing machine to the right temperature is only one factor. Other factors include how long heat is applied to the material (dwell), and how much pressure you apply while sealing. One temperature, Dwell, and PSI setting is not uniformly recommended for each material. For example a better seal can sometimes be obtained with a lower temperature allowed to dwell longer allowing the sealant layer polymers to fully melt together.

    Heat Sealer Settings

    Here is a table of heat sealer settings which are a good starting point for your testing process. 

    Material

    Temperature Range

    PSI

    Dwell Time

    CareSilver

    375 F – 400 F

    40 PSI

    1 Sec

    CareFoil

    400 F – 450 F

    40 PSI

    1 Sec – 1.5 Sec

    CareFoil-N

    450 F – 500 F

    40 PSI

    1.5 – 3 Sec

    CareKraft

    400 F 425 F

    50 PSI

    2 Sec

    CareClear

    350 F – 375 F

    40 PSI

    1 Sec

    Factors effecting heat sealer settings

    Many customers focus on the machine settings when dialing in their heat seal settings, but all the factors below should come into consideration to get the highest strength heat seal. 

    Material Type

    Seal strength, and sealer machine settings will be adjusted to the physical properties of the material  being sealed to. Clear PET based material generally will use different settings than nylon or foil based material. The material thickness, flange or surface design, physical pouch configuration, size, and feature placement will also be considerations. Some materials like Carefoil reduce the amount of heat that can get through to the sealant layer so they require more heat or long dwell time. Material Thickness can effect the overall mount of dwell that is required. 

    Dwell

    Dwell time relates to how long heat is applied to the pouch. Heat and dwell time are not independent variables, they go hand in hand and should not be evaluated separately. Dwell time requires adjustment based on the same factors that effect temperature. Some heat sealable flexible barrier materials require lower heat for a longer time to properly sell. While you can “seal” a bag with high heat for a short duration. The sealant layer may not form a high strength bond. 

    PSI

    The pressure at which heat is applied to the pouch can effect bag seal strength.The amount of pressure applied by the heat-sealing equipment will create differences in the heat and dwell settings.  Thicker materials and those which are more rigid such as CareKraft require more pressure, while with thinner materials if too much pressure is applied the heated selant layer can be pressed too thin. 

    Fouling

    Fouling can occur during the loading process particles, dust, or liquid we left in the sealing zone. If so, these contaminates can affect the settlings required on your sealing machine to seal the bag properly. Foreign material in the seal zone can also reduce the seal effectiveness. Powder products are notorious for causing fouling. Dust acts like corn meal on the bottom of a baking pan inhibiting the polymers from adhering to each other. 

    Type of Machine

    The type and condition of your heat-sealing machine will create another variable to consider.  There are several types of heat-sealing machines and how these machines apply heat. Types of heat sealers include Impulse sealers, roller sealers, platen seal.  

    External Environment

    Ambient temperatures, and humidity can have a small impact on heat or dwell time as well.

    There isn’t going to be an exact specification because proper temperature will vary widely based on the conditions mentioned in this article. But here are some of the settings that have been reported to us by customers, as well as our own understanding. 

    The information provided should only be used as a starting point for the customer’s own investigation, and testing when determining the best settings for your heat sealer machine. 

  • What is Blind Shipping

    What is Blind Shipping

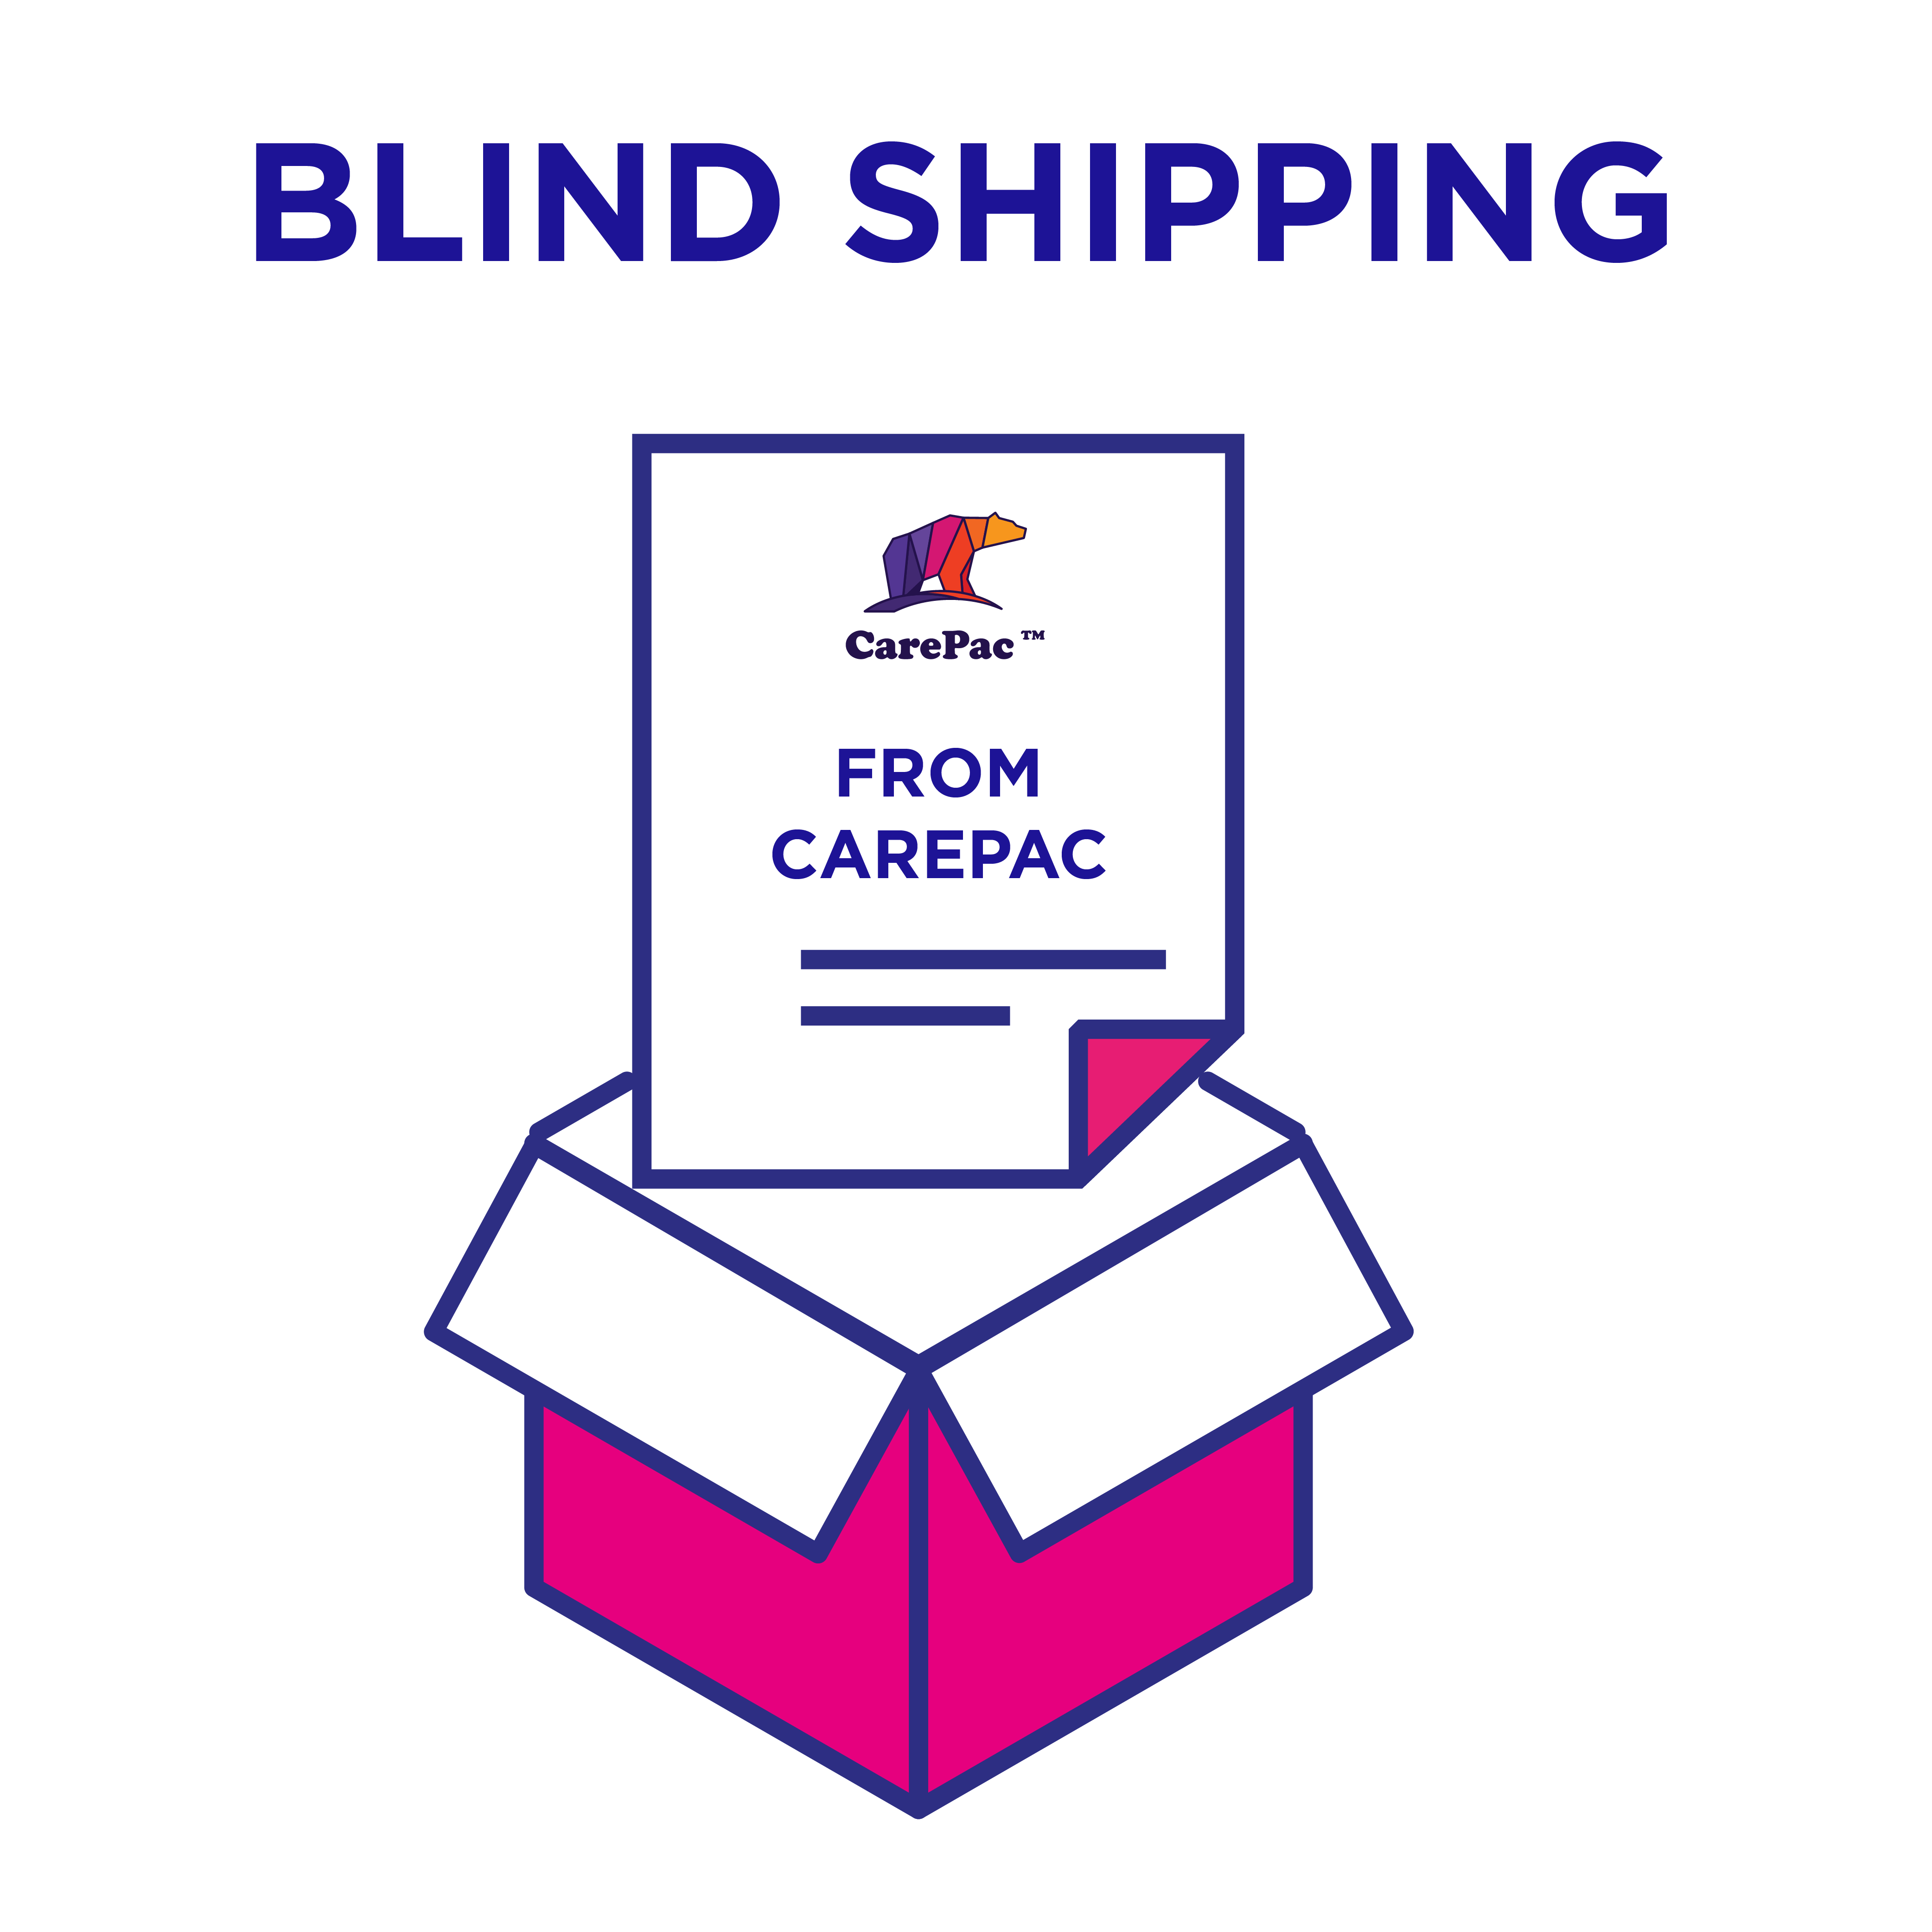
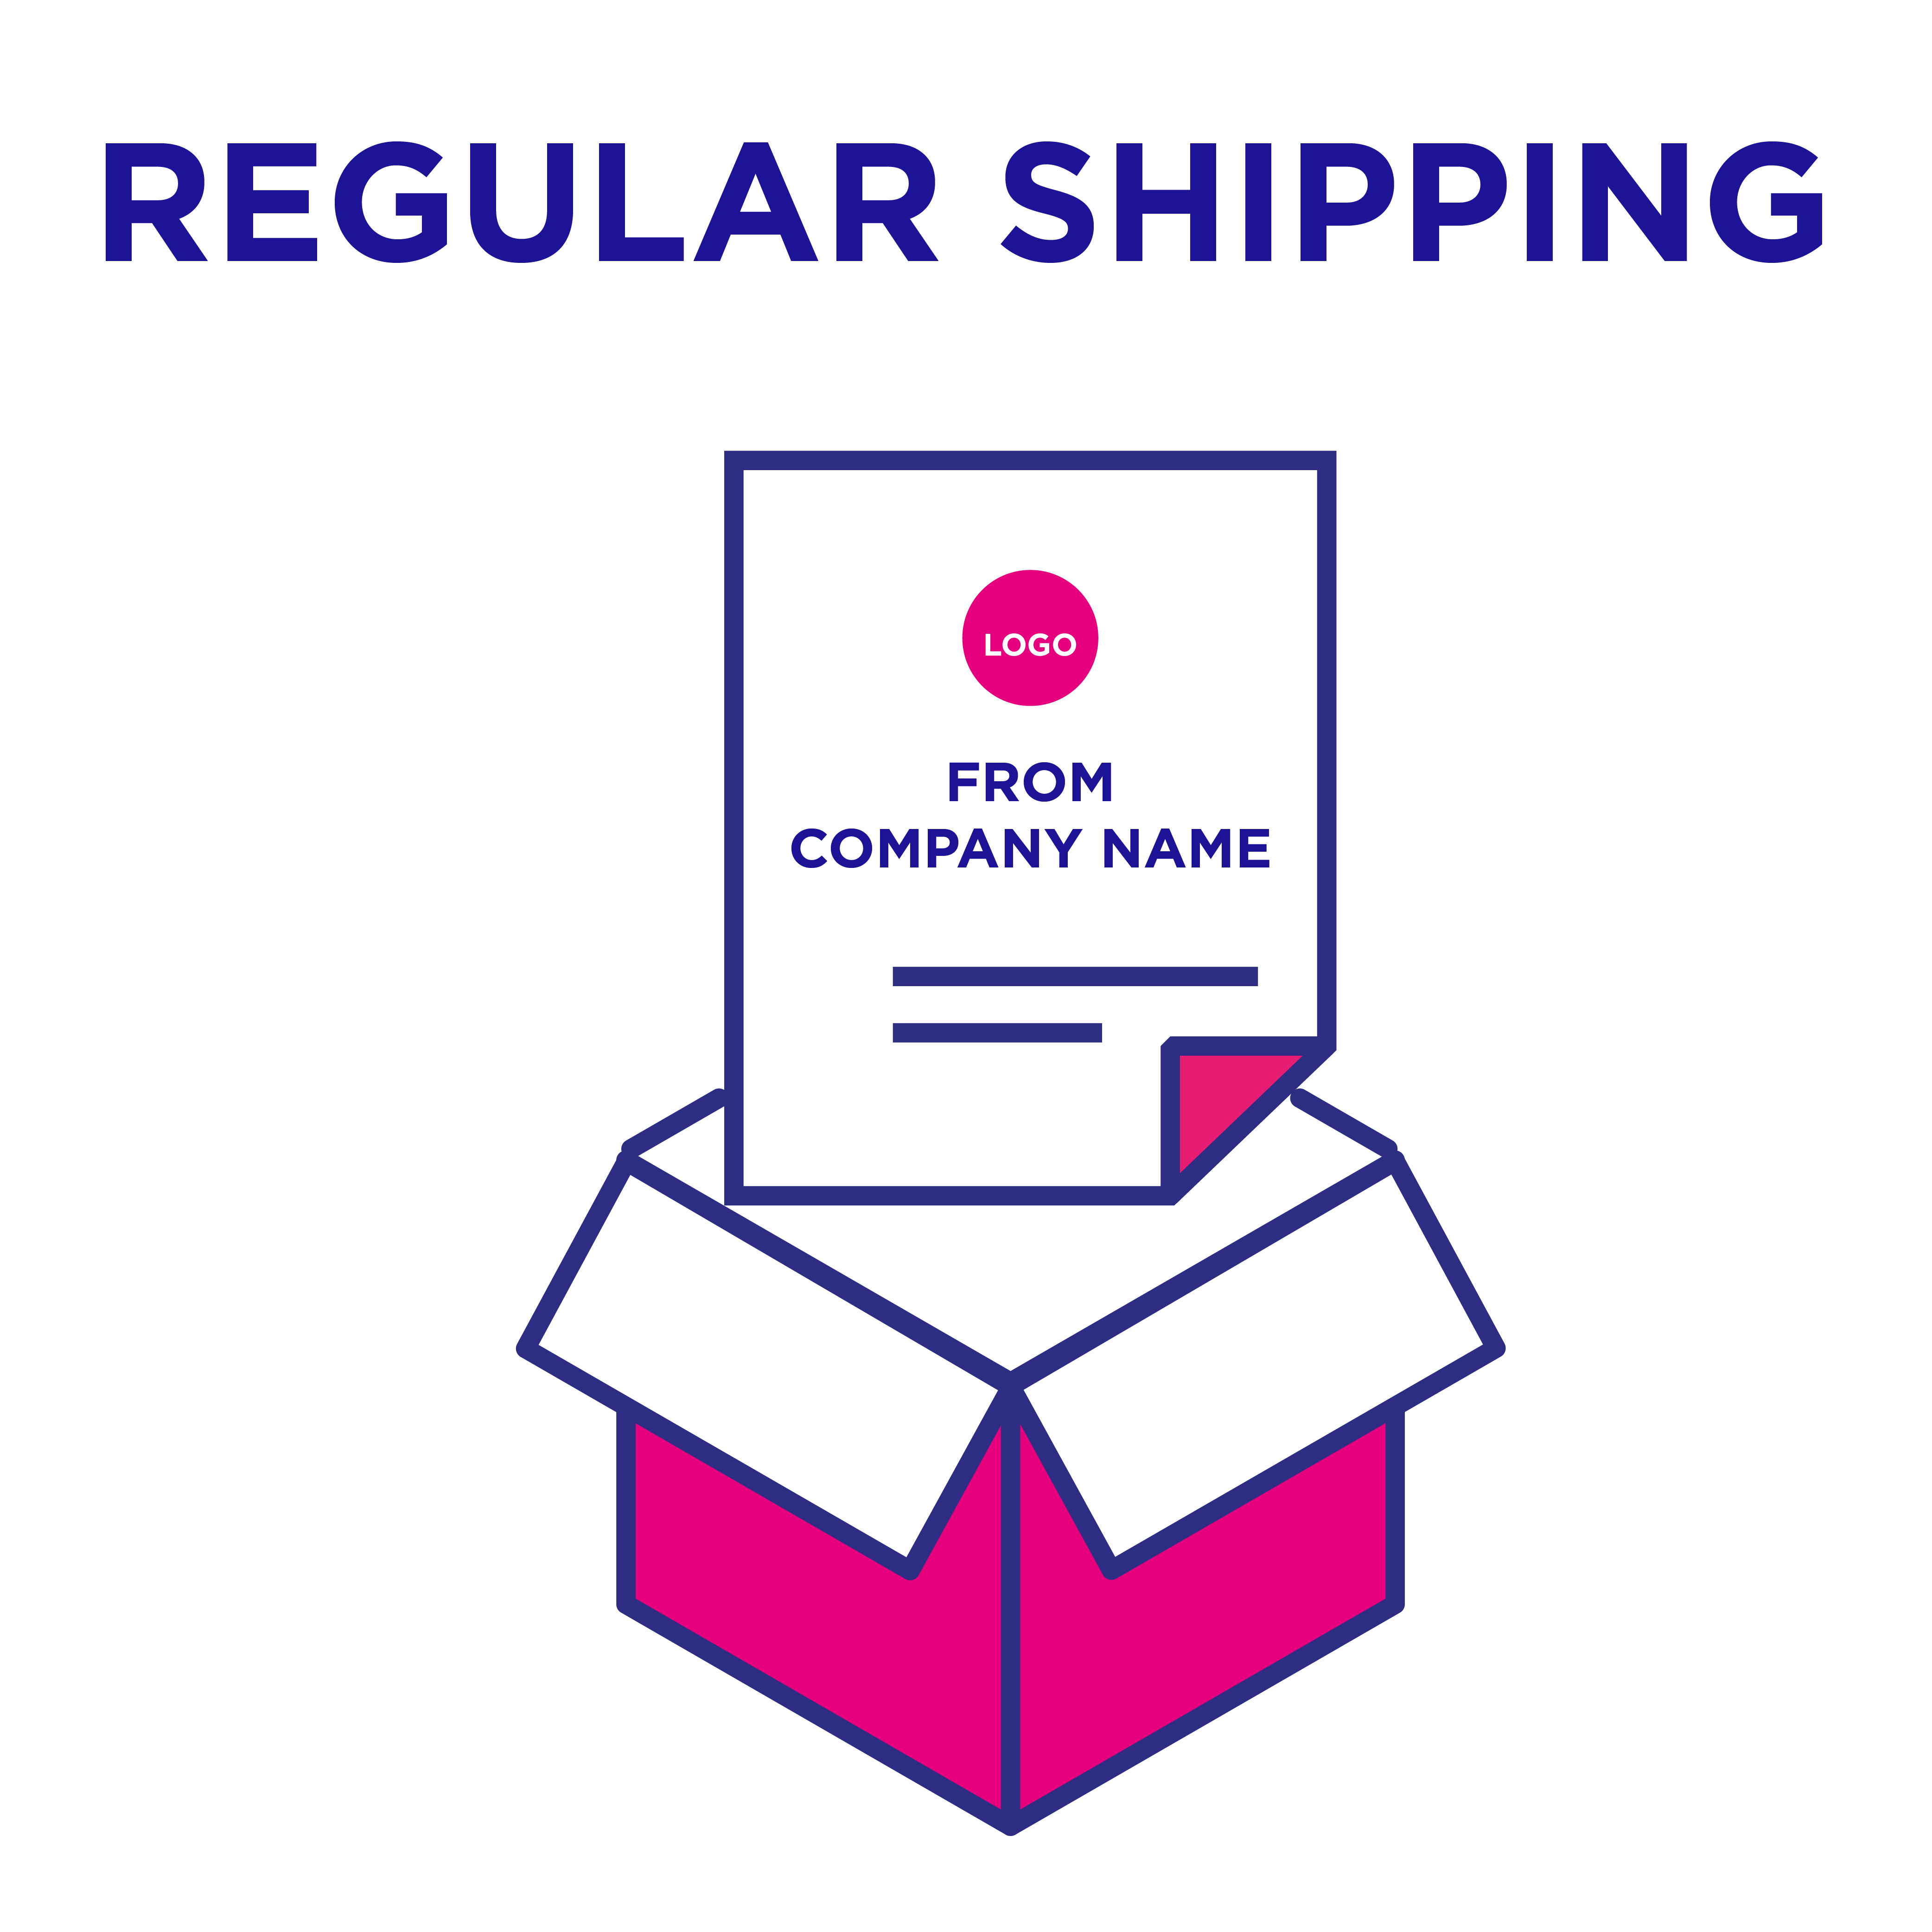
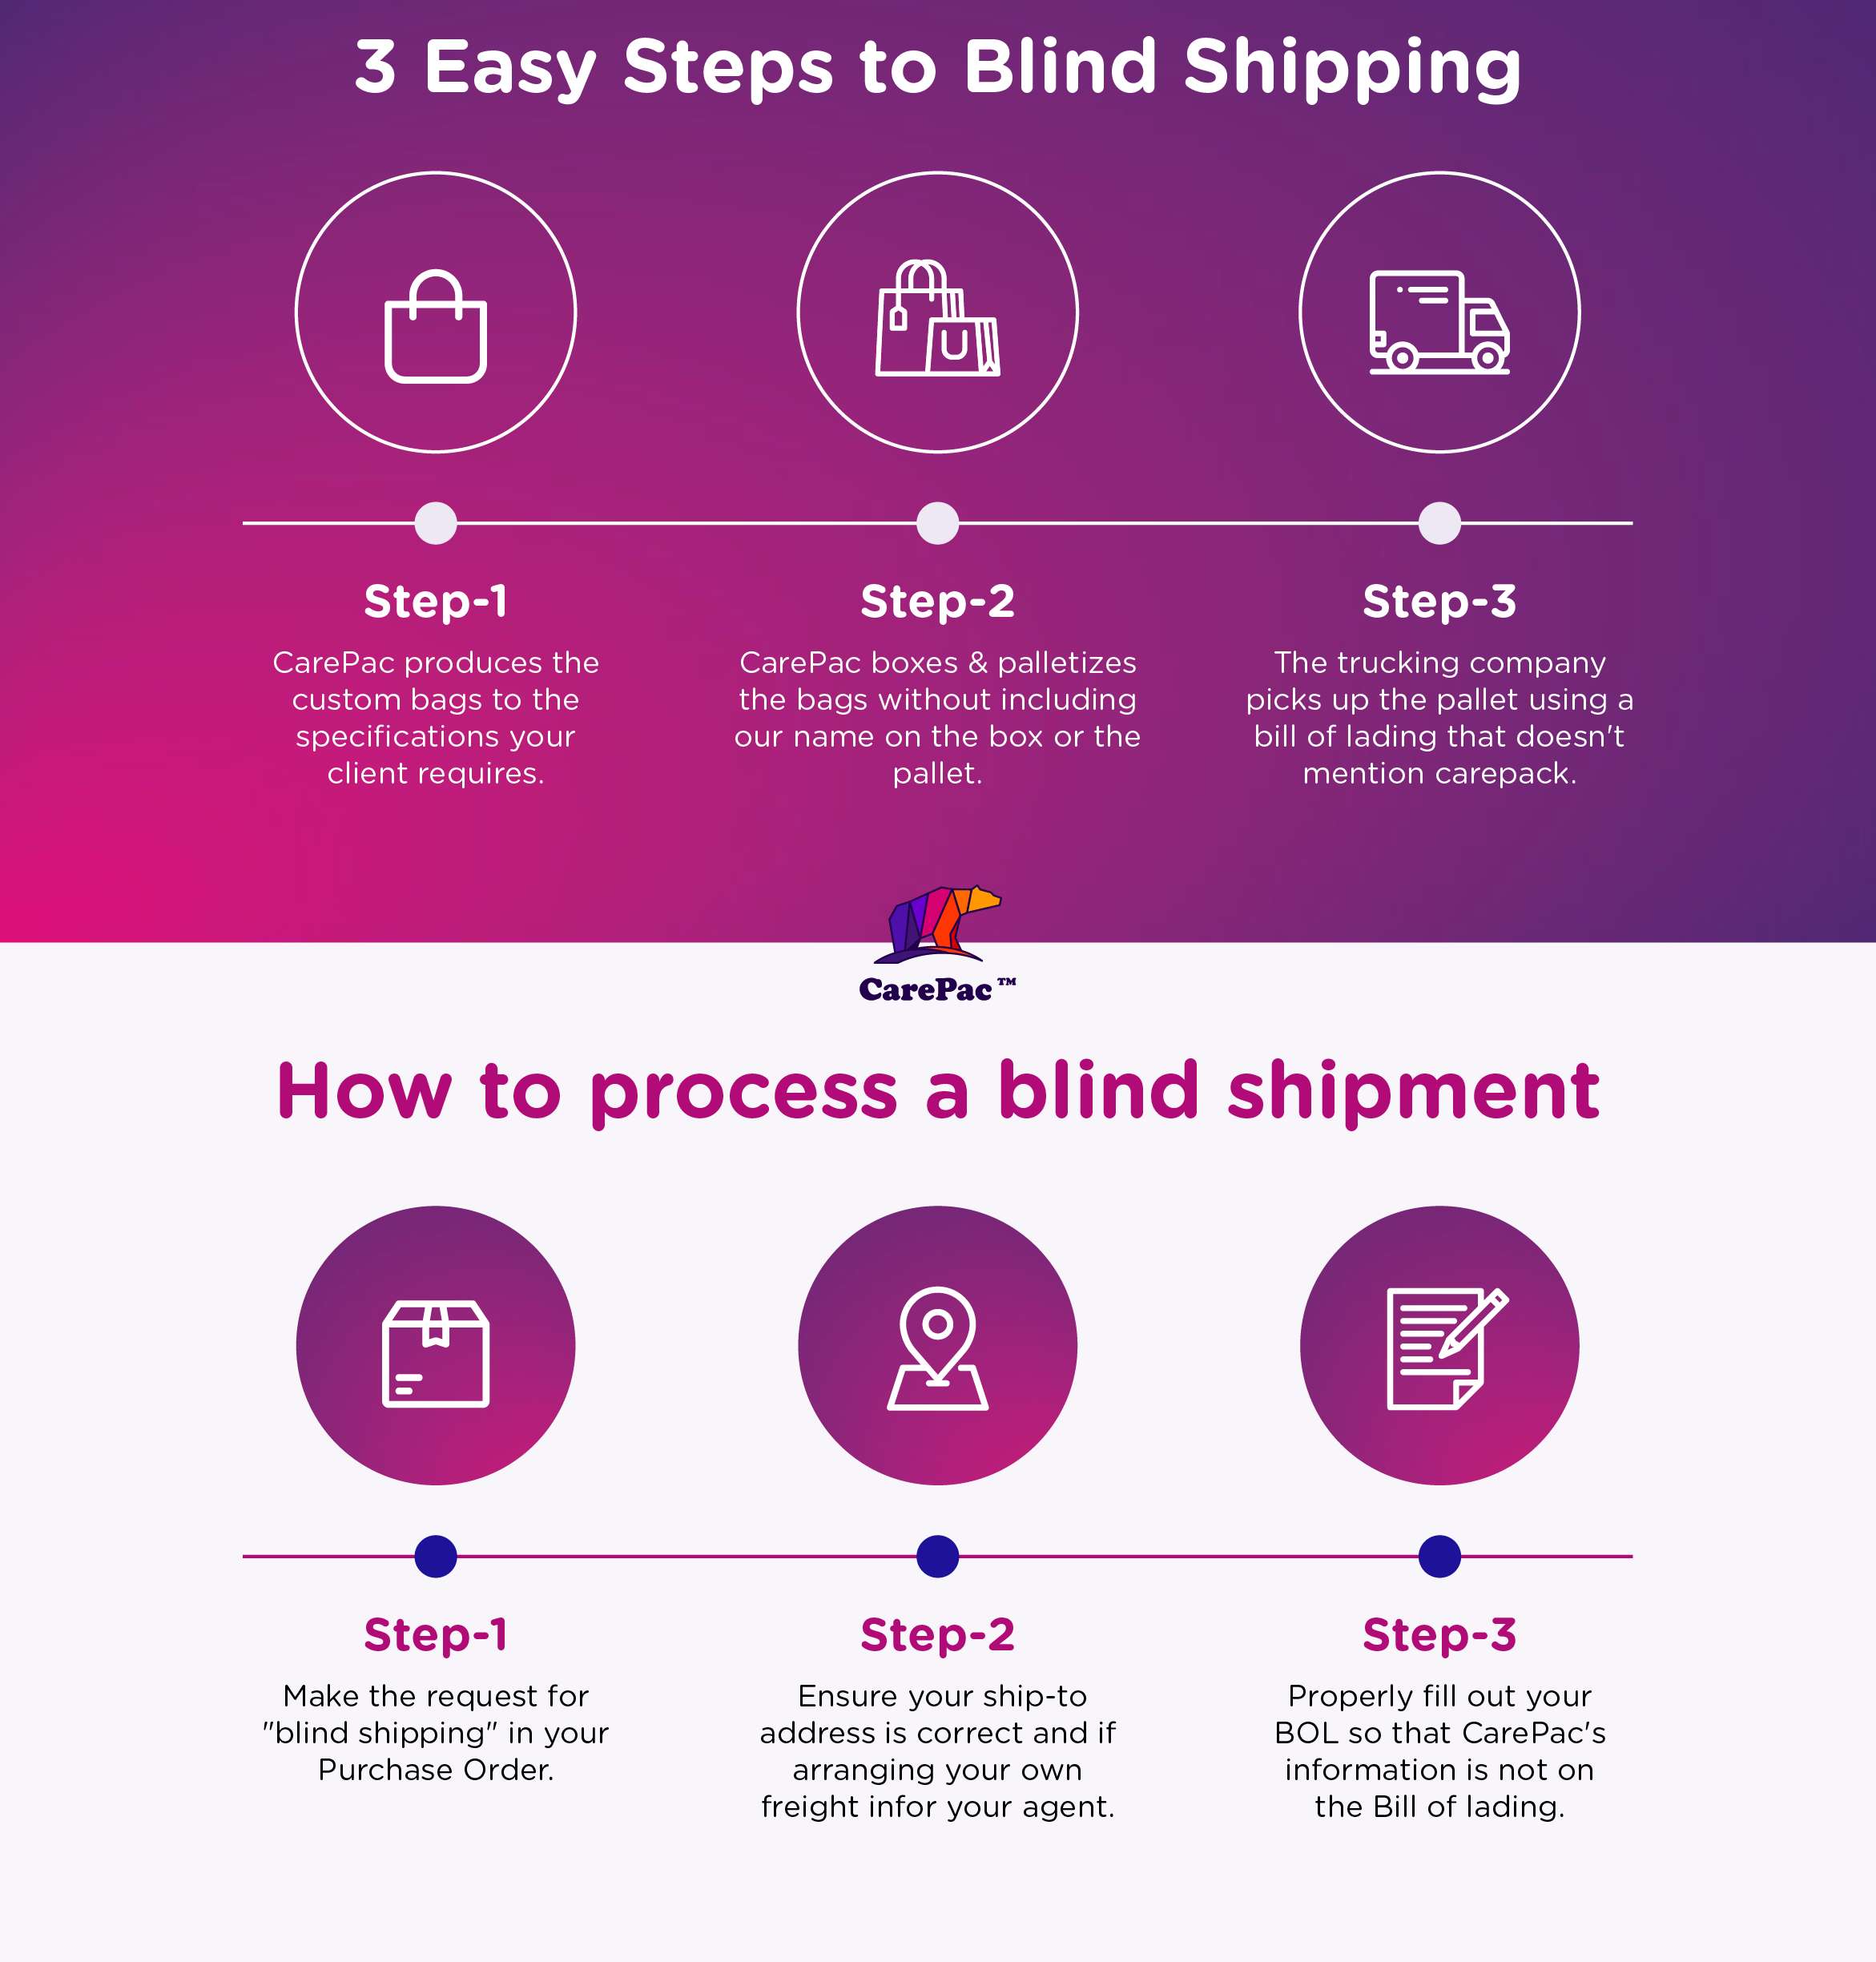
    What’s the difference between blind shipping and regular shipping, you ask? We just so happen to have the answer. In this guide, you’ll learn what blind shipping is and whether it’s the right fit for your business. 

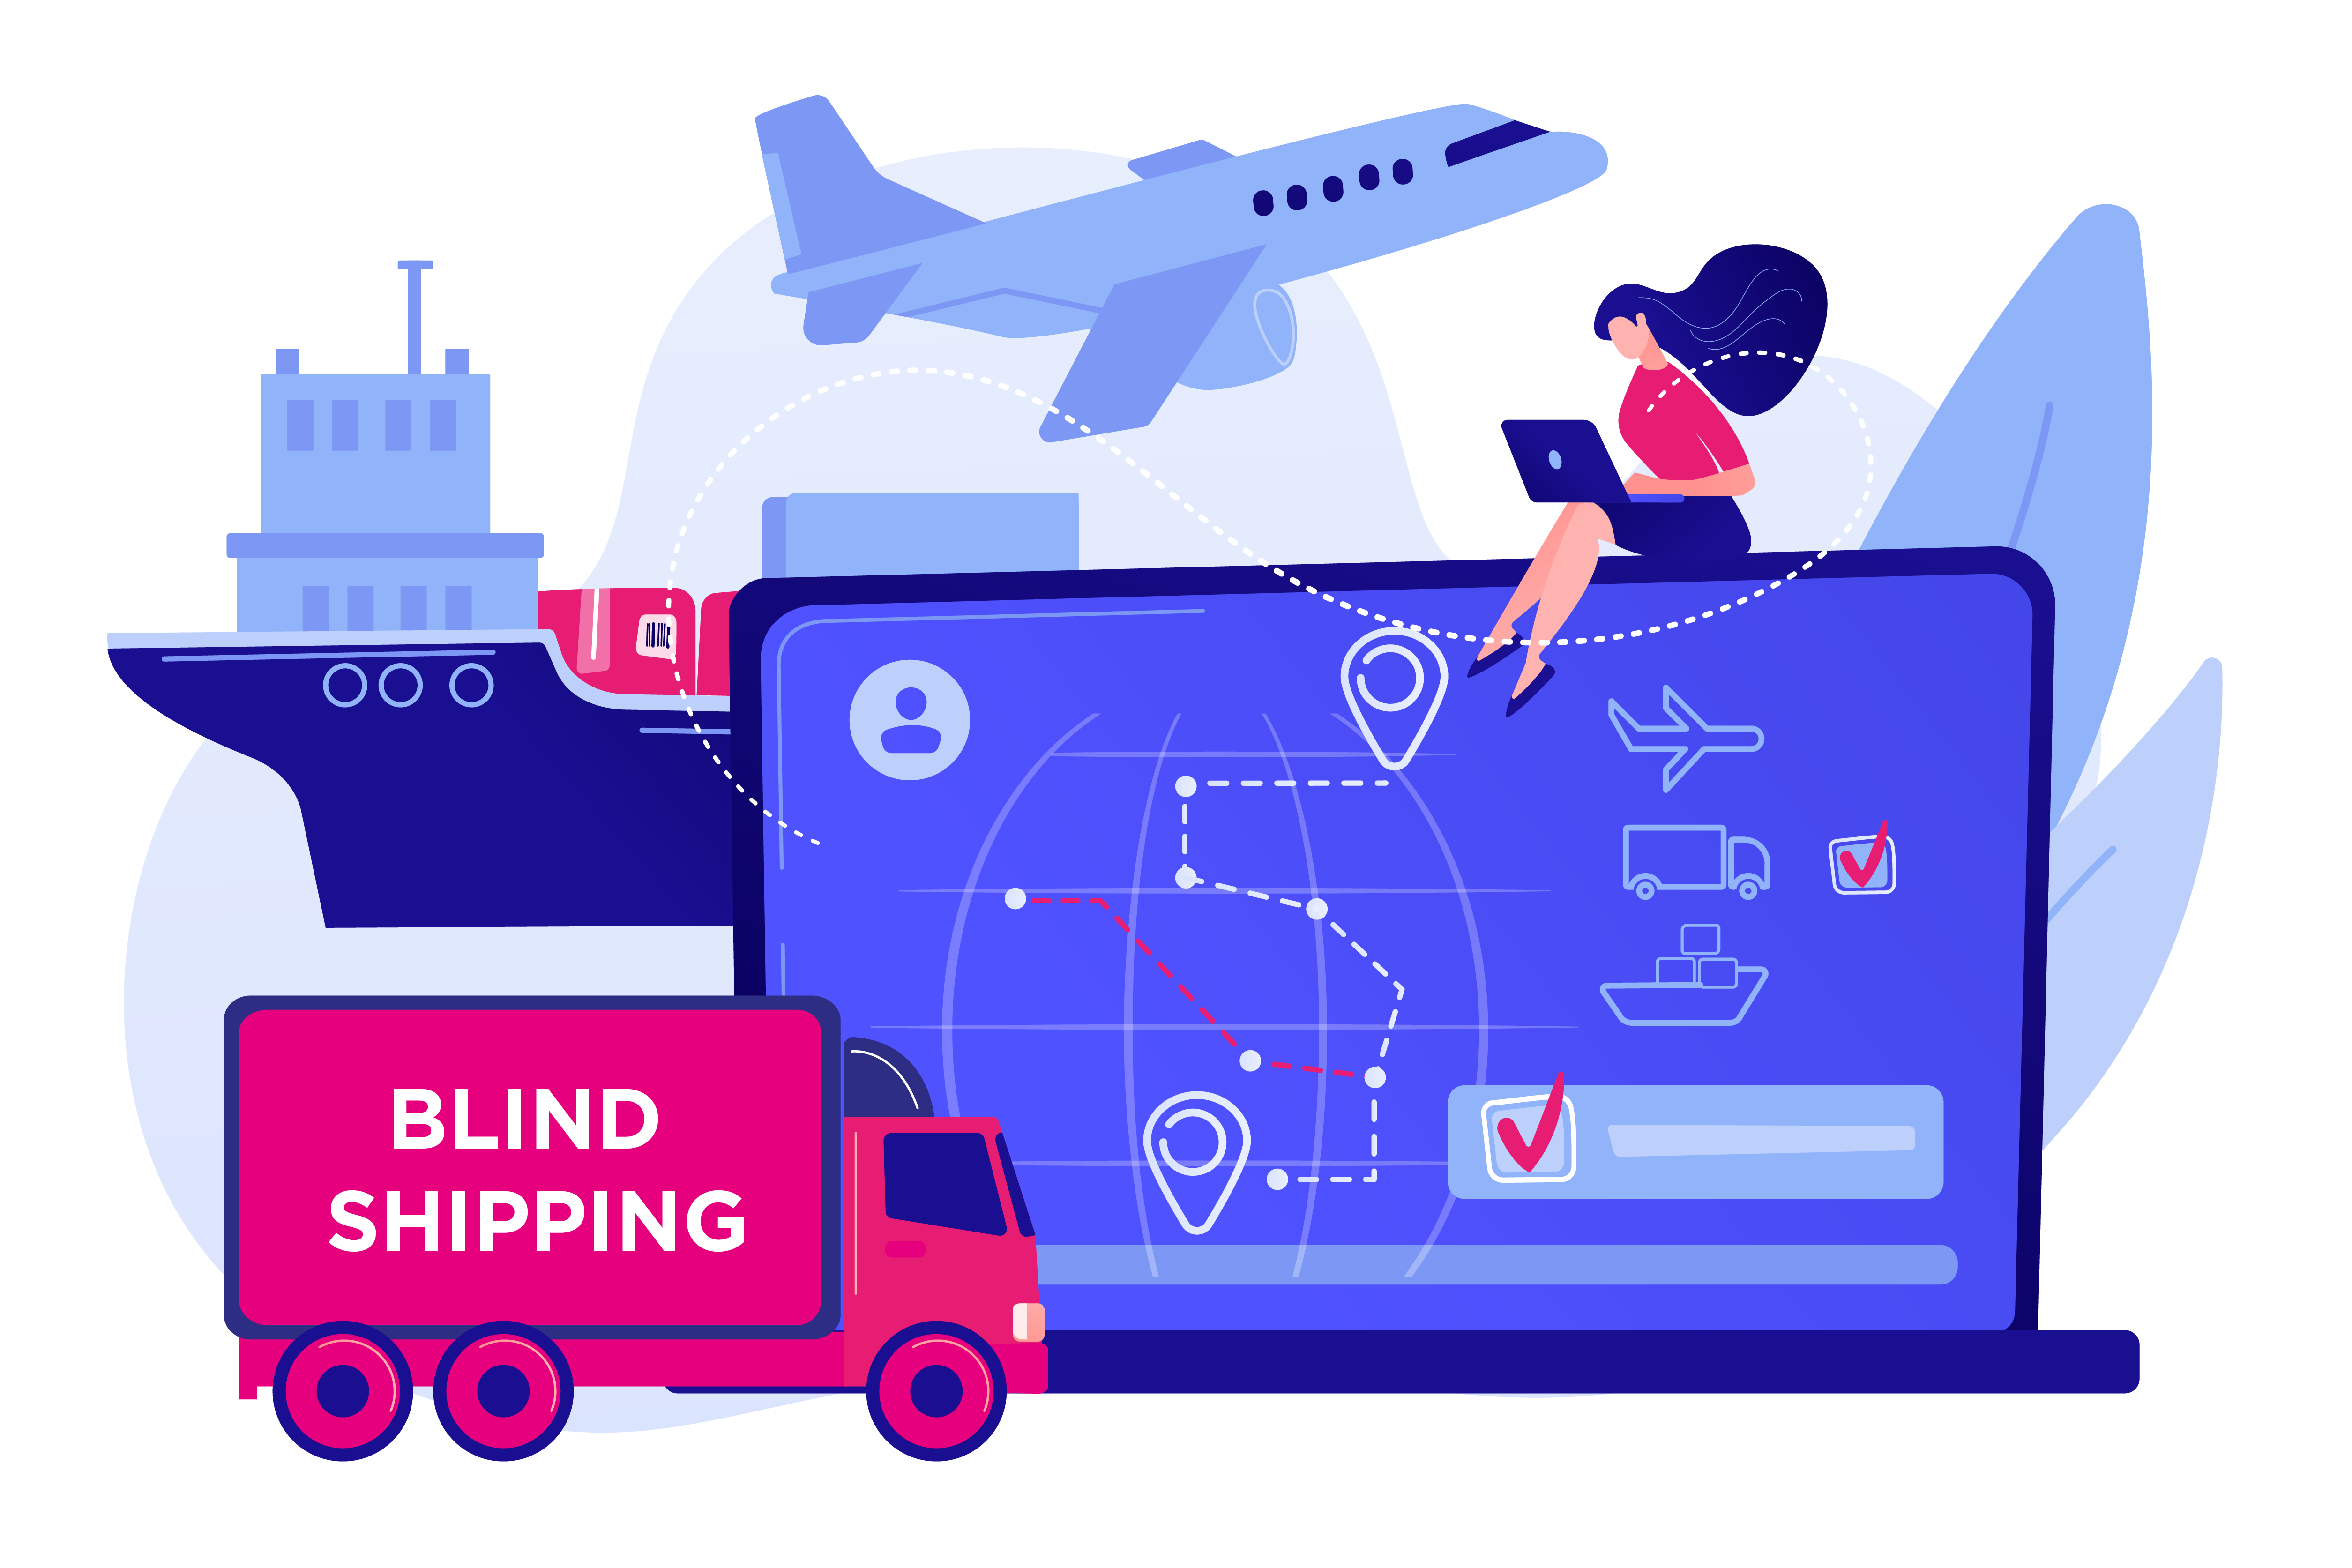
    Quite simply, blind shipping means that your products arrive at your customer’s address from a supplier or distributor who remains anonymous, and your delivered orders will look as if they came directly from your company or store, whether via UPS, FedEx, or USPS.

    With regular shipping and packaging fulfillment, your business products arrive with full disclosure of where its been, who shipped it and who manufactured it. Your customers will know everything. 

    Who would benefit from blind shipment?

    Blind shipping is most frequently used by distributors, graphics designers or other people involved in the procurement process, who want to be the only point of contact for their client. Blind shipping or managed transportation services aren’t needed when you’re shipping to your co-packer, or co-manufacturer, as the blind supplier information doesn’t need to be hidden. 

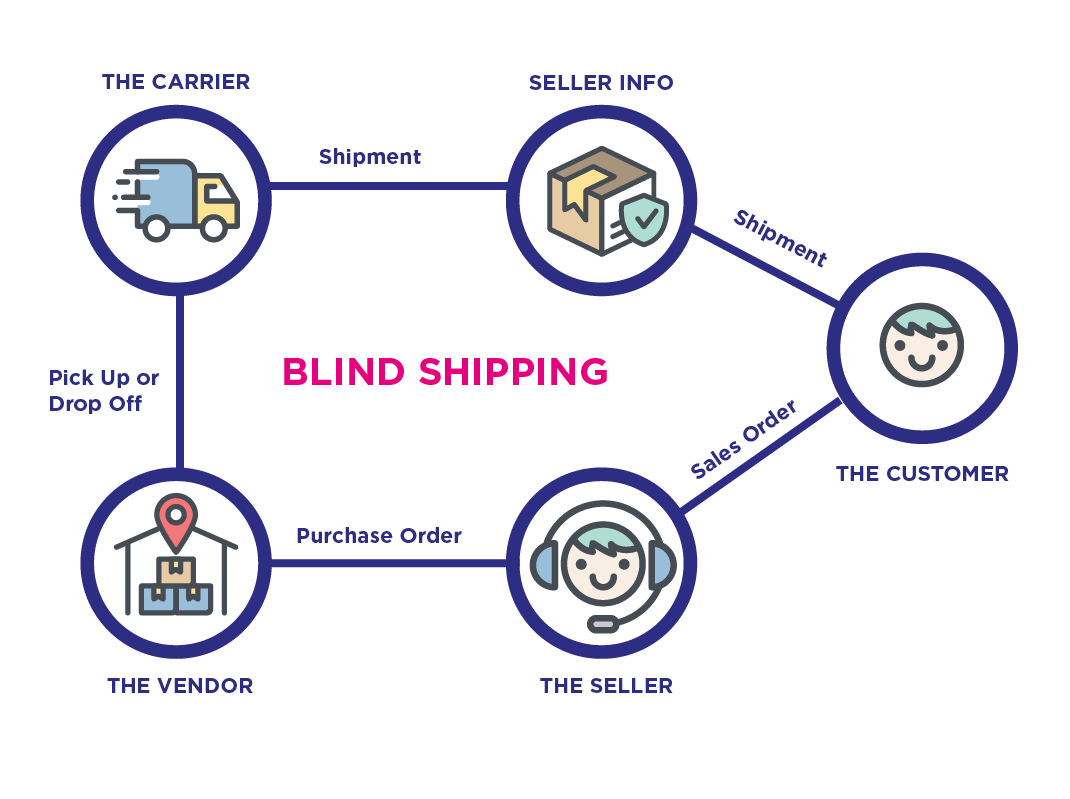
    Blind shipping is very common and is a strategy used around the world to help distribution businesses like yours get the help and expertise they need with ins and outs of the sometimes-complex shipping business. By shipping orders directly from the warehouse, you cut out the middle man. Learn more about how blind shipping works.

    The top 3 benefits of blind shipping are privacy, control of the customer relationship, and keeping your company name in the customer’s mind instead of the factory’s name.

    You may have also heard the term ‘dropshipping’ and might be wondering how that service compares to blind shipping. In essence, they are the same. However, blind shipping goes the extra step to make sure your shipping supplier or factory remains anonymous. Meanwhile, behind the scenes they take on all the responsibility of manufacturing and delivering your products accurately and on time to customers around the world, all for one standard freight shipping quote fee. 

    There are other benefits to dropshipping as well, such as, possibly lowering the cost of UPS shipping, reduced errors or missed shipments, lower internal payroll costs, and perhaps most importantly, time is freed up to reinvest in the one thing that matters most: growing and managing your business. 

    The best way to fully understand how dropshipping works is to take a look at a simple ecommerce example:

    There is also one service known as Double-Blind shipping, or double dropshipping. With Double-Blind shipping, both the shipper and the customer remain private. This is common when it’s important to protect the privacy or identity of the purchaser and/or seller for a wide range of reasons. The most common reason for Double-Blind shipping is to protect or help ensure middle supplies do not have access to customer information and as a result cannot ‘steal’ those customers.

    The Double-Blind process is complicated, and this process can be even harder to do with custom ordered goods, especially as we are working with the customer’s artwork, logo, and graphics. This is where the trust in working with CarePac comes in. We work with distributors frequently and always maintain the privacy of your sourcing relationships. If a customer of a distributor comes to us directly, we will first check with you before talking with them and we never poach or try to “steal” customers from our distributors. Furthermore, we pay attention to potential conflicts of interest and work with integrity to not just maintain our client relationships but to build them to last for years. Reach out to us to learn more about how your items can ship blind and how you can get your own freight shipping quote.

  • What is an eye mark

    What is an eye mark

    What is an eye mark

    Did you ever look at a product packet and noticed different kinds of information and markings on it and wondered why are they here?

    These marks called “eye marks” are present for specific reasons. Though they are not important for the customers in general, they are very important for the manufacturer during the packaging stage.

    These markings are sometimes referred to as eye spots.

    What is an eye mark?

    While it might be a common practice in the packaging industry to talk about an eye spot, it certainly confuses and raises different questions for someone unknown to the term.

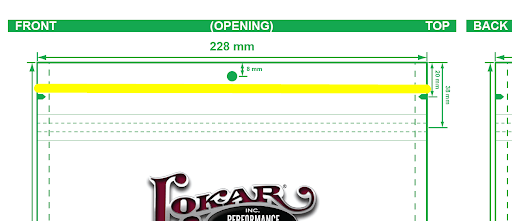
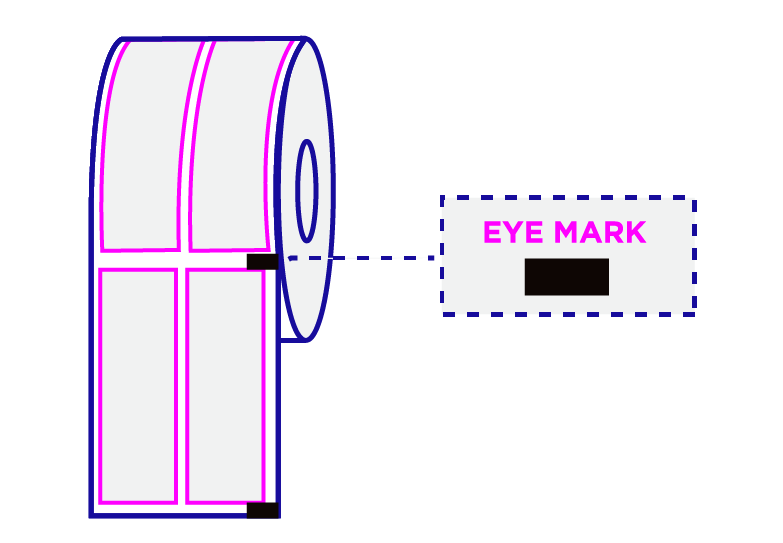
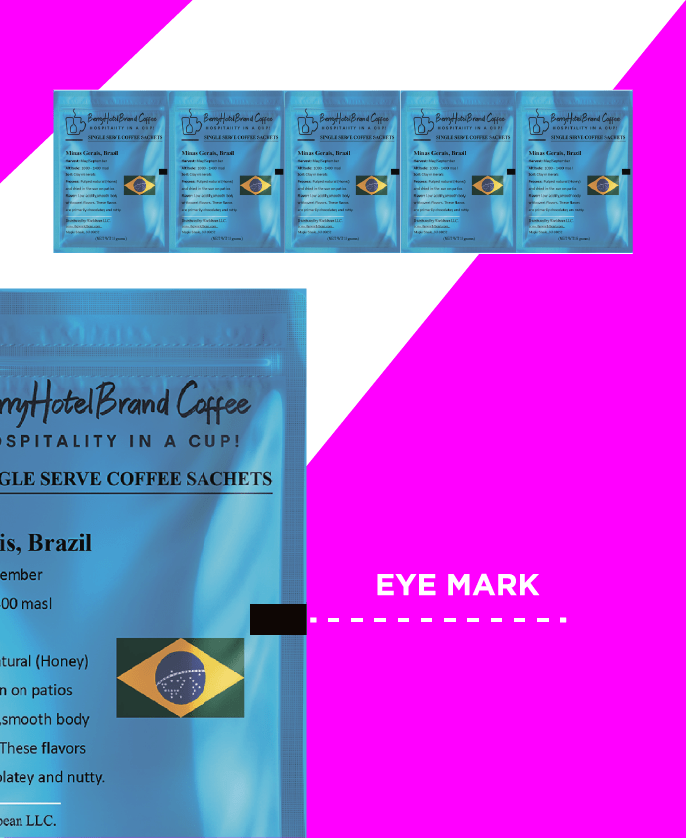
    Roll Fed Form fill machines, and other packing machinery need to be able to identify the point when the first label, or pouch starts and ends. If the machine cannot understand these locations, they will not process the package correctly.  Therefore, there is  strong need for a certain marking to guide the label machine to identify the label’s start and end for a smooth process.

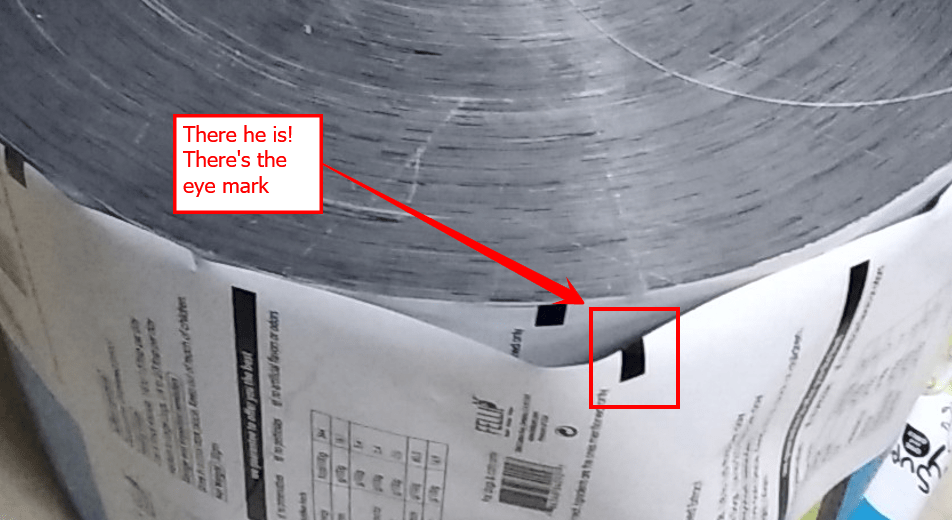
    That is how the black box i.e., the eye mark for the machines to read using a optical reader.

    An eye mark is an important part of the pack as it helps tell the machine where it should cut the film on the packaging line. Then, since all the packs come on a continual loop, the reel is put into the packaging machine, allowing separate individual packs, folding them, closing the join, then sealing one end, filling it with the product, and finally sealing the other end.

    Because the machinery can be meant to cut upon an offset from the eye mark, the eye mark does not need to be highlighted at the spot where the cut occurs.

    An important thing to understand is that this mark does not affect the crimps or seals; it is only used for cutting.

    Why is eye mark artwork still used on packaging?

    The eye spot on the packet is a part of the custom design. The cutter guide and print specification provide the eye spot’s position, size, color, and other important information. Beyond various advancements in the packaging. The companies are still using eye marks.

    To answer this question, why are they still being used? Let us now look at the reasons behind this practice to have a clear idea about its importance.

    It ensures that the giant roll of printed packaging is properly divided into smaller rolls within variance.

    In addition, it also instructs the bag-forming machine where to make cuts during the bag-forming process. Without an eye mark, the sensor on the machine will not identify the mark and cut the film by the cutter causing uneven packs and unusable batches for the customers.

    Finally, if a quality issue occurs, such as a printing problem on the packaging, it is useful to troubleshoot by determining which lane or pitches the defect occurred on. The printer can use this to look up information about their production records.

    Although, these are some of the obvious reasons. However, in some cases, if the eye mark is missing in the design, then the company will have to face certain issues during the registration of the label of the product.

    Why don’t all pouches have eye marks on them?

    Well here is a little secret, almost all pouches DID have a eye mark, but it was trimmed off before the final pouch was made. This is done to make the pouch more esthetically pleasing, and because the eye mark was only needed during the conversion of the pouch.

    Have a question? We have the answer

    The aim of this article is to shed light on the importance of eye marks so that it is easy for anyone to understand why they may need to be present on your packaging. If you have any further questions, please connect with us. 

  • Lead Time Menu

    Lead Time Menu

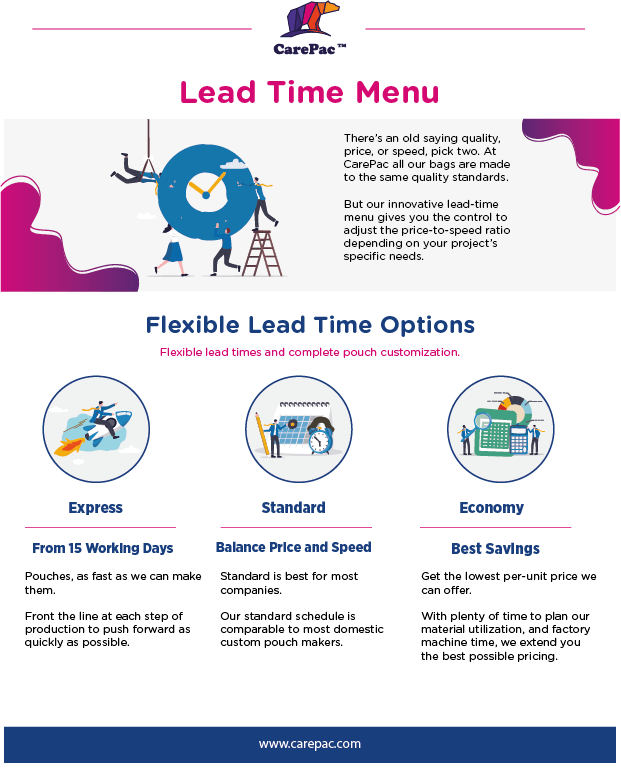
    There’s an old saying Quality, Price, or Speed, pick two. CarePac’s innovative lead-time menu gives you control over the price-to-speed ratio, based on the needs of your business. 

    You’ll find just what you need with CarePac as your guide. No matter what production schedule you select all bags you order from CarePac are made to the same high quality standards. 


    CarePac’s Innovative manufacturing lead time menu has three options. 

    Express

    Standard

    Economy

    How can CarePac offer lower pricing on slower production lead time schedules? 

    Everything we make is totally custom, With longer production schedules, we have more time to optimize our production processes: material utilization, machine time, and labor and we pass those savings on to you. Here are our three production schedule options.


    Express

    Is our fastest production lead time schedule, you’re getting priority placement, are front of the line, and each step of the production lead time is pushed forward as quickly as possible. Our fastest express option is Express Digital which is 15 working days.

    Standard

    A great balance between price and speed, our standard schedule is comparable to many other custom pouch makers. Unlike some competitors who streamline their production scheduling by limiting customer’s choices on material, bag configuration, and sizing. We provide our customers totally customize the bag, which results in unique product packaging that makes your product stand out on on the shelf and in your customer’s hands. 

    Economy

    With our economy production schedule we trade speed for the lowest per-unit price we can offer. With plenty of time to plan our material utilization, and factory machine time, we can extend to you the best possible throughput and lead pricing.

    Who is each manufacturing lead time best suited for?

    Express

    Bag Emergency

    Perhaps you didn’t plan ahead, or an unforeseen opportunity (or emergency) arises. With Express you get totally custom pouches as fast as our management team can make them. 

    Standard

    Busy Businesses

    You’re looking for that sweet spot of price to speed. Small businesses that have to balance unit cost with cash flow. Standard is best for most companies. 

    Economy

     Established brands

    These are established SKUs and you are forecasting and planning months in advance for pouch utilization and new product development. 

    How does CarePac stack up against the lead time competition?

    Great! You want to learn more about our order lead time.
    As we mentioned several competitors state an amazing order lead time, if you’re willing to sacrifice customization, work with a few sizes, materials, and configurations they offer, and are only wanting digital printing manufacture. 
    With CarePac we offer competitive lead times while still offering you complete pouch customization and management. Oh, and let’s not forget the Chinese, they might quote you “20 days” but they don’t tell you about the 3 months your bags sit on the boat, or every (expensive) express shipping fee. With the never-ending supply chain issues in China, your 20 days can become 10 months very fast.
  • Is RGB or CMYK better for digital

    Is RGB or CMYK better for digital

     Whether you are a designer or just trying to get a project across the finish line for your team, some things are essential to know if you are working with printed packaging. One of the most important things to know is the concept of RGB vs CMYK color modes.

    The mastery and knowledge of both these concepts are not restricted to the complete forms of both words. It also refers to understanding of how they help optimize the design and printing process. So, for example, it also helps to understand which color mode you choose for products paper envelopes.

    When we try to understand the concepts, they are presented in a challenging way, and we get more apprehensive of learning about them.

    However, in this article, we will explain the RGB and CMYK color modes in a more straight forward way so that you can use them in the best way.

     So, without any further ado, let us get started!
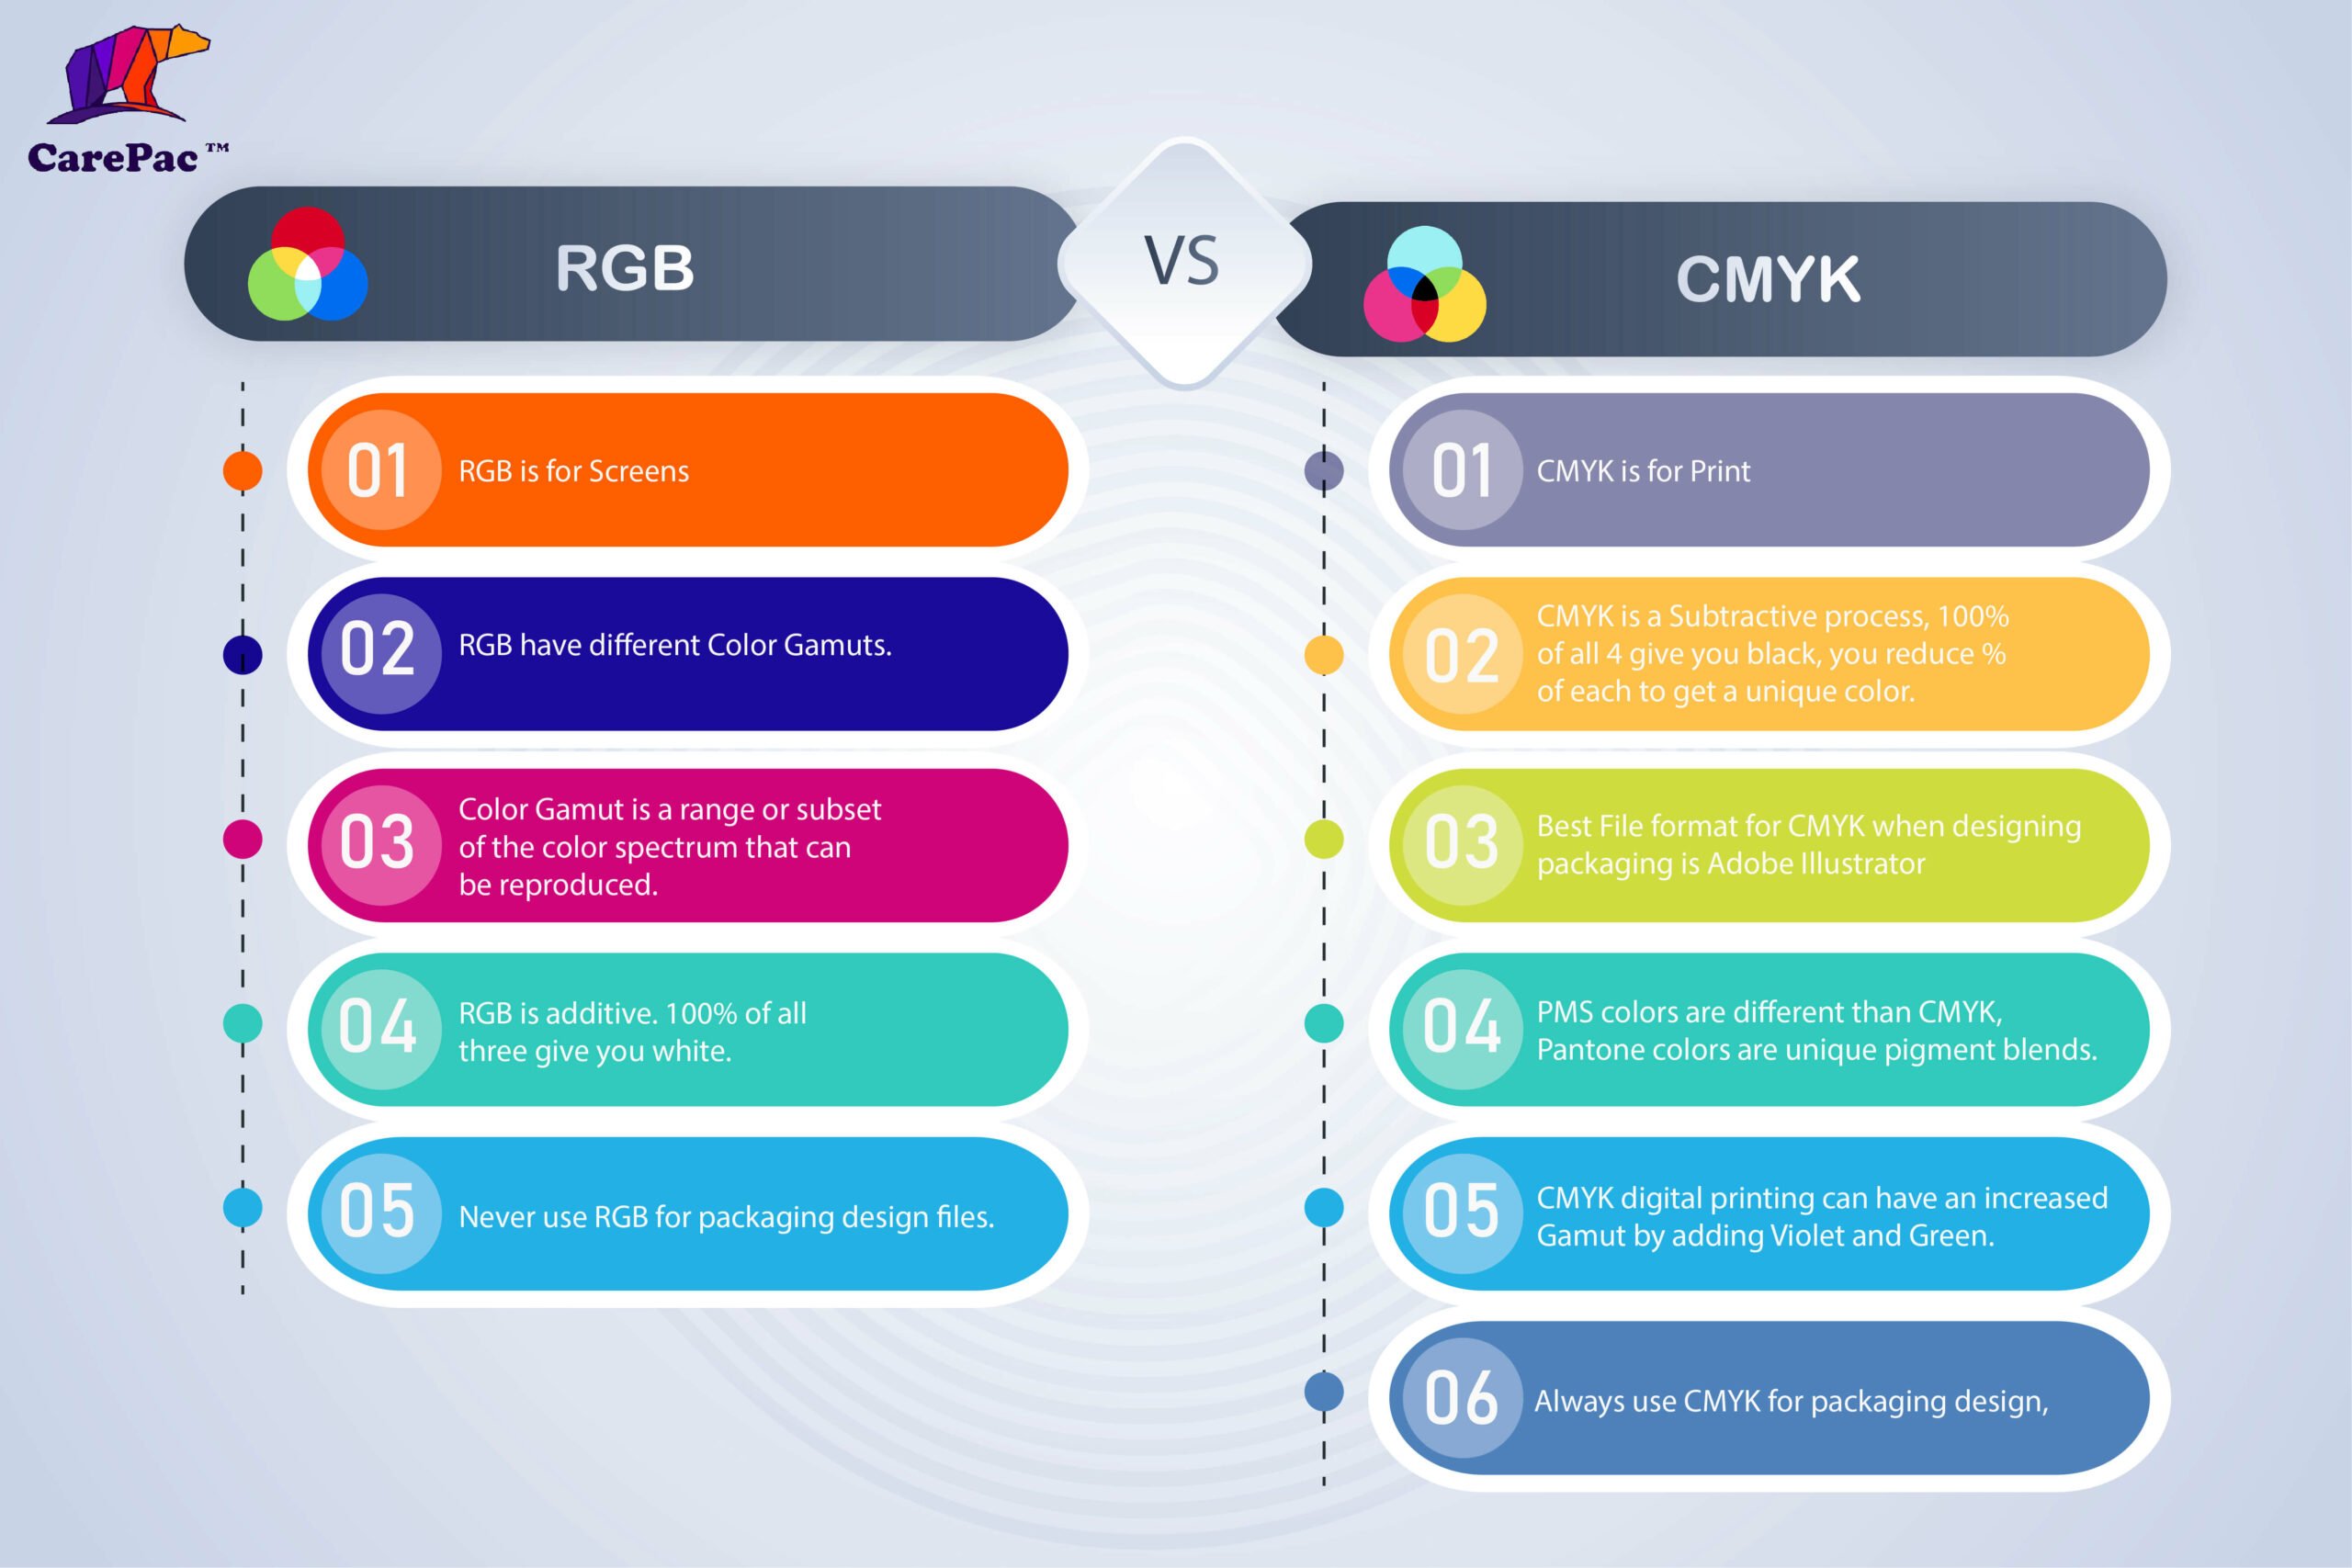
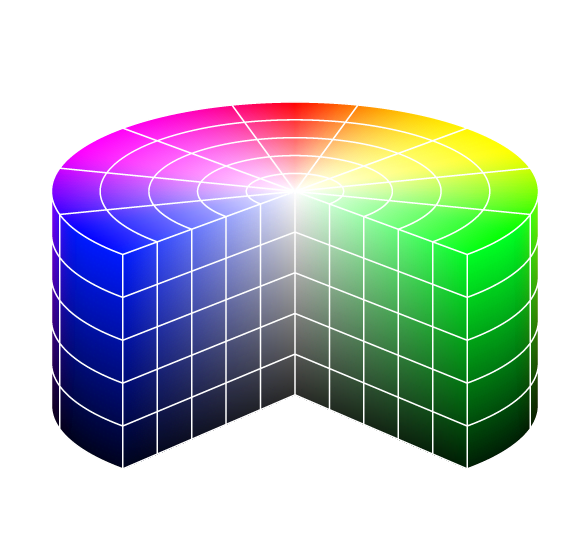
    An infographic showing the differences between RGB and CMYK

    What is RGB?

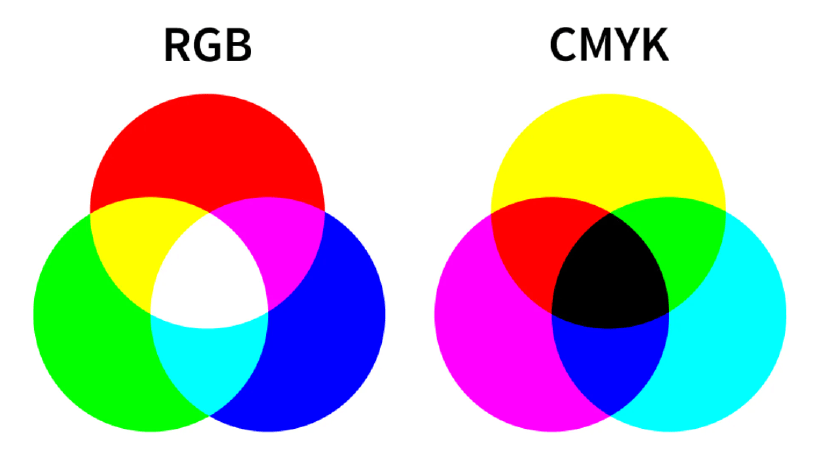
    The complete form of RGB is Red, Green and Blue and is the color space frequently used for digital images.

    All the colors initially consist of black darkness; then, the three colors are put on top of one another to create the perfect pigment and brighten it. This is what a light source does, and it produces the color you want by combining red, green, and blue light and adjusting the intensity.

    The graphic designers can adjust and play around with three primary colors (red, green, blue) to control the vibrance, saturation or shadowing to increase or decrease the final color outlook. Moreover, they even can alter the light source so the designers can use it to achieve the required color on the screen.

    When to use RGB?

    There are times when you need to use RGB color mode instead of CMYK to display your design. 

    RGB is for Screens

    If the destination of your design is a digital screen, then you should opt for the RGB color mode. A digital screen includes different devices, like mobile phones, tablets, android televisions, projectors, computers or even cameras.  But that is not all. You will also need to opt for RGB color mode for the following options:

    Websites and applications design

    This includes all the graphical content, like icons, signs, buttons or even graphics.

    Social Media

    Social media content includes posts that incorporate data, images, profile pictures or backgrounds.

    Video Content and Infographics for Web

    Visual content accumulates all types of content mentioned above and other options like videos, infographics or even photographs for various online platforms like websites, applications, or social media.

    Best file formats for RGB

    Now that we have talked about RGB color mode, the next thing that we need to understand is that not all the file formats are for RGB. However, there are some preferred file formats required for RGB.

    JPEGs

    The most common format for RGB is JPEGs. They are easy to read by any software, and you can easily play around with the size and quality. If you like, you might even compress it.
    PNGs

    The second most common but better version of JPEGs is PNGs. They are not only transparent but are of higher resolution, which is great for graphics. This type of format is excellent for website content like icons or buttons.
    PSD

    PSD is an editable file version of photoshop and a common source for RGB documents. It is excellent to use when sharing files with other graphic designers.

    GIFs

    Everyone is aware of GIFs, a combination of different animated elements. It is used on various platforms for work or fun.

    What is CMYK?
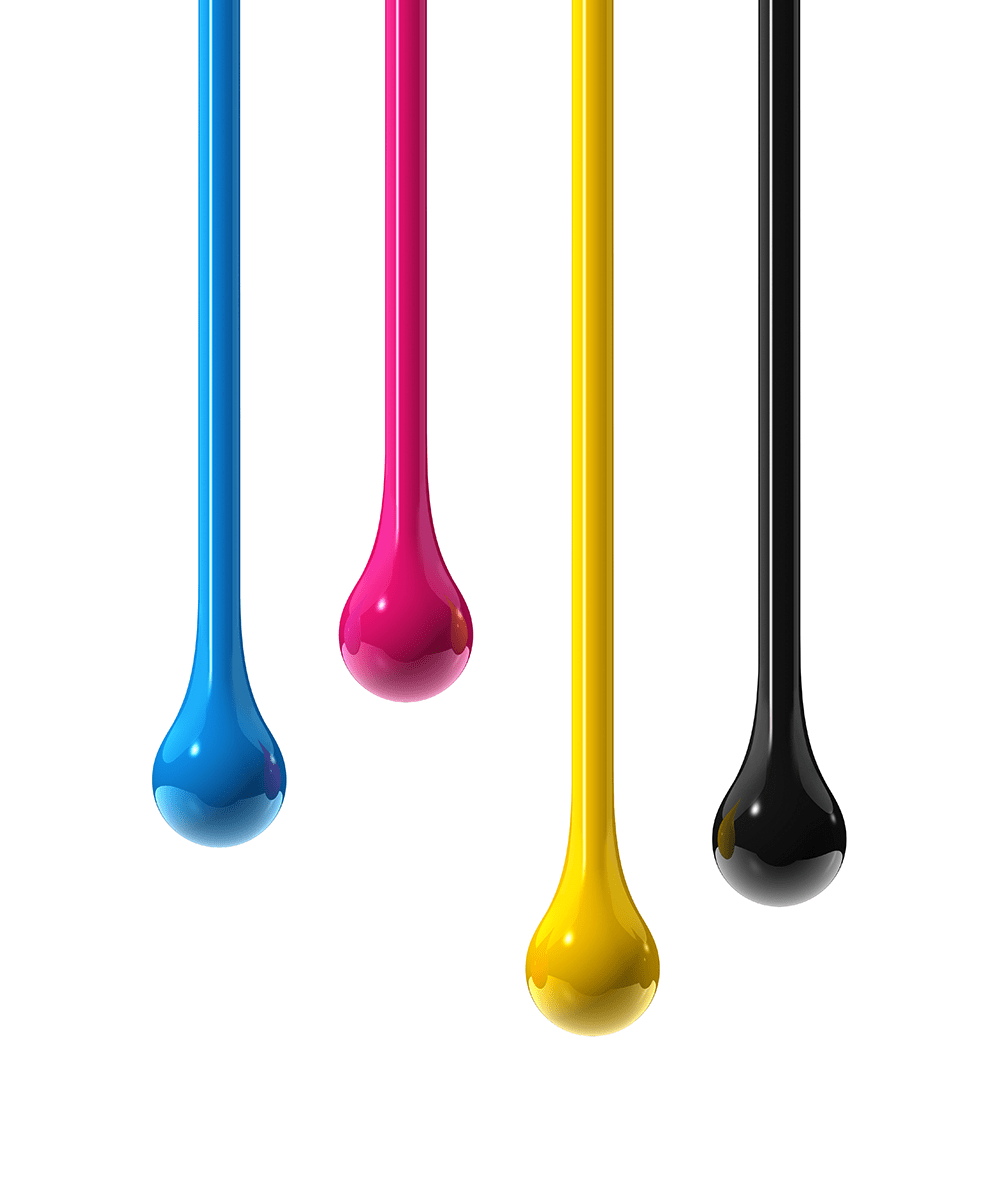
    CMYK means Cyan, Magenta, Yellow, Key/Black. The CMYK colors are mixed up using real ink, and a printing machine creates the images.

    This process is referred to as subtractive mixing. All colors begin as white, and every layer of ink diminishes the initial brightness to get the desired color. When all hues are combined, they become absolute black.

    When to use CMYK?

    There are certain times and file formats where you should use CMYK color mode. However, you should avoid doing so other times unless you know which format would be the best.

    You need to understand a simple rule: you should always opt for CMYK when a design needs to be printed. CMYK color helps to recreate a design or a style in a more accurate way.

    It would be best if you choose CMYK in the following project types:

    Printed Packaging Design

    Any packaging design that will be printed digitally, (and some which will be flexographic or rotogravue), should be setup with CMYK. It should be noted that like a onion, color space selection is complex, and we havn’t address PMS colors in this article, but as a rule of thumb, the best place to start with packaging design is using CMYK.

    Advertising

    Marketing collateral like posters, flyers, billboards, brochures, menus, vehicle wraps, business cards, management tags and more.

    Merchandises and materials

    The merchandise and packaging that need to be oriented should be included in the CMYK list, such as products, paper envelopes, collection printed samples, menus, packaging, clothing or even hats.

    Best file formats for CMYK

    AI

    AI is the editable file of Adobe Illustrator, also known as the standard source file. Working with a team of designers, you should always use AI file format.

    PDFs

    We all know PDF versions and have used them for our word files, but we need to understand that it is perfect for CMYK files. One of the reasons is because of its compatibility.

    EPS

    If you don’t want to use AI files, you can choose to go with EPS files. While AI files might be compatible with some software, EPS files are best to work with all the vector programs.

    Moreover, you should also get a printout and then decide if you need to adjust the colors again or are the colors output is good enough.

    TIFFs

    When you save a PSD as a TIFF Photoshop creates a flat Tiff image file and the layer data is a separate Tiff Tag and can have embedded RLE. 

    Why the RGB and CMYK Difference Is Important in Graphic Design

    You should understand and comprehend the difference between RGB and CMYK channels in Graphic Design. One of the significant reasons to understand the difference between the two can affect the final printed version compared to the digital one.


    Both RGB and CMYK are two different color modes. They have their own  requirements, pros and cons.


    Attempting to print a file in the wrong format will result in incorrect colors. This mistake can further be an expensive and time-consuming problem to solve. Therefore, understanding the differences and avoiding these color issues is essential for good design and printing.
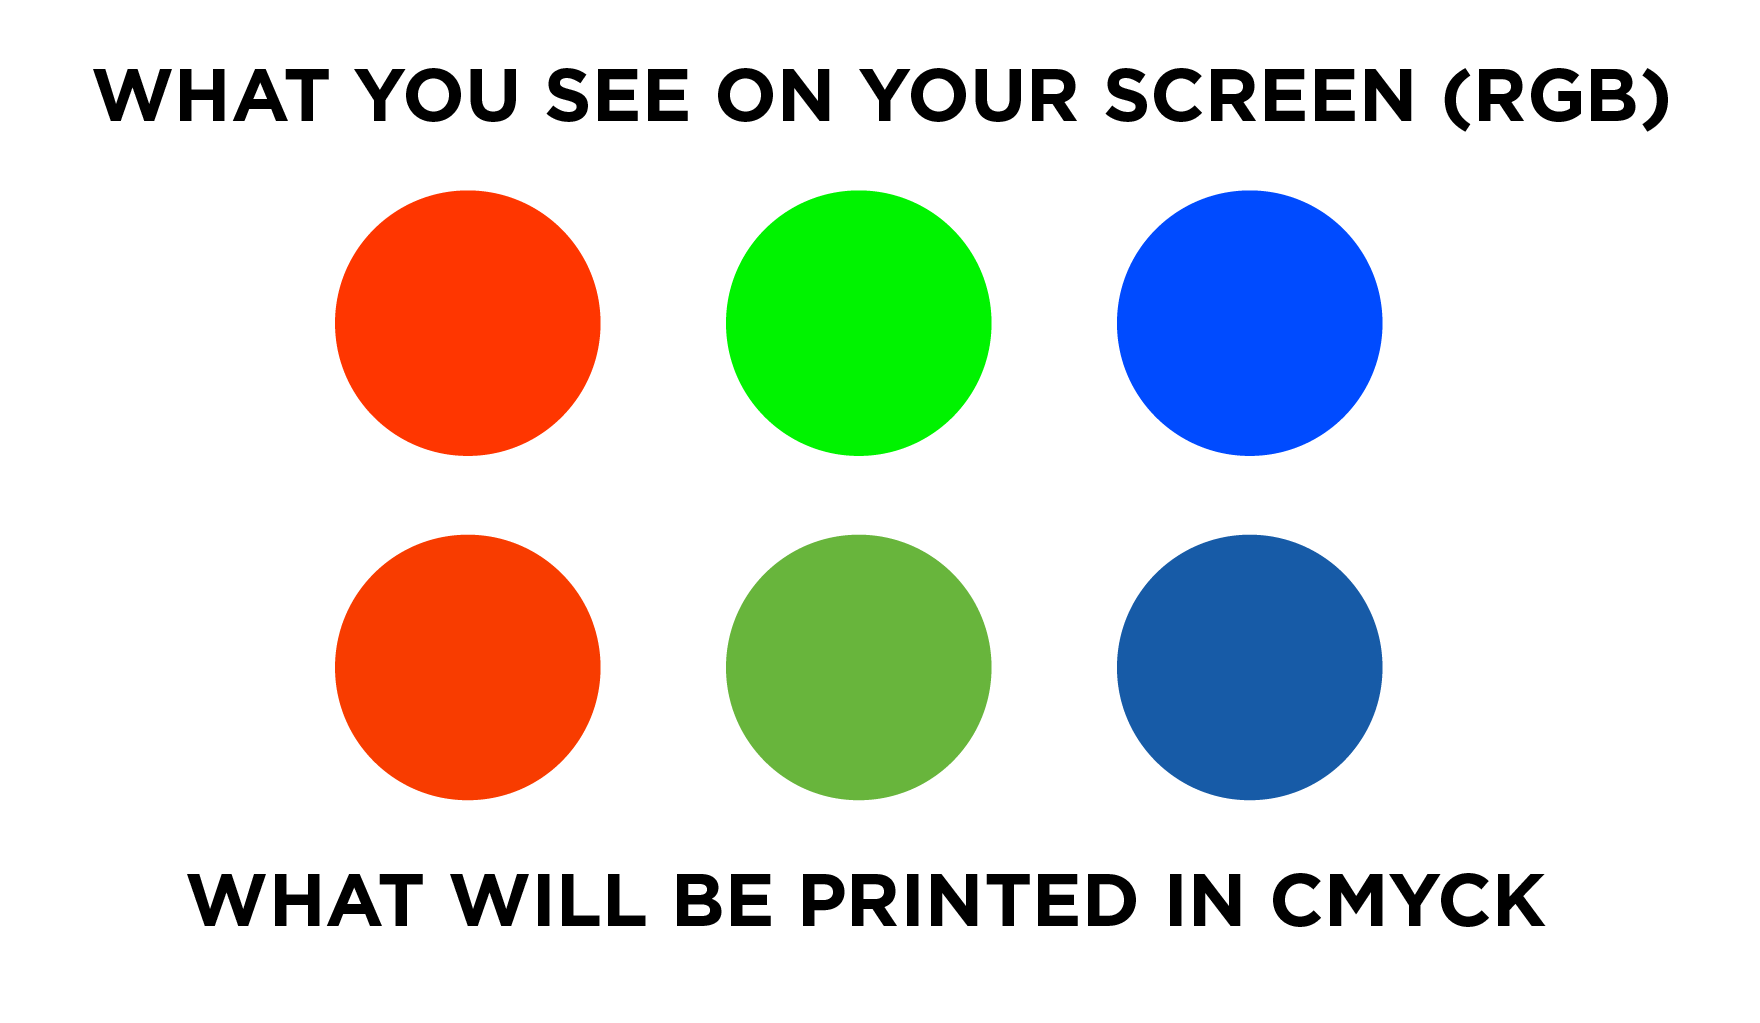
    Moreover, it is also essential for the digital printing services to know the difference since they are in charge of printing an order. A little mess up can incur high costs; therefore, digital printing services need to know what is best for digital marketing and other channels.

    For digital printing on pouches your file should be set to CMYK. CMYK stands for Cyan, Magenta, Yellow, Black. These are the ink colors that will be combined when printing your logos and graphics on the pouch. RGB which standards for Red, Green, Blue is applicable to on-screen display and is not used for printing. 

    RGB vs CMYK Model
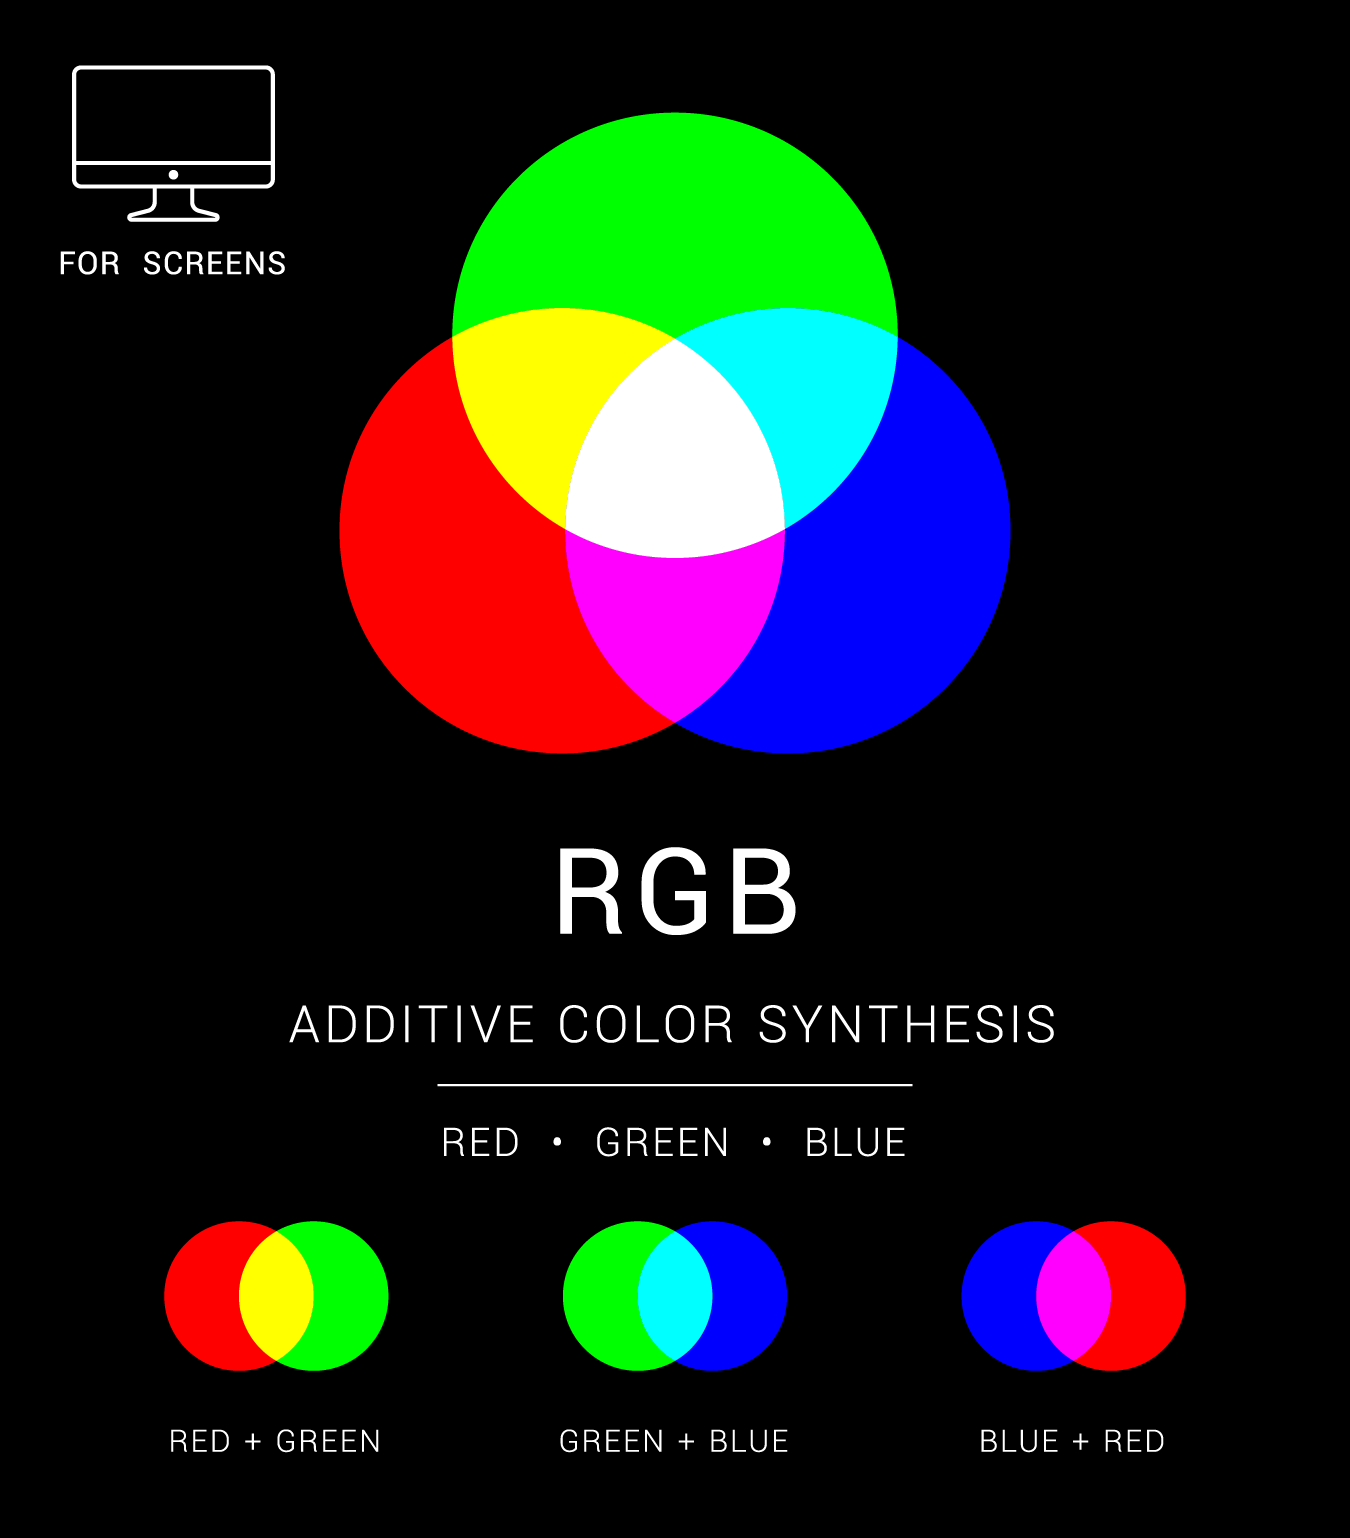
    RGB is an additive, whereas CMYK is a subtractive color model. RGB color model uses white as the sum of all primary colors and black as the darkness of light. Graphic designers and publishers use the RGB color model for any media that emits light. Because the mediums emit color as red, green, or blue light, RGB is perfect for digital media design.

    In the RGB color paradigm, pixels on a digital screen are all one of three hues when magnified: red, green, or blue. The white light projected by the screen combines the three colors on the eye’s retina to produce a wide variety of additional apparent colors. The rule is that the more color beams sent by the device, the closer the color goes to white.

    However, not producing any beams results in color darkness. This is the inverse of how CYMK operates. CMYK color model employs white as the original color of the print backdrop and black as a color ink combination.
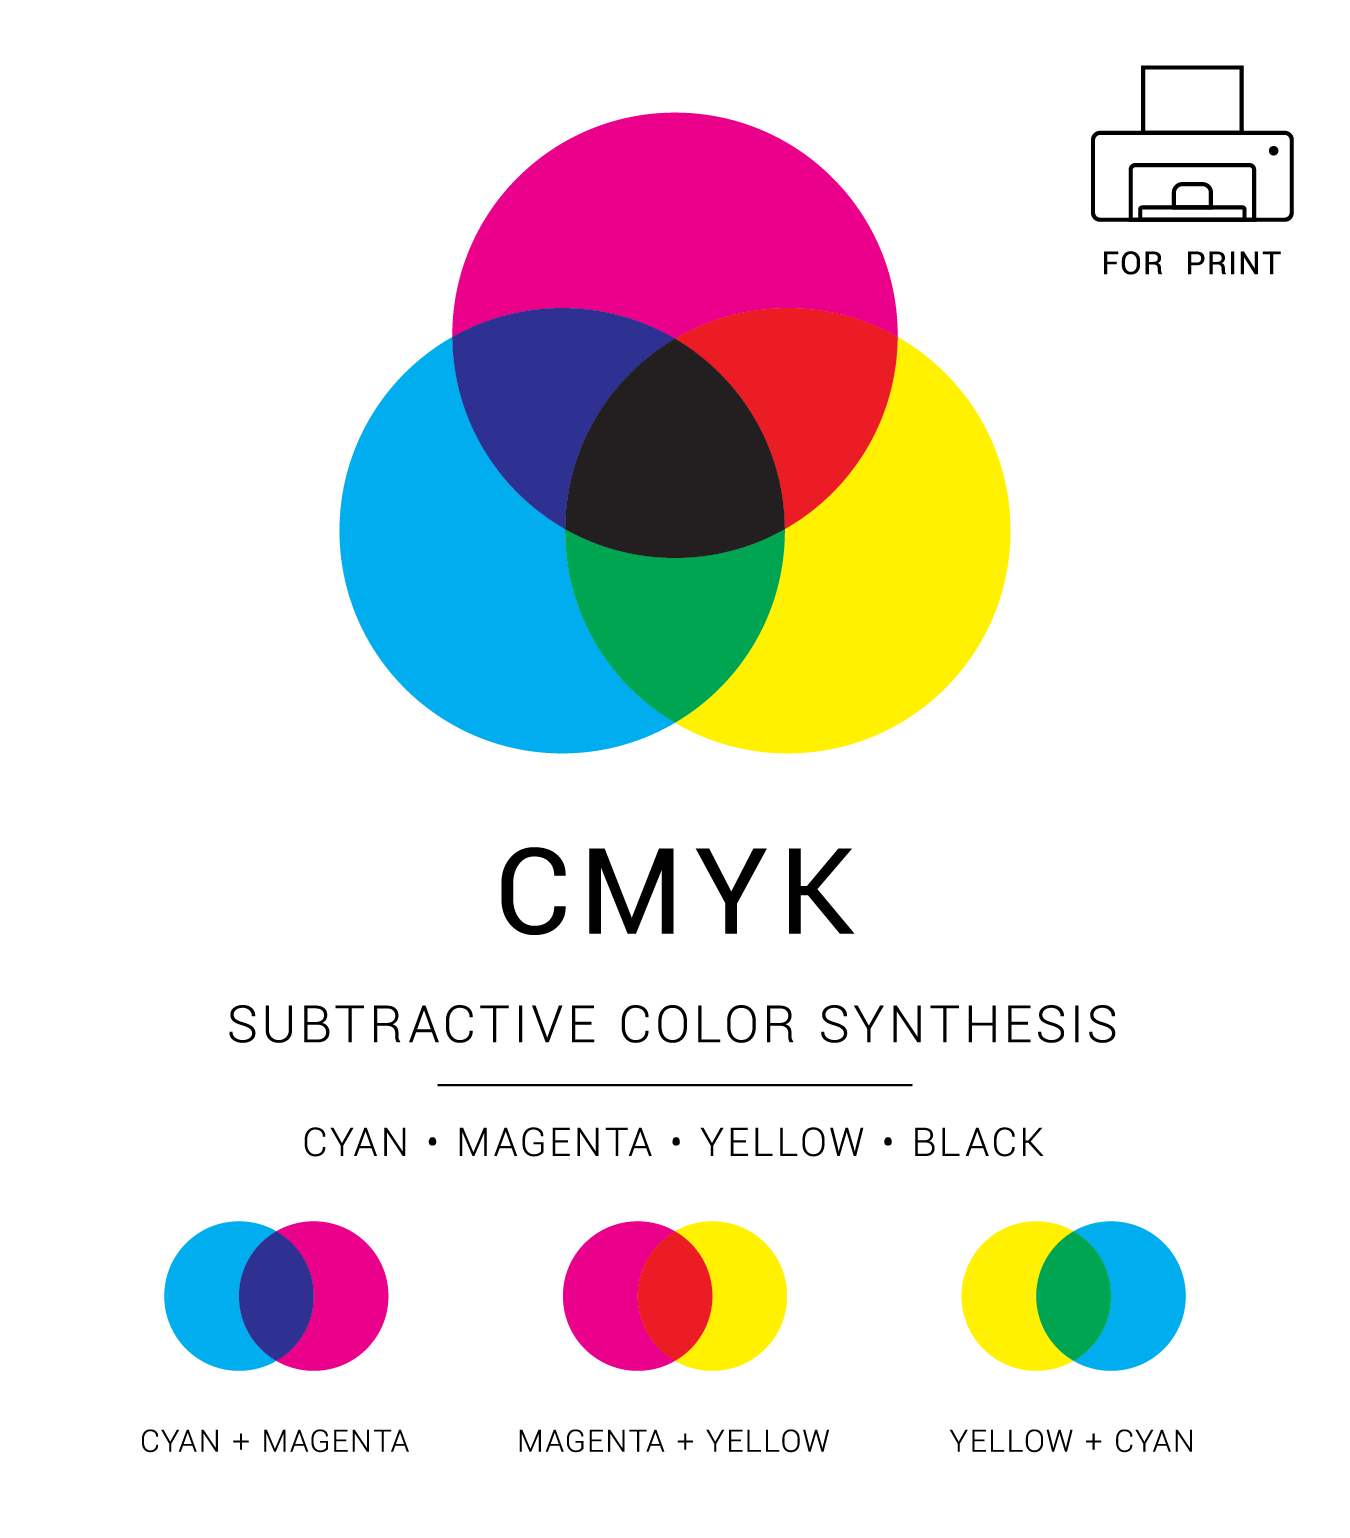
    CYMK is ideal for print marketing materials like logos and best for digital materials because it uses colored ink for printing. Using CMYK, colors are subtracted from the original white light and converted into pigments or dyes.

    Printers apply these pigments onto the paper in the form of tiny cyan, magenta, yellow, and black dots that can be spaced out or used closer together to create the required colors.

    The more colored ink applied on a paper with CYMK, the closer the color gets to black.

    However, as you subtract cyan, magenta, yellow, and black inks, you get the white or original hue of the paper or background. RGB color values vary from 0 to 255, while CMYK color values range from 0% to 100%.

    How to Convert an RGB File to CMYK

    You might have to change the color space of a document, and the change might require changing the colors.

    About Color Spaces

    A color space refers to applying a color model, either RGB or CMYK. RGB and CMYK have numerous color spaces, and each one of them has a unique gamut. Adobe RGB and sRGB are the two most common color formats. However, the screens commonly use standard RGB or sRGB and are appropriate for photos on the web as they are translated by most displays the audience uses.
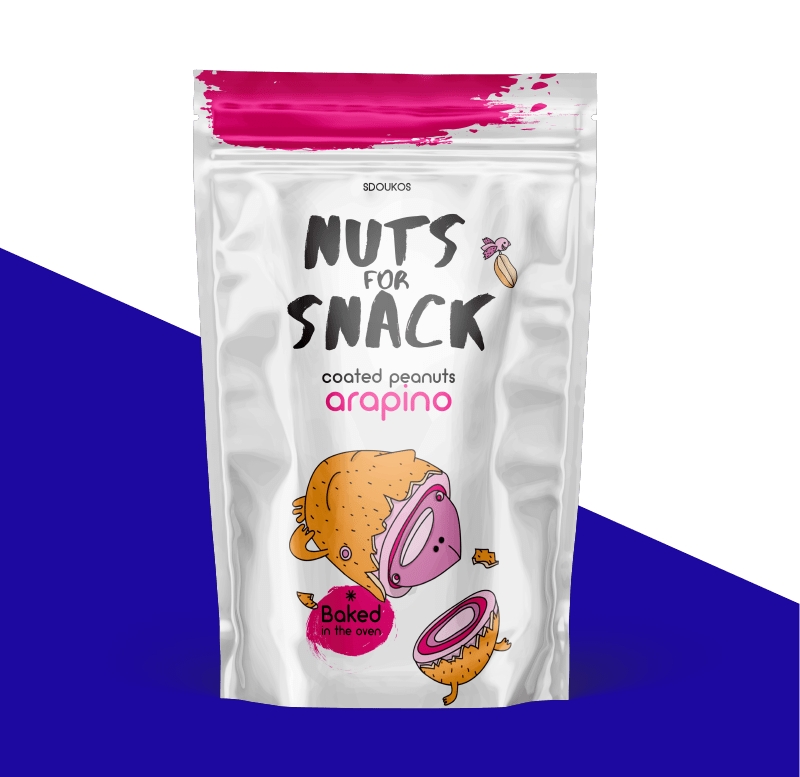
     

    If you wish to learn more about color spaces, you need to know the differences between the two-color modes in even more detail.

    The Simple Answer: CMYK+W is for print RGB is for screens