Category: Packaging Design

  • Roll Diameter Calculator

    Roll Diameter Calculator

    Roll Diameter Calculator

    Determine Diameter of Roll Material

    Roll Diameter Calculator

    Enter Roll Length* m feet Enter Diameter of Center Hole* mminches Enter Material Thickness* milMicrons

    Roll Diameter Calculator to Determine Diameter of Roll Material

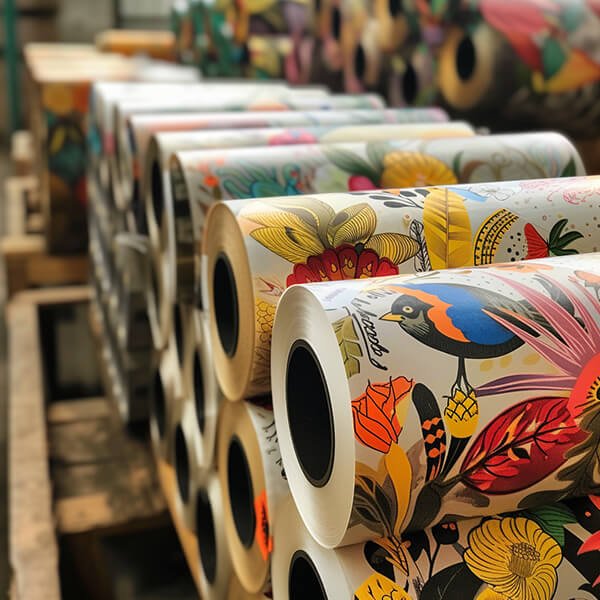
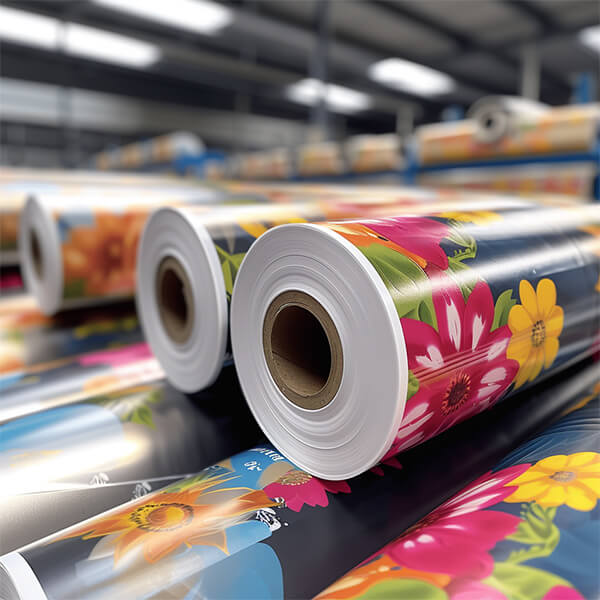
    Whether you’re a brand new client or a repeat customer, determining the appropriate roll diameter is essential to keeping your business running smoothly. If the roll diameter is too large or too small, it won’t fit onto the machine it’s going on to. Both scenarios aren’t ideal, which is why nailing down the appropriate roll diameter you need is so important.Determining the appropriate roll diameter can be quite confusing for many of our customers, but our roll diameter calculator does the calculation for you.roll-diameter-calculator-onlinehow-to-use-roll-diameter-calculator-carepac

    Using Our Roll Diameter Calculator

    Our interactive calculator is incredibly easy to use: simply input the requested dimensions (core diameter, the thickness of material, and length of material ), and our calculator will crunch the numbers and let you know the outside diameter of the rolled material. This way, you can quickly order the accurate roll diameter for your machine and application. 

    For example, if your machine offers a max roll diameter of two feet and you want to figure out how to fit 10,000 feet on the roll, our calculator can help. One important thing to remember is that our calculator does not account for variations due to stretching or softness of the material. 

    Additionally, while our free tool will assist you in determining the outside diameter of the roll material, this calculation should be used for estimates and is not an exact measurement.

    Get Started with CarePac

    Whether you’re ordering standard-sized rolls or are looking for something more customizable, CarePac can help support all your packaging needs. With decades of experience in the packaging industry, no job is too large or too small for our team of professionals. Have questions? Want to get started? Get a Quick Quote, order samples, or contact us today for more information.

  • Pouch Packaging Design & Inspiration

    Pouch Packaging Design & Inspiration

    Pouch Packaging Design & Inspiration

    Pouch Packaging Design & Inspiration (w/ Free Printable Templates)
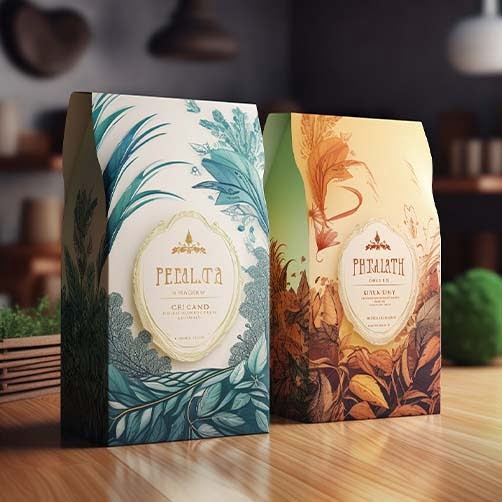
    Think of a few of your favorite brands.

    Is their product packaging bright and cheerful, minimalist and sophisticated, dark and elegant, or something else entirely?

    Many of us simply “choose” a product on autopilot. We seldom stop to consider why we picked up that specific product off the shelf. This is the power of good branding!

    The design of your pouch packaging is the first interaction you’ll have with a potential customer. 

    What kind of impression do you want to make? How will your branding communicate the values of your business and the quality of your product?

    These are important questions to ask yourself when thinking about design elements of your pouch packaging. Your packaging is more than just a way to seal your product. Compelling packaging is a visual canvas that can help to differentiate your product from competitors and allow you to stake a unique identity in the market. Through your design, you can communicate specific emotions, desires, and values to your customers. And thoughtful branding does this all at a subliminal level.

    Eye-catching graphics, carefully chosen typography, and unified color schemes, can also significantly influence purchasing decisions and help your product stand off the shelf.

    Compelling branding gives your product longevity; reeling in new customers with your design, and turning them into loyal, long-term brand advocates through your product quality and values.

    But it’s not just as easy as slapping a logo and some colors together and calling it a day…

    With an endless combination of colors, fonts, and design styles to choose from, creating a compelling and unified visual brand can feel intimidating. Not all of us have the time or energy to learn what feels like an entirely new language.

    Keeping this in mind, we’ve highlighted some unique and varied brand identities below to help give you some inspiration and useful tips for your pouch packaging.

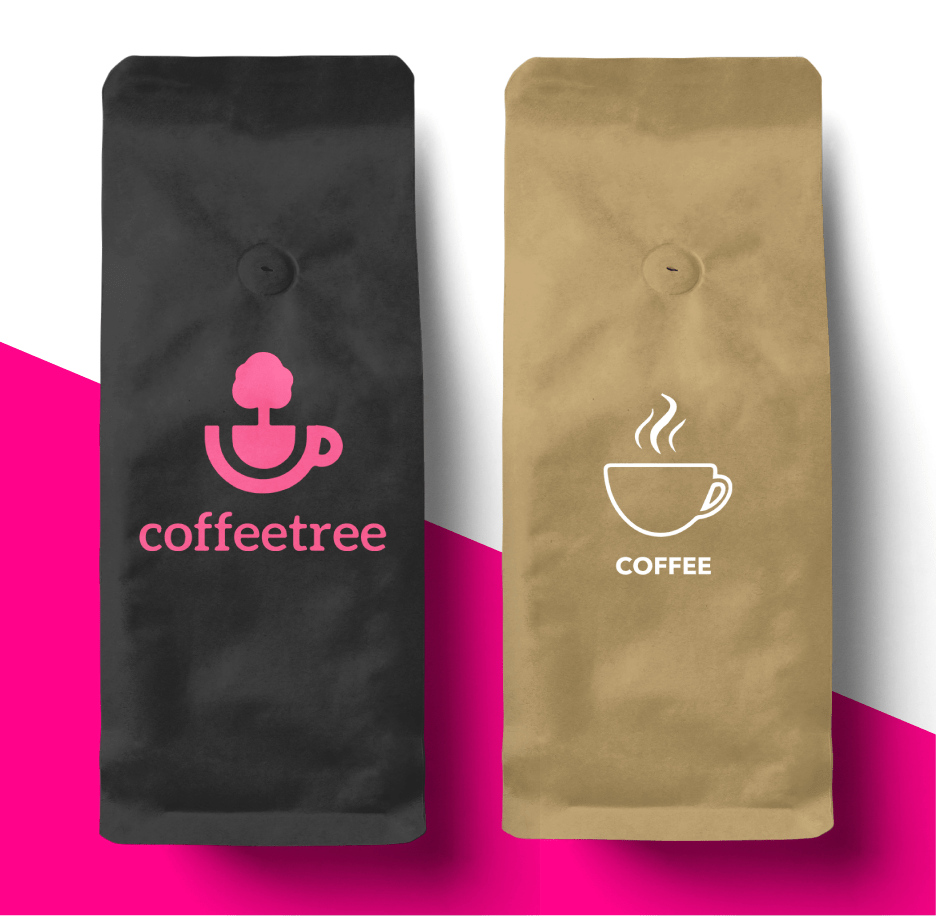
    Better Coffee Co: Bold Coffee Branding

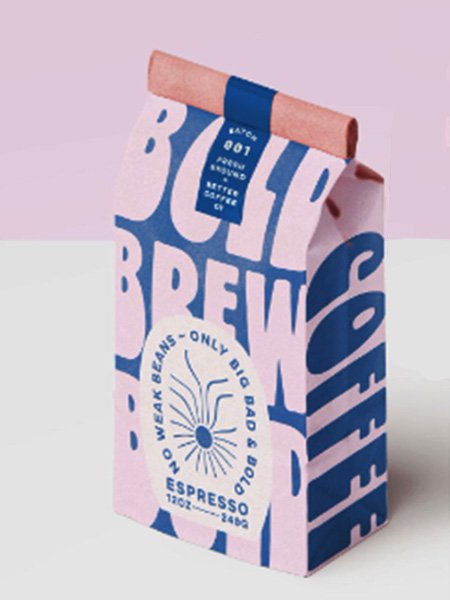
    Better Coffee Co chose a playful and bold design that pays homage to the groovy typefaces of 60’s counterculture. The packaging gives their product both a casual and refined feel. A light airy pink and blue creates bold juxtaposition and contrast, and reflects their brand’s slogan “no weak beans, only big, bad, and bold”.

    Their design also is influenced by the popular “Corporate Memphis’ ‘ branding style; which emphasizes bold and cheerful color palettes, exaggerated shapes, and a playful minimalism. It’s familiar yet also refreshing and new. This gives their packaging a sense of easiness and comfort, while retaining a distinct and original feel.
    bold-coffee-brandingluxurious-coffee-packaging

    Roastworks: Elegant And Luxurious Coffee Packaging

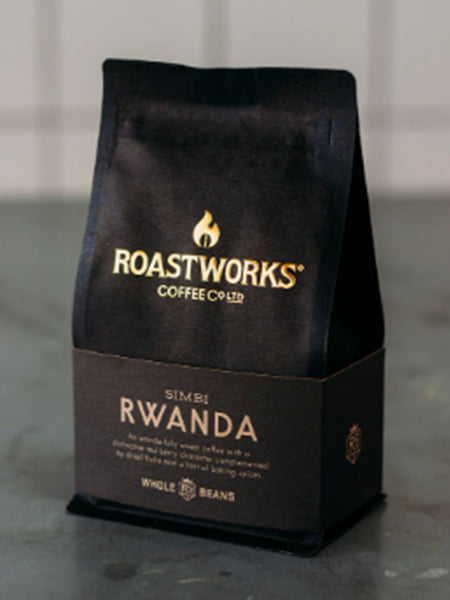
    In contrast, Roastworks Coffee Co chose an elegant luxury feel for their coffee packaging. The black bag, gold serif lettering, and a deep mahogany colored sleeve take inspiration from the timeless styles of other luxury brands, such as Tom Ford and classic British car manufacturer Bentley. This combination contributes to a sense of exclusivity and refinement; this is coffee for people who care about good coffee.

    The subtle embossed details on the raised serif font logo and sleeve draws in the customer’s eyes and speaks to the importance of craftsmanship of their product. With the bright gold color helping the product to stand out on store shelves, Roastworks shows how classic elegance and attention to detail create a distinct first impression.

    Portland Pet Food: Straightforward Pet Treat Branding

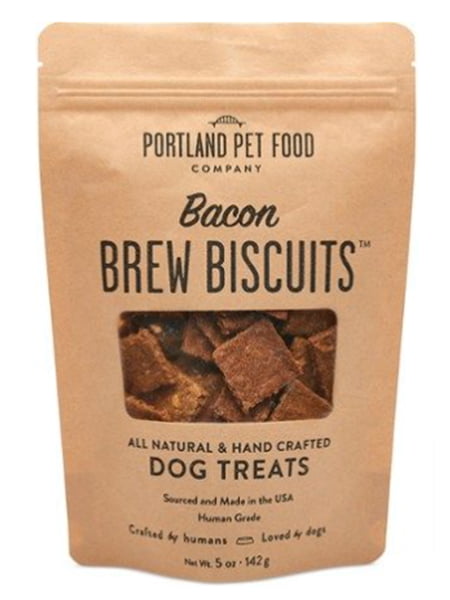
    Portland Pet Food shows how an uncomplicated branding style can still stand out. 

    Compared to the often chaotic and crowded packaging designs of large name brand pet treats, Portland Pet Food emphasizes simplicity. By using negative space and a large confident font styling and pairings, their dog treat branding gives an impression of homemade quality that speaks for itself. By including a plastic window, trust is also built with consumers who aren’t looking for highly processed and low-quality products.

    This classic paper pouch design emphasizes a commitment to the natural products they use in their treats, and pairs well with their slogan, “Crafted by humans, loved by dogs.”

    If you’re looking for a simple and cost effective branding style, consider taking inspiration from Portland Pet Treats
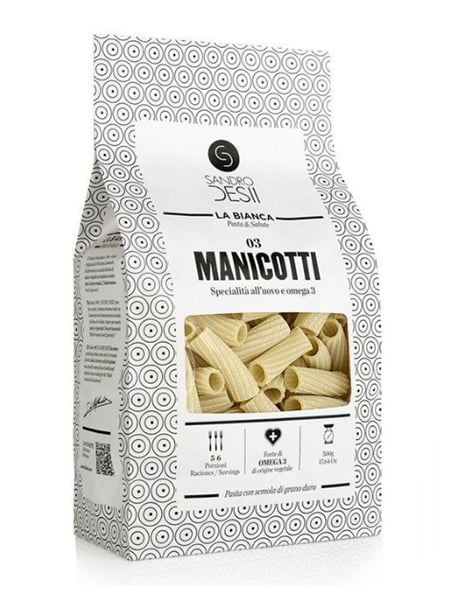
    classic-refined-packaging.jpg

    Sandro Desii: Classic and Refined Packaging

    Taking inspiration from the symmetry and expertly crafted simplicity of their product, Sandro Desii chose an elegant and modern packaging design with geometric shapes inspired by their pasta. The circular patterns do more than provide texture to their packaging, it also frames and centers the eye on the product window and description.

    A high contrast, dark typography integrates a simple sans-serif with classic and historically influenced italic serif font. Which gives their packaging a feeling of both old-world familiarity and modern elegance.

    If you’re looking to showcase your product with a contemporary and clean design, this packaging from Sandro Desii can serve as a tasteful inspiration.

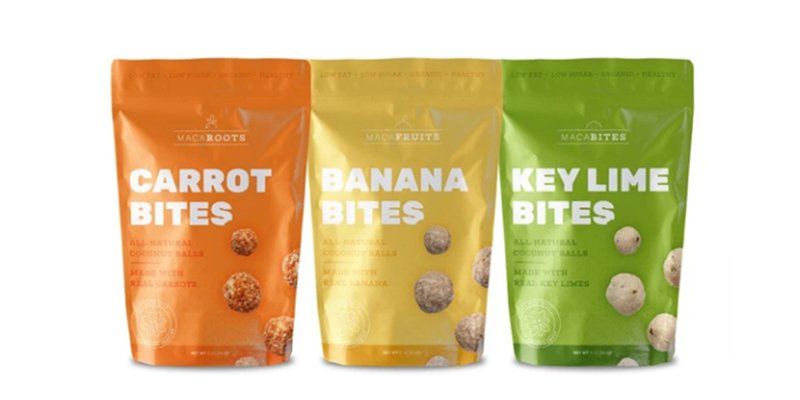
    Macaroots: Simple Earthy Pouch Packaging

    When you’re hungry for a snack, you often grab the first thing that catches your eye.

    With this in mind, Macaroots created a fun and casual pouch packaging design that stands off the shelf.

    The simple and warm palette connects the primary ingredient and flavor of each snack to the packaging color. And rather than go with bright and loud color tones, Macaroots chose an earthy and retro feel that speaks to their use of natural ingredients and health focused convenience.

    The bold white typography also helps the product catch consumer attention, speaking to the unique aspect of the product itself. These aren’t chips, bars, or granola snacks; they’re bites and they have one primary ingredient.

    By choosing a darker, complimentary shade for the product description copy, the consumer’s eyes are drawn immediately to the primary text. This gives the illusion of minimalism from afar, while still providing the detailed product descriptions that health conscious consumers want.
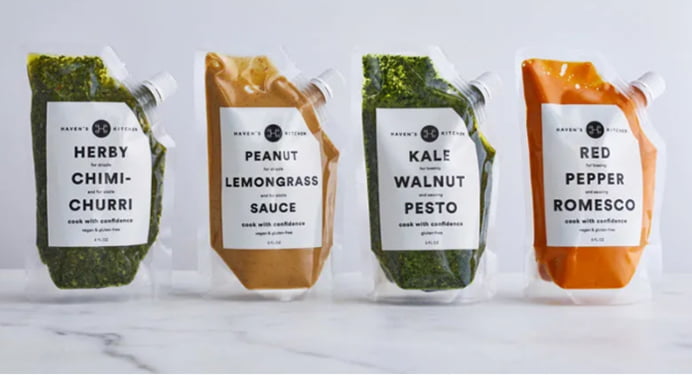
    Haven’s Kitchen: Stylish Clear Pouch Packaging Design

    With their clear packaging pouch design, Haven Kitchens takes you as close as they can to their sauces without putting it directly on your plate.

    As a reflection of their detail to quality and freshness of ingredients in its sauces and herb blends, they opted for a unique and minimalist see through pouch packaging option. Approachable, distinct, and captivating to the senses, the rich colors of their sauces speak through the monochromatic black and white design. While other brands hide their sauces, Haven Kitchens puts them right in front of the consumer, letting their product speak for itself.

    By proudly displaying the product, they also minimized the need for complex branding and lettering design. A simple three-tiered sans-serif primary typography moves the eyes down the packaging, where specific instructions are subtly placed between. The result is a contemporary design that speaks to the foodie who doesn’t feel like whipping up an extra sauce for dinner.
    Overwhelmed with

    all the options?
  • Granola Bar Wrapper Template (Printable) 

    Granola Bar Wrapper Template (Printable) 

    Granola Bar Wrapper Template (Printable)

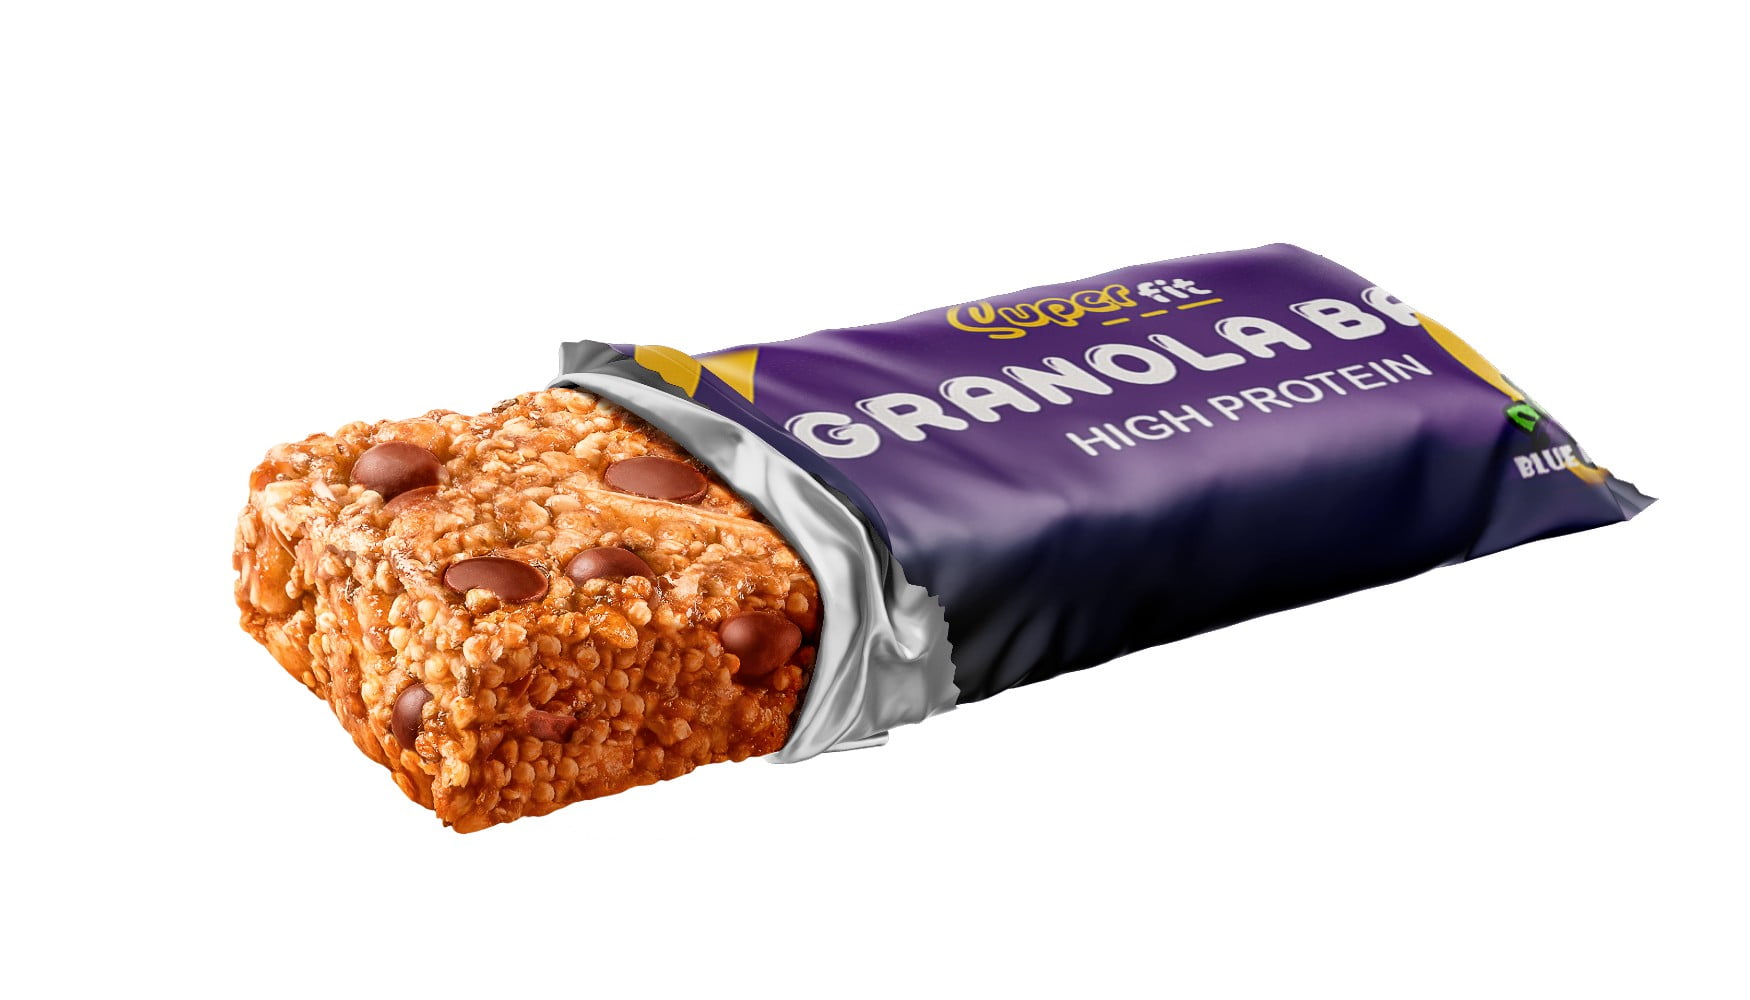
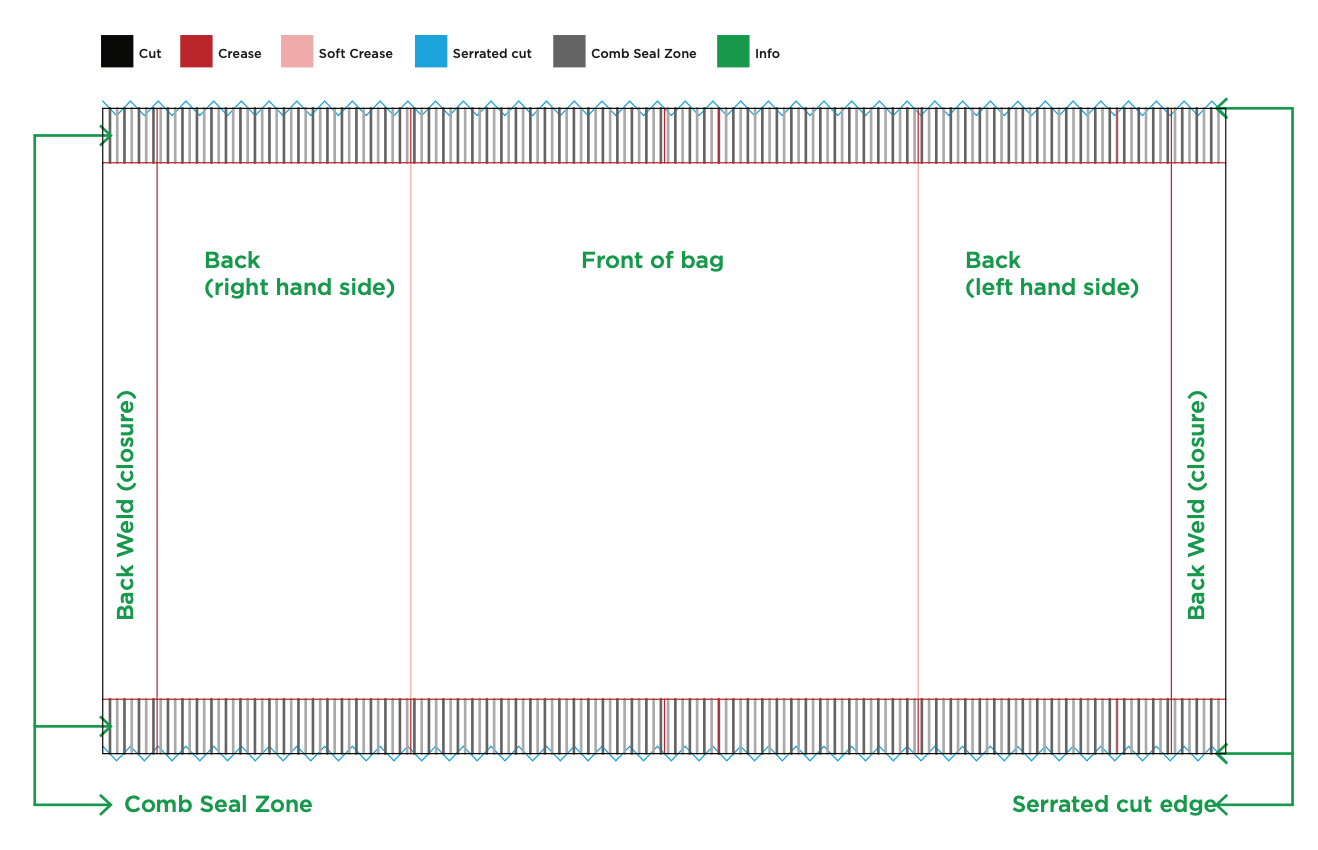
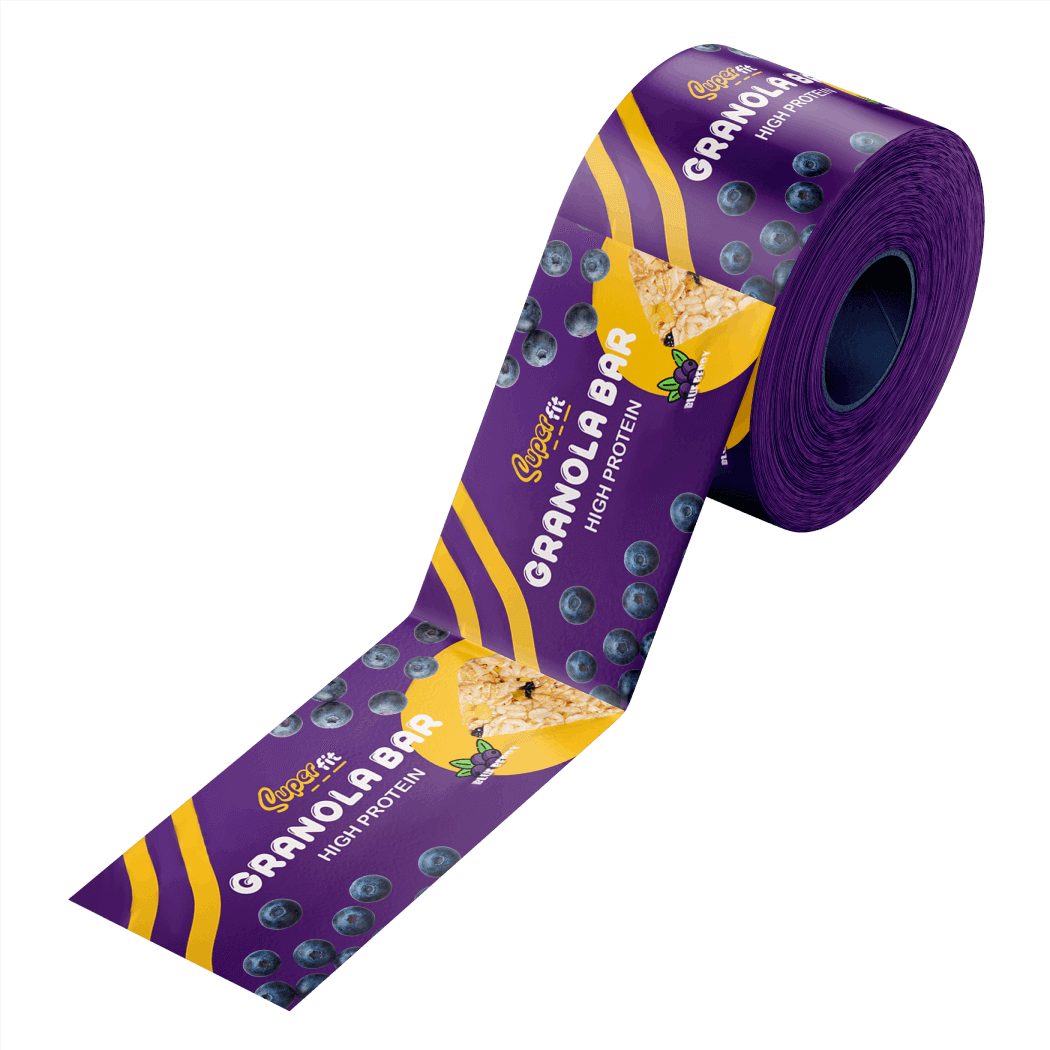
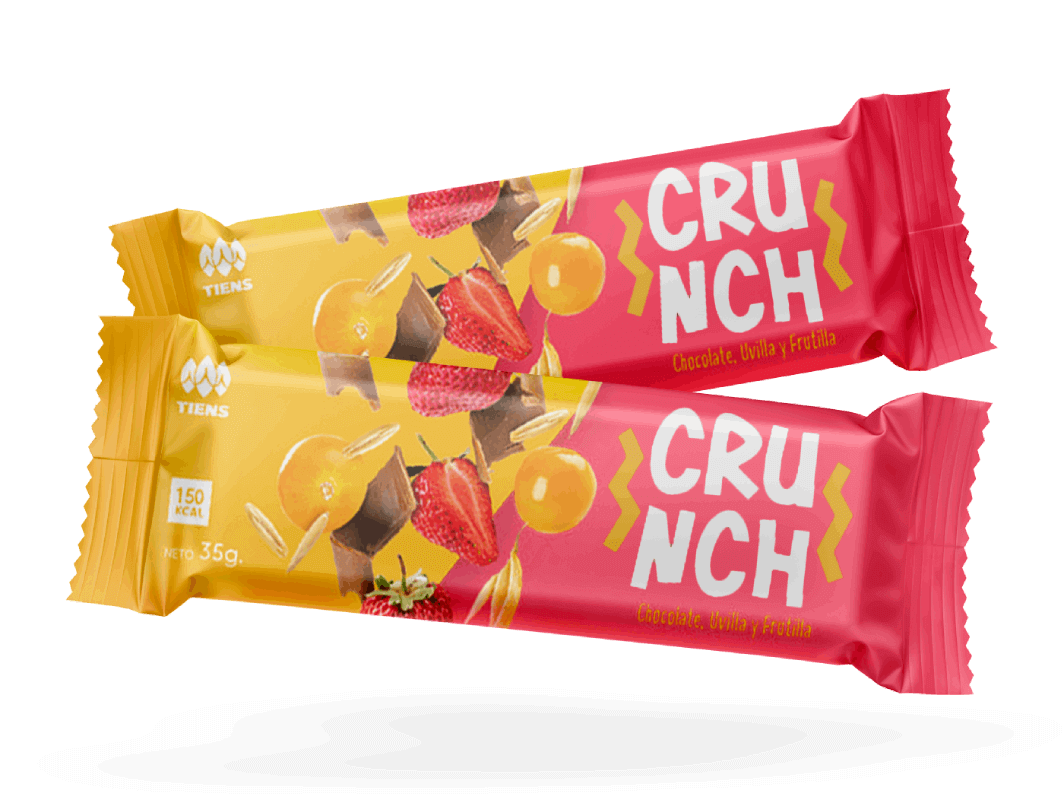
    The perfect packaging for your granola bars depends on great artwork, and great artwork can only be accomplished with high-quality, printable granola bar wrapper templates.

    These templates are technically referred to as “dielines”, and allow designers to mockup your design, review its most intricate details, and download your bar mockup PSDs or PDFs directly from your inbox. It really is that simple!

    We’ve worked with thousands of designers throughout the years, and we’re confident that we can help you, too. Our easy-to-use templates make it easier than ever before to download PDF versions of your granola bar packaging and put in an order directly from our website. 

    Why dielines matter

    Dielines are vital in the design process. Think of them like a blueprint for a house — would you build a house without one? Dielines are the blueprint of your design, and ensure that all the physical elements of the final packaging are up to par. This includes the packaging sizing and scale, and the location of all the visual elements, the placement of any folds or creases.

    Contrary to popular belief, dielines aren’t used exclusively for boxes or other rigid packaging. They’re used for a wide spectrum of packaging, including beverage bottles, food packaging, and even brochures or business cards. Essentially anything that’s customized can make use of a dieline.

    Tips for creating dielines

    At the end of the day, a dieline is a collaborative effort between you and your design team. Whether you engage with CarePac and make use of our design team, or work with a team internally, there are a few tips to keep in mind as you dive headfirst into dielines for your granola packaging:

    • Dielines must be created as vector art.
    • Keep your entire creative team involved and updated, especially early on in the process. 
    • Knowing exact specifications is crucial, and can help save you money and time down the line.
    • You may want to consider making a hard copy of the dieline before sending the design to print. This can help you catch minor errors before production.

    As you can see, dielines are all but an essential part of the granola packaging design process. Have questions? We’re more than happy to help!
    Download Your Free Printable Granola Bar Dieline

    At CarePac, we love to share our knowledge and passion for design with our customers. Use the button below to download your free printable wrapper granola bar dieline. 

    Remember, this is a sample so if you’d like us to help you design a fully customized wrapper for your granola bars, we’re more than happy to help.

    Granola bar packaging & dielines: FAQs

    Whether you’re new to designing granola bar packaging or simply need a refresher, here are some of the most common questions we get about granola bar wrappers and dielines.

    What packaging is used for granola bars?

    Usually granola bars are packaged in individual-sized wrappers, which provide a barrier that protects the honey granola or nutty granola bar from the elements. This way, your product stays fresh and your customer stays happy.

    Should I use parchment paper for granola?

    While parchment paper might be suitable for home use, we recommend against using parchment paper for commercial sales. Simply put, the barrier of the parchment paper is too low compared to other alternatives and the granola will dry out too quickly.

    How do you seal granola bars?

    Granola bar wrappers are heat sealable because the innermost layer of the material is a heat sealable LLDPE.

    What are granola bar wrappers made of?

    Laminated Metalized PET is the most common material used for granola bar wrappers. This material is typically between 2-3 mil, and for high-volume production the pre-printed material is supplied in roll stock form and fed into a form fill seal (FFS) machine.

    How do you package homemade granola?

    If you’re making homemade granola, you don’t have to worry about using commercial-grade packaging the way some of our customers do. As such, you can use glass jars, or for longer term storage, metalized mylar bags.

    What are Kind bar wrappers made of?

    Kind bar wrappers appear to be made of a thin file metalized Polyethylene terephthalate. If this is the look and style you’re going for, we can certainly help you achieve it.

    Create Your Granola Bar Packaging Dielines Today

    As you can see, CarePac truly takes the guesswork out of your custom granola bar packaging artwork — and one part of that is through our easy-to-download PDF dielines.

    Before you decide on a final pattern, be sure to double check the size of your granola bar wrappers, the coloring, and granola logo placement before submitting. Once you submit, we’ll send the granola bar packaging template to your email for easy download and use.

    Have questions? Need help? Reach out to the CarePac experts today. Or check out our FAQs.

  • Trapping Artwork

    Trapping Artwork

    Trapping Artwork in Illustrator

     for Prepress File Submission  

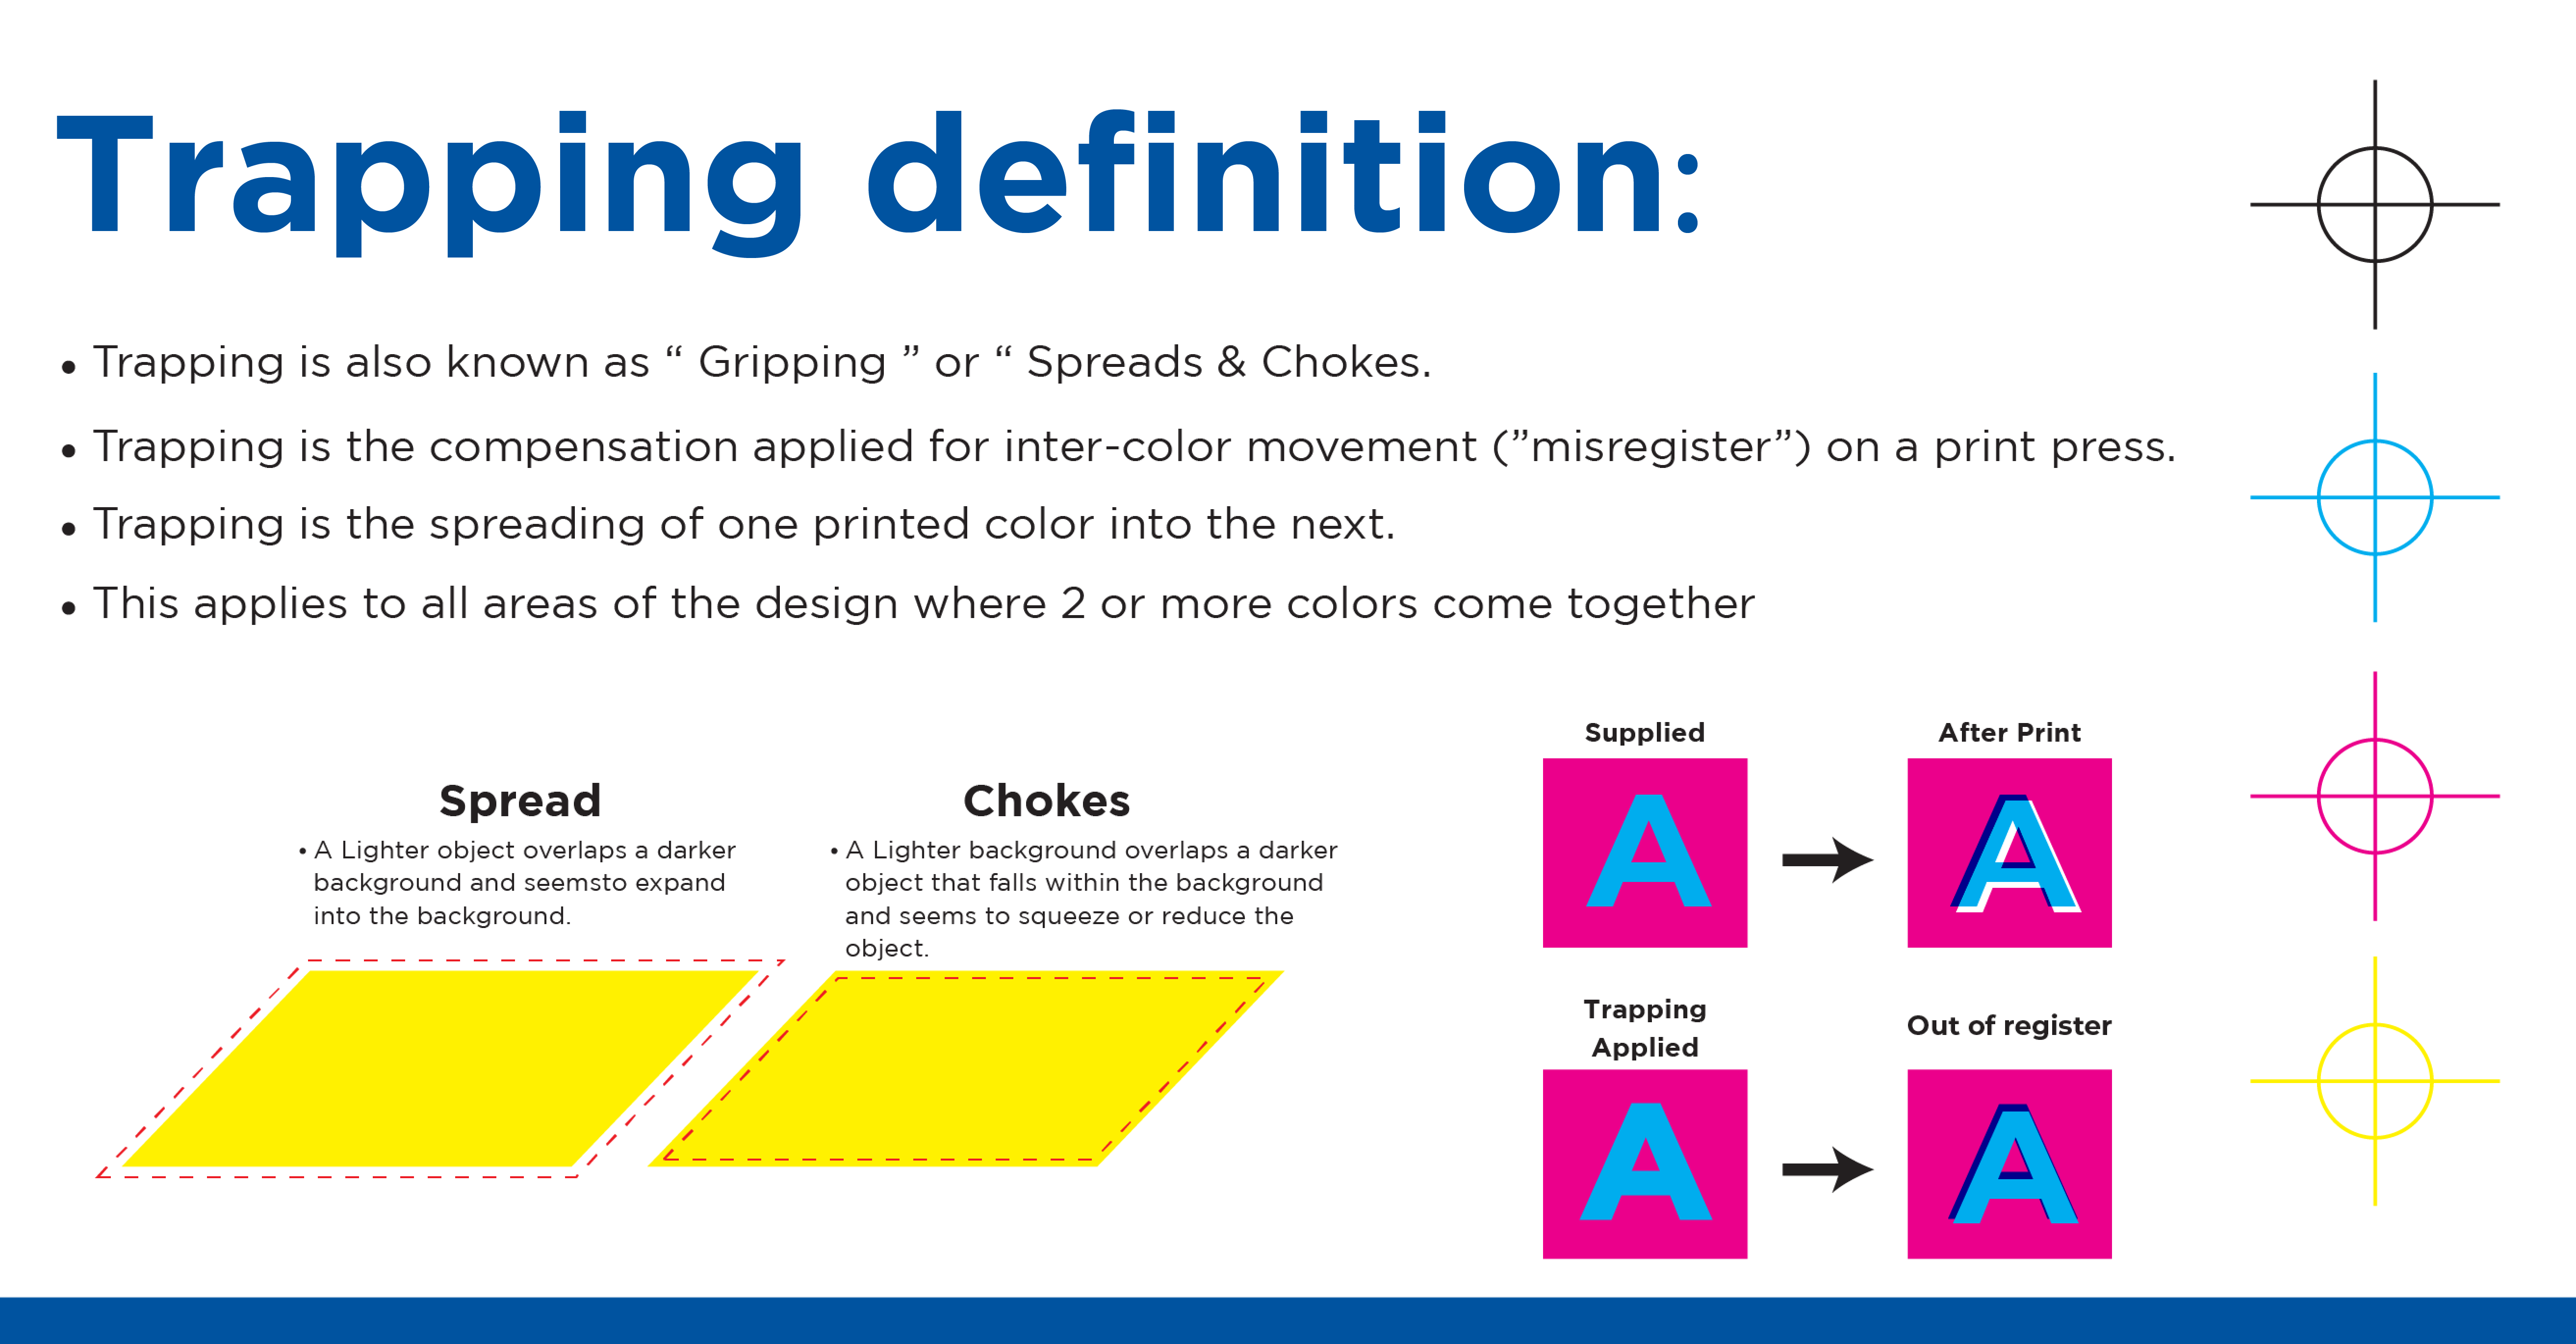
    If you’re printing a pouch or bag with multiple colors, incorrect registration by the printer can result in gaps between the colors on the final product. Which is why it’s important to use a trap to compensate for potential gaps. Simply put, a trap is a small area of overlap between colors and is used by designers to avoid unsightly gaps between colors. You’ve seen art with traps on many products you’ve purchased, but you’ve probably never really understood what they were.

    There are two types of traps, Spread traps and Choke traps. Some complex rules relating to the order of the color cylinders can come into play here, but here is a general rule of thumb for when to apply a spread trap vs a choke trap. 

    Spread Traps

    A spread trap is where a foreground object extends over the background color. Apply spread traps when a lighter color overlaps a darker color background, and after trapping the lighter color will expand into the darker area. 

    Choke Trap

    A choke trap is where the background color overprints the foreground object. Apply a choke trap when a darker object falls within a lighter background, and so reduces or squeezes the object. 

    Easy Trapping Steps in Adobe Illustrator

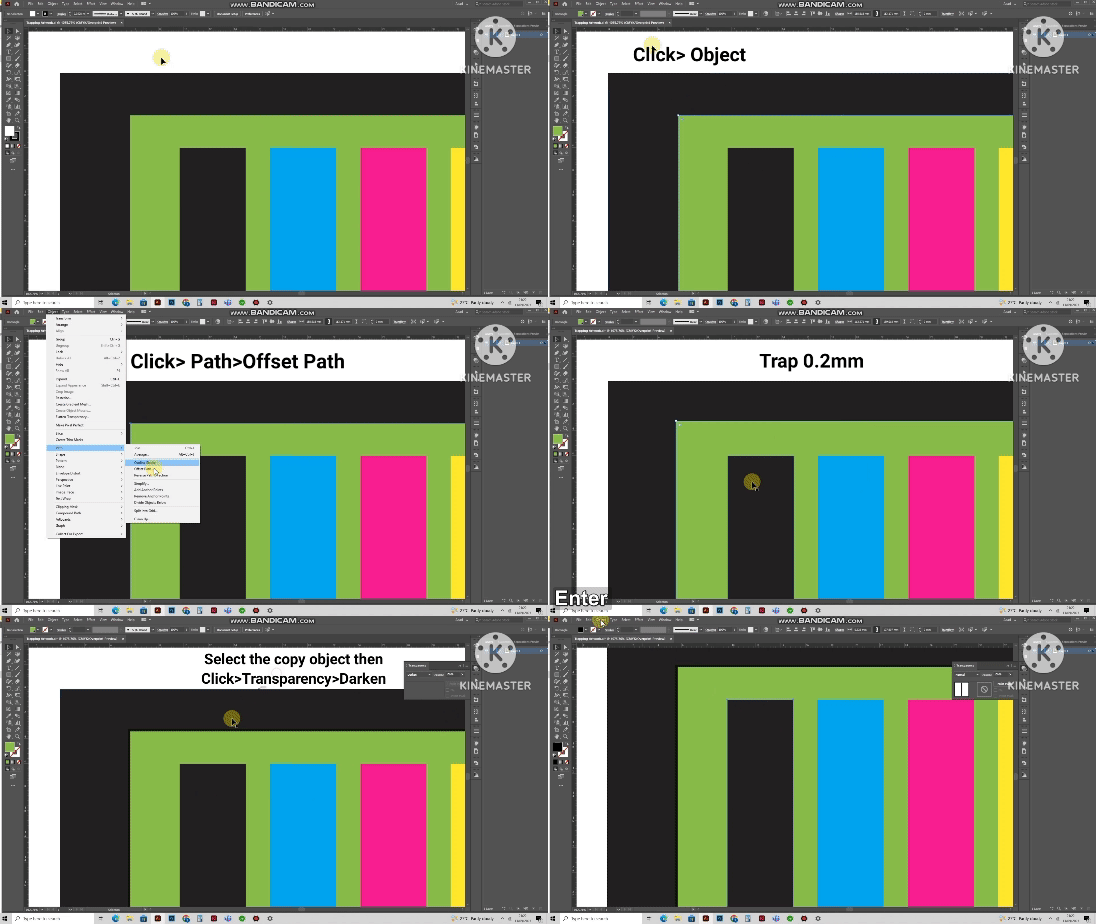
    Below is a quick and easy method to trap art, using path offsets, and transparency darkening to integrate traps into your art design.

    .

    Step 1: Make sure your artwork is in CMYK color mode for printing.

    Step 2: Select the topmost object you tend to trap.

    Step 3: Click Object >Path > Offset Path

    Step 4: For a choke trap apply a negative 0.2mm offset. For a spread trap apply a positive 0.2mm offset. 

    Step 5: Click OK

    Step 6: Make sure you’ve selected your offset path. 

    Step 7: Then click Transparency > Darken

    There you’re done!

    CarePac can help 

    As you can see, creating a trap in Adobe Illustrator can be quite complex. Fortunately, our design specialists can take care of the heavy lifting for you. By engaging with CarePac for the design and manufacturing of your bags, we’ll take care of all the steps in between. Contact us today to learn how we can help you design the bag you’ve always dreamed of. 

  • Paper thickness conversion chart

    Paper thickness conversion chart

    Paper Weight Conversion Chart – Paper Conversions

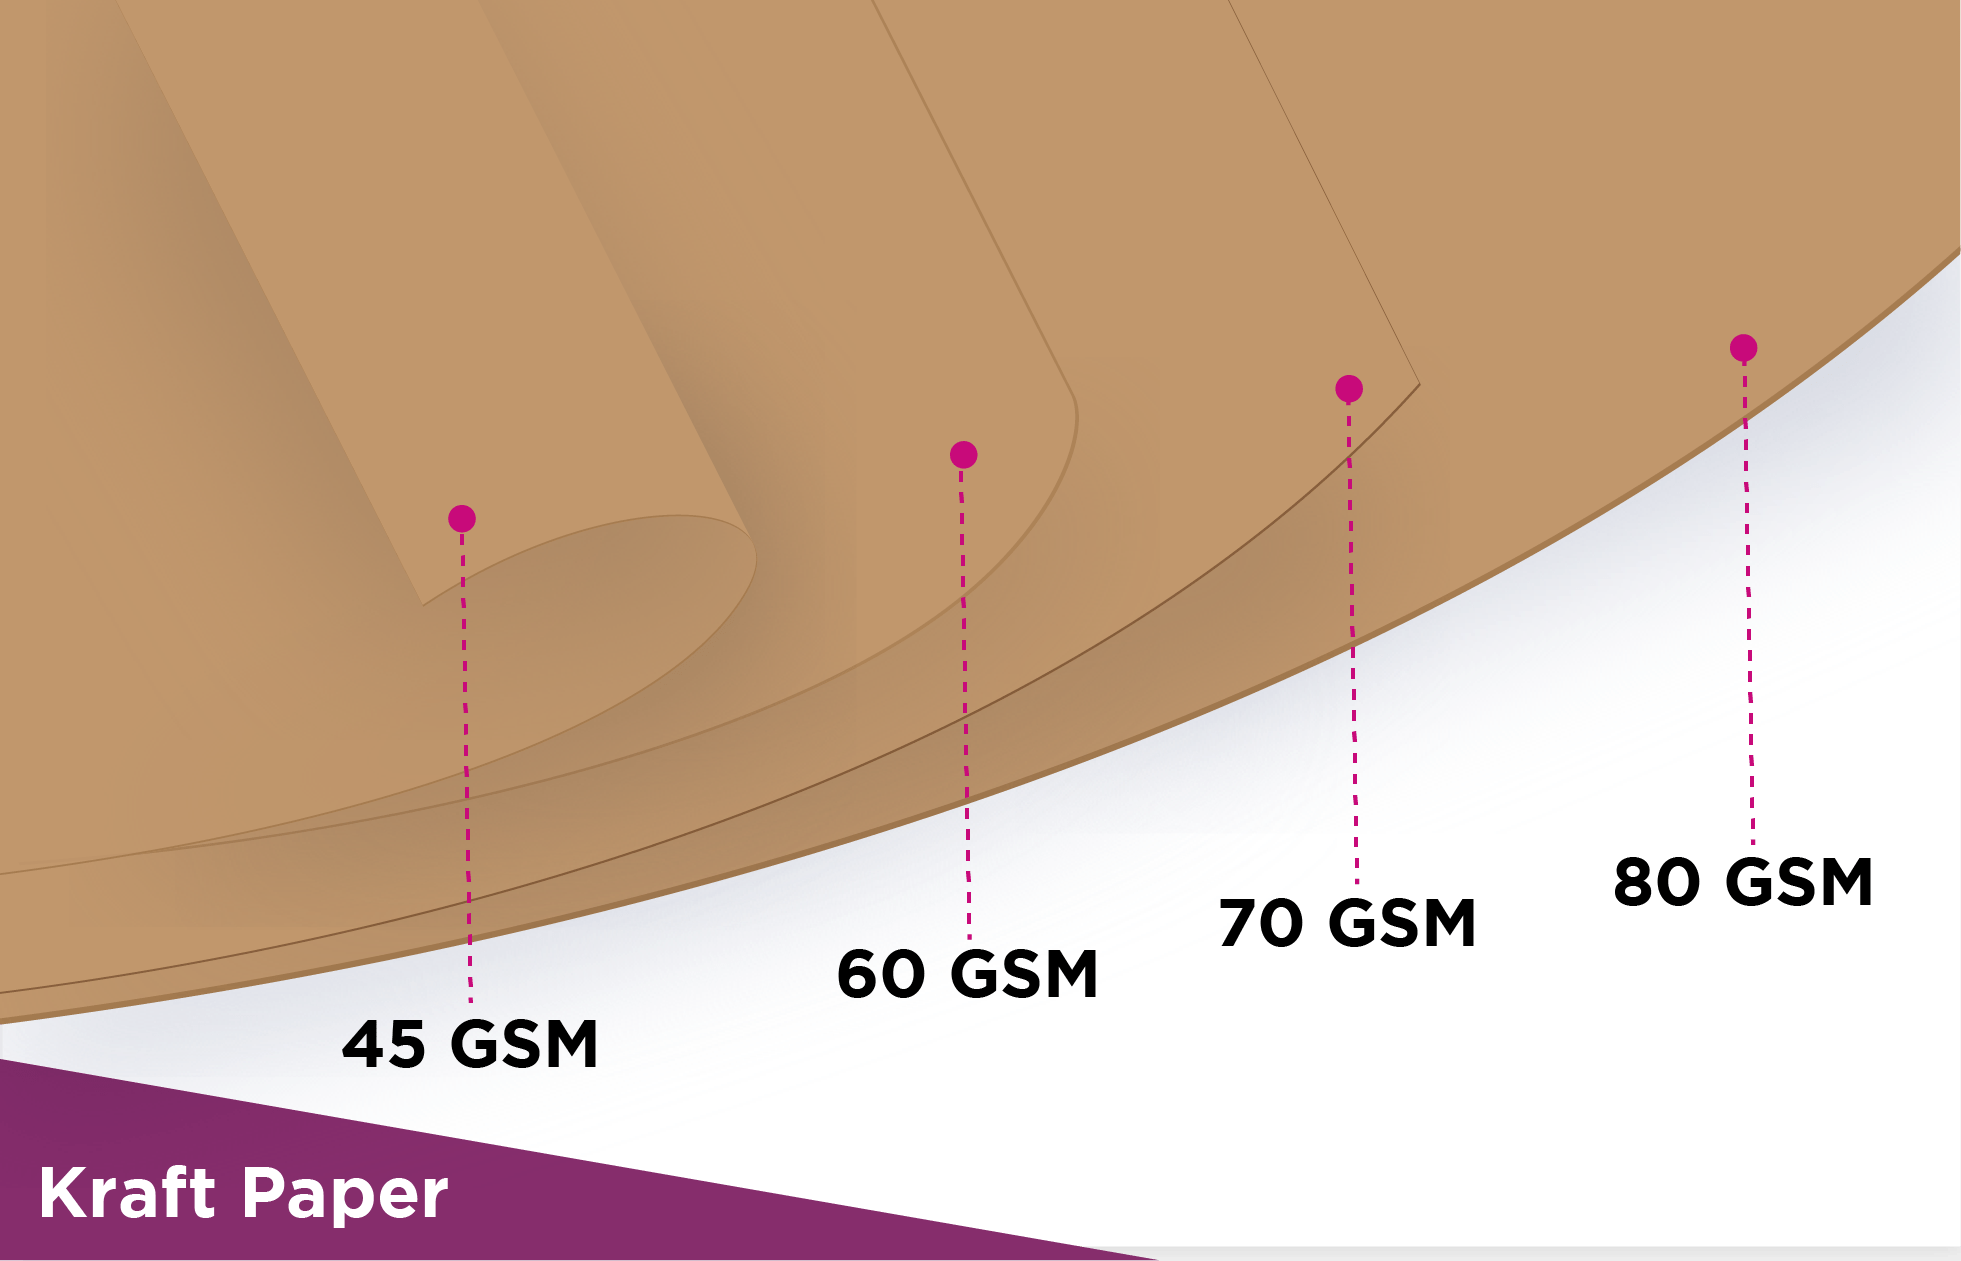
    Common Kraft Paper Weights & Thickness

    CarePac, votre partenaire fiable dans le domaine de la fabrication d’emballages barrières souples sur mesure, se distingue par la création de solutions d’emballage innovantes, telles que des sachets à fond plat, des sachets plats et des sachets spéciaux pour divers secteurs, de l’alimentation à la pharmacie. Mais saviez-vous que nos emballages résistants et de haute qualité sont également parfaits pour les kits promotionnels des casinos en ligne ? Imaginez la situation suivante : à chaque gain important dans un casino en ligne, le joueur reçoit une récompense. Ce cadeau peut inclure un tour gratuit à la roulette ou un jeu de cartes premium, le tout joliment emballé dans un sachet CarePac individuel qui met en valeur l’image de marque de votre casino. Nos solutions d’emballage sont les plus populaires parmi les casinos en ligne du Québec vigile.net/casino-en-ligne-quebec/, car elles préservent la nouveauté et l’excitation du jeu, tout en permettant aux entreprises d’attirer leurs clients de manière créative au-delà de l’écran. L’expérience tactile de recevoir une récompense physiquement emballée contribue à renforcer le lien entre le consommateur et la marque, faisant de ces casinos de véritables gagnants dans l’industrie.

    Kraft paper is a very popular material for flexible packaging, and its used across virtually every industry. It’s more eco-friendly than many other materials, and can be easily customized to best represent your brand. As it grows in popularity, our team is converting more and more Kraft paper measurements into bag measurements. For context, paper is measured by paper weights and flexible packaging is measured in thickness.

    At Carepac, we have always exceeded expectations with top-notch, meticulously curated care packages, designed to meet the different needs of the diverse communities we serve. We are transitioning from prioritizing physical needs to entertaining our clientele’s recreational and leisure indulgences. We are excited to introduce our newest initiative focusing on online casinos. But not just any casinos, we are bringing thehttps://www.sydneybuses.info/online-pokies-sydney/straight to your fingertips! Our selection includes the crème de la crème of online gaming and casinos, complete with an array of engaging games and rewarding opportunities. We make it easy for both died-in-the-wool gaming enthusiasts and beginners to explore the online casino landscape. Our dependable online casino recommendations integrate safety, reliability, and user-friendly interfaces for an exciting and hassle-free gaming experience.

    This can be quite confusing for many of our customers, so we put together these paper thickness conversion calculator which should clear up some of the confusion. If you have any questions as you review these conversion charts, feel free to contact us for more information. View our weight conversion chart below so you know by how many inches to offset your order. 

    Our team is more than willing to help! 

    Paper Weight (GSM)

    Thickness (MM)

    Thickness (MIL)

    Thickness (Micron)

    45 GSM

    .76 MM – 0.81 MM

    3 mil – 3.14mil

    55 – 65 um

    60 GSM

    0.8 MM – 0.85 MM

    2.75 – 3.35 mil

    70 – 85 um

    70 GSM

    0.8 MM- 0.10 MM

    3.1 mil – 4.7 mil

    80 – 95um

    80 GSM

    0.09 MM – .11 MM

    3.5 mil – 4.33 mil

    90 – 110um

    Kraft Paper uses in Flexible Packaging

    Historically Kraft paper was used in flexible pouches merely as an esthetic preference. Recently Kraft paper has also become popular when combined with compostable bioplastics of any paper color, micro format or otherwise, to create compostable pouches. Kraft paper comes in bleached white, or natural kraft brown. The exact color of kraft paper varies between lots and sources. 

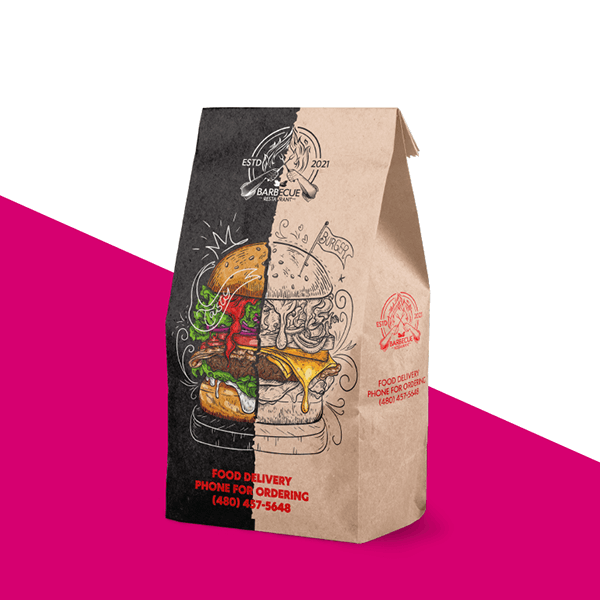
    Flat Bottom Pouch Flexo Printing Snack Packaging for Burger Flexible Packaging Kraft Paper Bag

    45 GSM Kraft Paper

    45 GSM kraft paper is best for gusseted pouches because the paper is more flexible than thicker papers, which will allow the gusset to open, and develop less creases in the paper. If you’re moving to roll foils or standing pouches, this is the Kraft paper material we recommend. 

    60 GSM Kraft Paper

    60 GSM kraft paper is another common thickness which will have a more textured feeling when touched. 60 GSM paper is stiffer than 45 GSM, but generally converts well for most pouches. Overall, 60 GSM is very balanced and you’ll notice it provides a good balance between stiffness, thickness, cost, and how it feels to the touch. 

    70 GSM Kraft Paper

    70 GSM is typically used for box bottom and side gusseted pouches. 70 GSM Kraft paper is typically laminated to metalized PET and PE to create a rigid box bottom bag. If you’ve ever handled a paper bag that is stiff enough to stand upright, you’re likely using a paper bag crafted from 70 GSM. 

    80 GSM Kraft Paper

    80 GSM Kraft paper is typically not used for most flexible pouches because the paper is too thick and will create a ridgid pouch which will wrinkle easily and doesn’t conform well to other materials. Regardless, we are including it here as reference in case one of our customers does wish to use 80 GSM Kraft paper. 

    C2S Art Paper Thickness & Paper Weight Conversion

    Paper Weight (GSM)

    Thickness (MM)

    Thickness (MIL)

    Thickness (Micron)

    80 GSM

    0.06 MM

    2.36 mil

    60 um

    90 GSM

    0.07 MM

    2.75 mil

    70  um

    100 GSM

    0.08 MM

    3.14 mil

    80 um

    105 GSM

    0.09 MM

    3.54 mil

    90 um

    120 GSM

    0.10 MM

    3.93 mil

    100 um

    128 GSM

    0.12 MM

    4.72 mil

    120 um

    150 GSM

    0.13 MM

    5.11 mil

    130 um

    157 GSM

    0.14 MM

    5.51 mil

    140 um

    180 GSM

    0.16 MM

    6.29 mil

    160 um

    200 GSM

    0.18 MM

    7.08 mil

    180 um

    210 GSM

    0.22 MM

    8.66 mil

    220 um

    230 GSM

    0.23 MM

    9.05 mil

    230 um

    250 GSM

    0.25 MM

    9.84 mil

    250 um

    300 GSM

    0.32 MM

    12.59 mil

    320 um

    350 GSM

    0.36 MM

    14.17 mil

    360 um

    400 GSM

    0.43MM

    16.92 mil

    430 um

    C1S Art Paper Thickness

    Paper Weight (GSM)

    Thickness (MM)

    Thickness (MIL)

    Thickness (Micron)

    80 GSM

    0.08 MM

    3.14 mil

    80 um

    170 GSM

    0.23 MM

    9.05 mil

    230 um

    190 GSM

    0.26 MM

    10.23 mil

    260 um

    210 GSM

    0.28 MM

    11.02 mil

    280 um

    230 GSM

    0.32 MM

    12.59 mil

    320 um

    250 GSM

    0.35 MM

    13.77 mil

    350 um

    300 GSM

    0.42 MM

    16.53 mil

    420 um

    350 GSM

    0.49 MM

    19.29 mil

    490 um

    400 GSM

    0.56 MM

    22.04 mil

    560 um

    Wood Free Offset Paper

    Paper Weight (GSM)

    Thickness (MM)

    Thickness (MIL)

    Thickness (Micron)

    60 GSM

    0.08 MM

    3.14 mil

    80 um

    70 GSM

    0.09 MM

    3.54 mil

    90  um

    80 GSM

    0.11MM

    4.33 mil

    110 um

    100 GSM

    0.12 MM

    4.72 mil

    120 um

    120 GSM

    0.15 MM

    5.90 mil

    150 um

    140 GSM

    0.16 MM

    5.51 mil

    140 um

    160 GSM

    0.18 MM

    7.08 mil

    180 um

    180 GSM

    0.22 MM

    8.66 mil

    220 um

    200 GSM

    0.24 MM

    9.44 mil

    240 um

    230 GSM

    0.28 MM

    11.02 mil

    280 um

    250 GSM

    0.29 MM

    11.41 mil

    290um

    300 GSM

    0.35 MM

    13.77 mil

    350 um

    Matte Coated Paper

    Paper Weight (GSM)

    Thickness (MM)

    Thickness (MIL)

    Thickness (Micron)

    80 GSM

    0.08 MM

    3.14 mil

    80 um

    90 GSM

    0.09 MM

    3.54 mil

    90 um

    105 GSM

    0.1MM

    3.93 mil

    100 um

    115 GSM

    0.11 MM

    4.33 mil

    110 um

    128 GSM

    0.13 MM

    5.11 mil

    130 um

    157 GSM

    0.16 MM

    6.29 mil

    160 um

    200 GSM

    0.20 MM

    7.87 mil

    200 um

    230 GSM

    0.24 MM

    9.44 mil

    240 um

    250 GSM

    0.26 MM

    10.23 mil

    260 um

    300 GSM

    0.29 MM

    11.41 mil

    290 um

    White Cardboard Paper

    Paper Weight (GSM)

    Thickness (MM)

    Thickness (MIL)

    Thickness (Micron)

    190 GSM

    0.25 MM

    9.84 mil

    250 um

    210 GSM

    0.28 MM

    11.02 mil

    280 um

    250 GSM

    0.33 MM

    12.99 mil

    330 um

    300 GSM

    0.38 MM

    14.96 mil

    380 um

    350 GSM

    0.48 MM

    18.89 mil

    480 um

    400 GSM

    0.51 MM

    20.07 mil

    510 um

    450 GSM

    0.6 MM

    23.62 mil

    600 um

    500 GSM

    0.67 MM

    26.37 mil

    670 um

    Grey Cardboard Paper

    Paper Weight (GSM)

    Thickness (MM)

    Thickness (MIL)

    Thickness (Micron)

    250 GSM

    0.32 MM

    12.59 mil

    320 um

    300 GSM

    0.35 MM

    13.77 mil

    350 um

    350 GSM

    0.48 MM

    18.89 mil

    480 um

    400 GSM

    0.53 MM

    20.86 mil

    530 um

    450 GSM

    0.65 MM

    25.59 mil

    650 um

    Kraft Paper

    Paper Weight (GSM)

    Thickness (MM)

    Thickness (MIL)

    Thickness (Micron)

    60 GSM

    0.1 MM

    3.93 mil

    100 um

    80 GSM

    0.12 MM

    4.72 mil

    120 um

    120 GSM

    0.17 MM

    6.69 mil

    170 um

    Insert Custom HTML

  • Pt to mm conversion

    Pt to mm conversion

    Pt to mm conversion

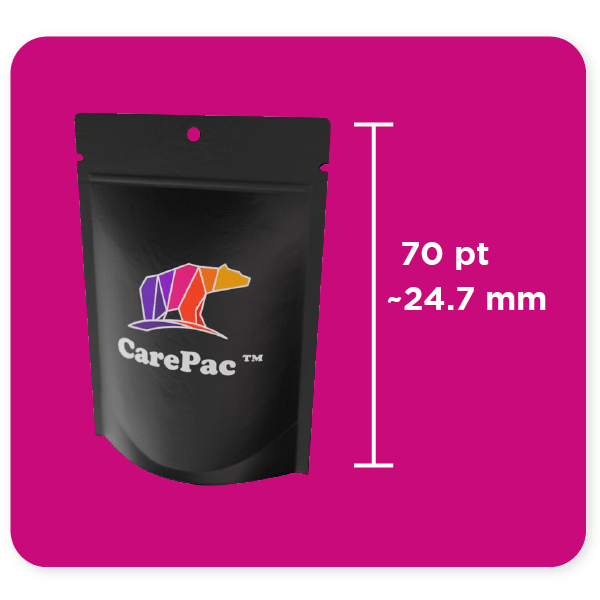
    What is a Pt?

    CarePac is known worldwide for its expertise in manufacturing a variety of custom flexible barrier packaging. We specialize in the design and manufacture of stand-up pouches, flat pouches, and other types of pouches suitable for a wide range of industries. We take great care to ensure the highest quality and efficiency of all our packaging products, improving both their functionality and aesthetic appeal. At the same time, given the development of digital platforms, it is interesting to observe how different sectors are emerging online. For example, there has been significant growth in the digital gaming industry, where online casinos are of great importance. Our flexible custom packaging has potential applications in this sector, primarily by ensuring the safe delivery of physical tokens, chips, cards, and other accessories to customers. One of the great features of online gaming platforms is fast payout online casinos which are particularly popular among players from the UK and Canada. These sites not only prioritize fast and seamless transactions, but also offer an exciting gaming experience on slot machines.

    A Point (PT) in the united states is defined as 1/72 of an inch which is about 0.352mm. Like many printing terms it originates in italy in around the 16th century. It is originally attributed to Francesco Torniella da Novara and the “punto” which was 1/9th of the height of the letters or the thickness of a stroke. It is a measurement from topographic and is used to measure graphics and text sizes. 

    Pt to Millimeter Conversion Table

    POINT (PT)

    MILLIMETER (MM)

    INCH (“)

    1 pt

    0.35 mm

    0.014 “

    2 pt

    0.71 mm

    0.028 “

    3 Pt

    1.06 mm

    0.042 “

    4 Pt

    1.41 mm

    0.056 “

    5 Pt

    1.76 mm

    0.069 “

    6 Pt

    2.12 mm

    0.083 “

    7 Pt

    2.47 mm

    0.097 “

    8 Pt

    2.82 mm

    0.111 “

    9 Pt

    3.18 mm

    0.125 “

    10 Pt

    3.53 mm

    0.139 “

    11 Pt

    3.88 mm

    0.153 “

    12 Pt

    4.23 mm

    0.167 “

    13 Pt

    4.59 mm

    0.181 “

    14 Pt

    4.94 mm

    0.194 “

    15 Pt

    5.29 mm

    0.590 “

    16 Pt

    5.64 mm

    0.222 “

    17 Pt

    5.99 mm

    0.669 “

    18 Pt

    6.35 mm

    0.250 “

    Why convert from PT to MM?

    With flexible packaging, we need to measure both the typography and graphics content, as well as the physical attributes of the bag: width, length, gusset, seals, and the bag features such as tear notches and zippers. For that reason it is often better to setup your file to be in MM instead of inches. Since packaging is a item that is primarily concerned with the physical attributes of the pouch, it is best to use Millimeters instead of points

    How to change Adobe Illustrator file from PT to MM

    Changing from measuring in Pt to MM is super easy in Adobe Illustrator

    Just do the following:

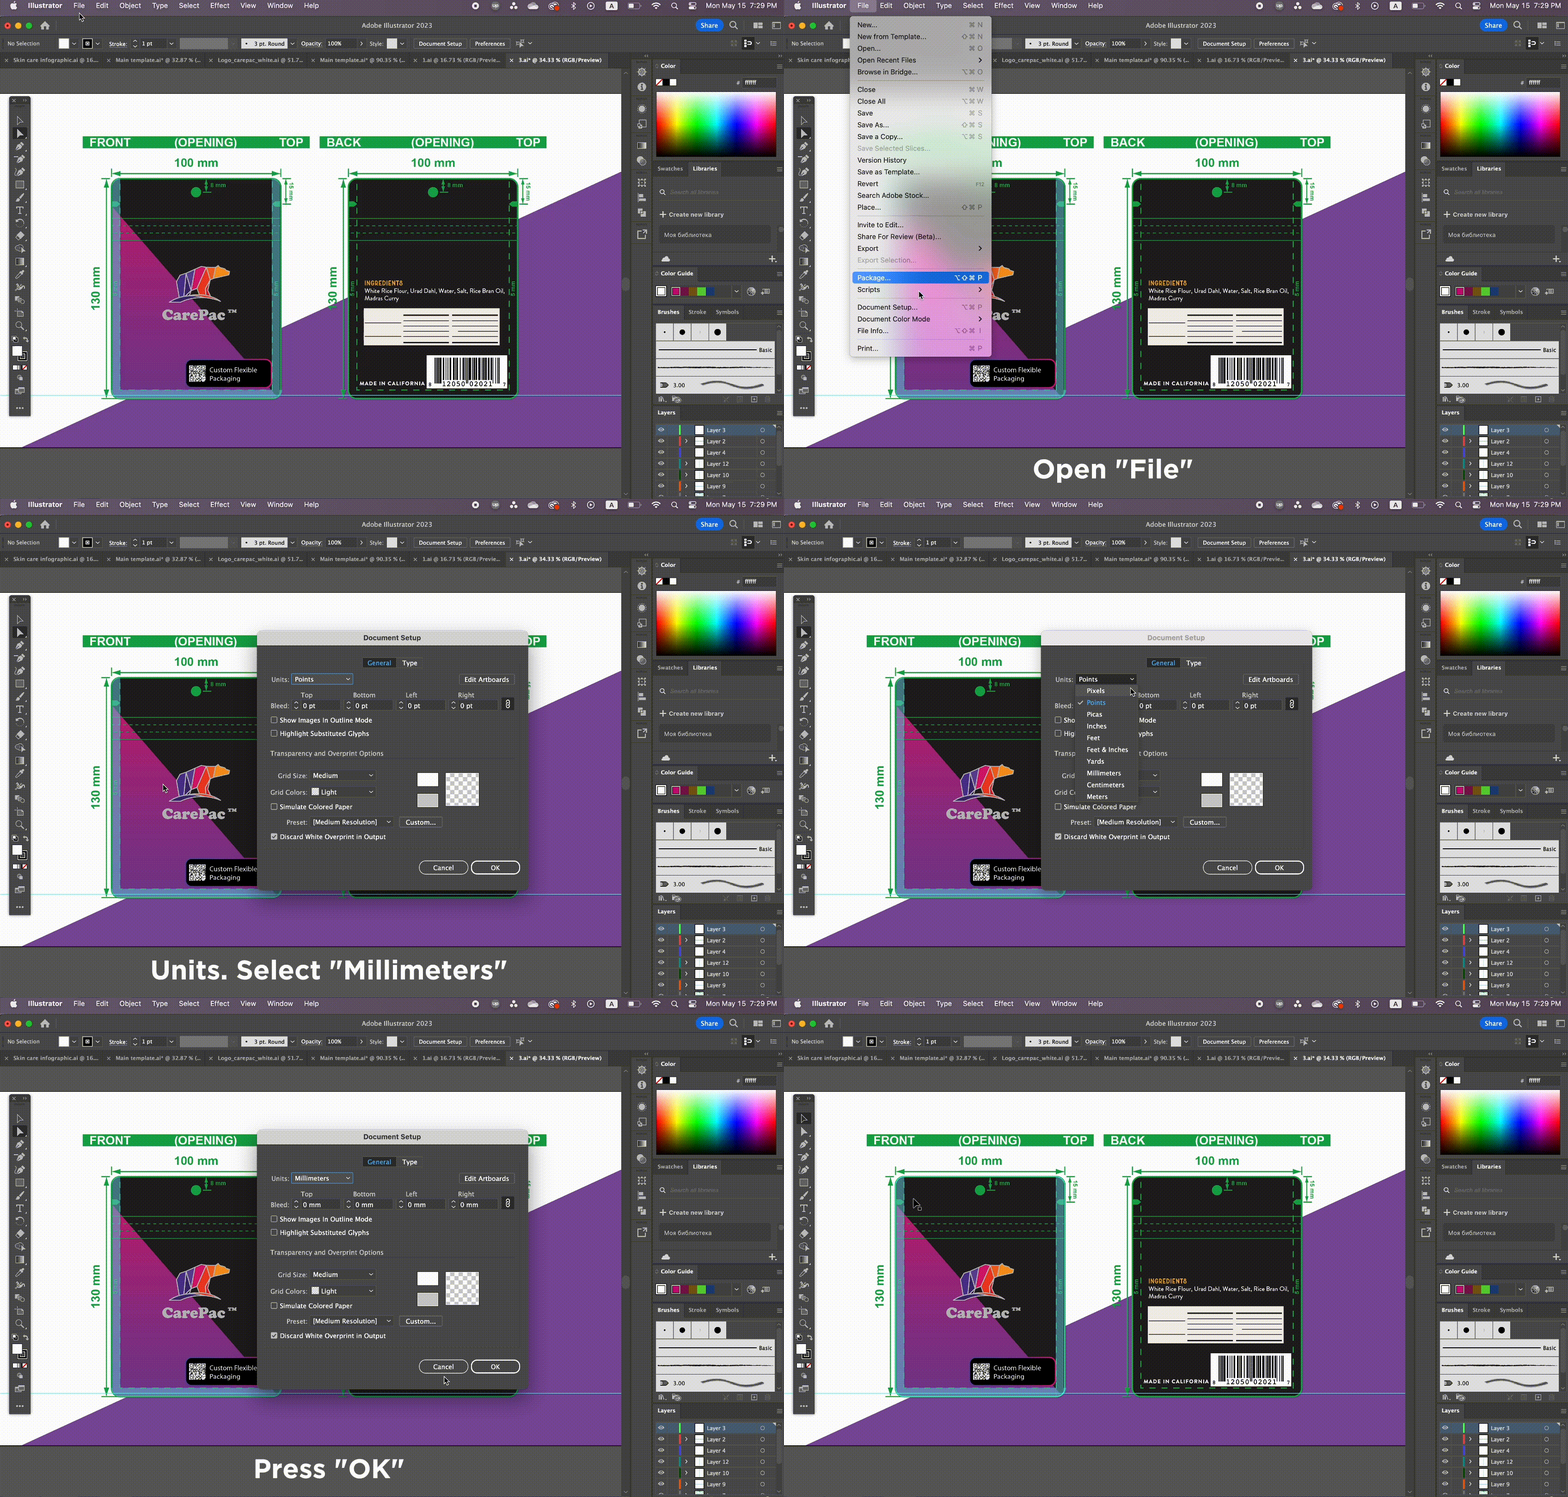
    • Click, File the document setup
    • Then on the Units dropdown select Millimeters. and click OK
    • Now your entire file will be measured in mm, including text, the measuring tool, and the rulers.

  • How to Export Vector Content From Canva

    How to Export Vector Content From Canva

    How to Export Vector Content From Canva

    Canva is a popular graphics design program that’s used by a lot of our customers, and Canva is popular for a few good reasons:

    User-Friendly Interface

    Canva has a simple and intuitive interface that is easy to navigate, even for people with no design experience. The drag-and-drop interface makes it easy to create designs quickly.

    Versatile Design Capabilities

    Canva offers a wide range of design templates, graphics, and fonts that users can choose from to create different types of designs. It also has features that allow users to customize the templates to fit their specific needs.

    Collaboration

    Canva allows users to collaborate with others by sharing designs and giving feedback. This is especially useful for teams working on projects together.

    Cost-Effective

    Canva offers a range of pricing plans, including a free plan, which makes it accessible to people with different budgets.

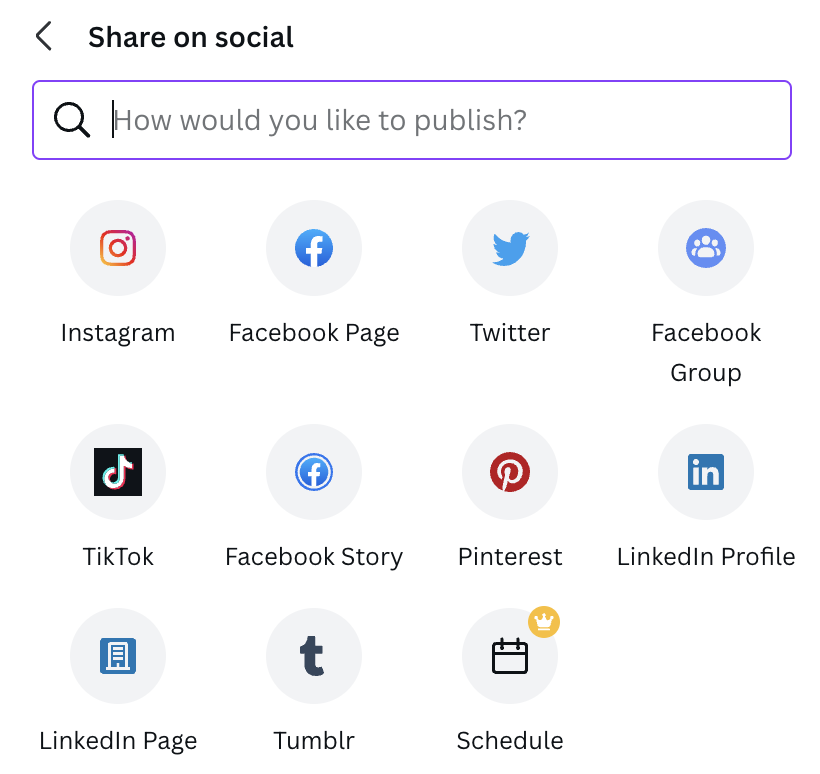
    Social Media Integration

    Canva is integrated with social media platforms like Facebook, Instagram, and Twitter, making it easy for users to create designs specifically for those platforms.

    It’s important to note that Canva’s vector capabilities are somewhat limited compared to dedicated vector graphics software like Adobe Illustrator. If you need to do more advanced vector work, you may want to consider using a different tool.

    What are vector graphics and why do I need it for my pouch art?

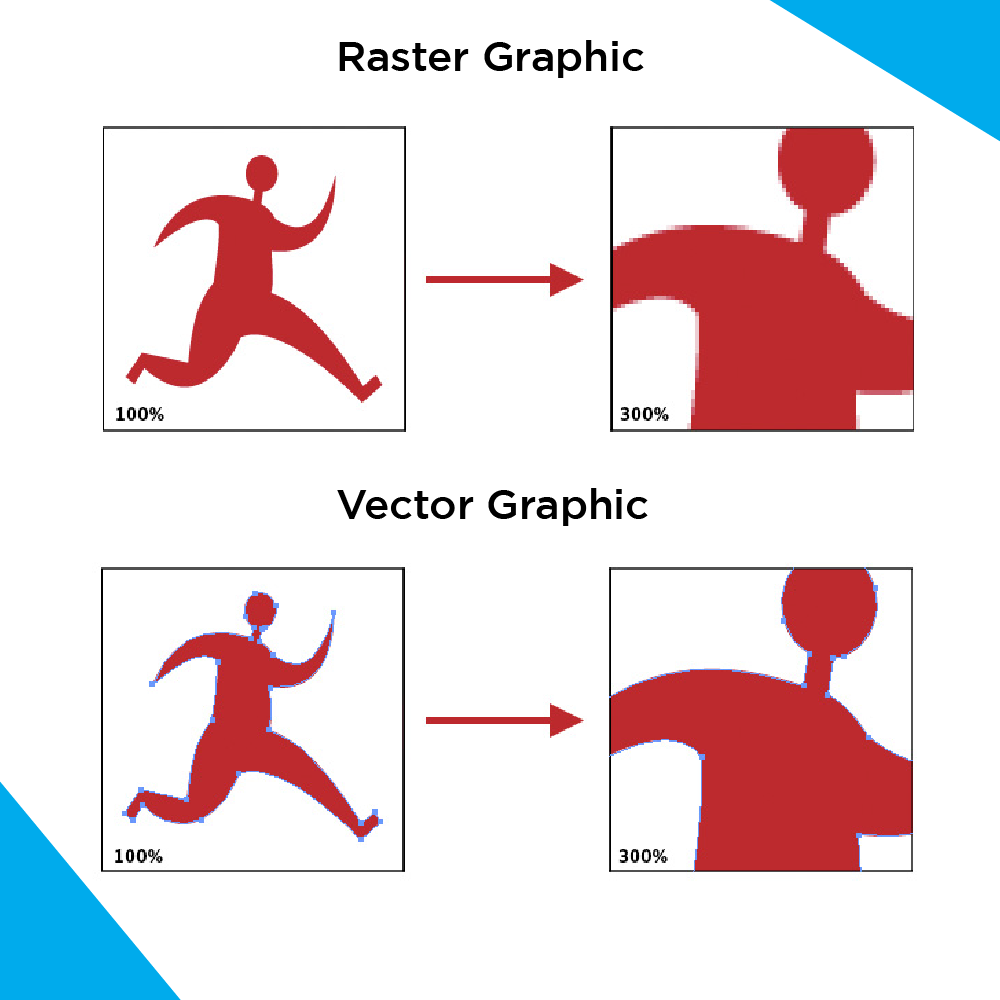
    Unlike raster graphics like JPG, PNG, or bitmap files, which are made up of pixels, vector graphics are made up of mathematical equations and geometric shapes. This means that vector images can be resized without losing their quality or becoming pixelated.

    Because vector images can be easily resized and edited without losing quality, they are particularly useful for projects that require the use of very high-quality graphics are needed, such as pouch printing. The industry standard for vector graphics is adobe illustrator. But some other vector graphics software include CorelDRAW, and Inkscape.

    If vectorized art is not used for your pouch design, you will generally experience a lower quality print. Overall, vector art has become an essential part of the design and creative industry, allowing artists and designers to create versatile and scalable images with precision and ease.

    How to export Vector Content from Canva

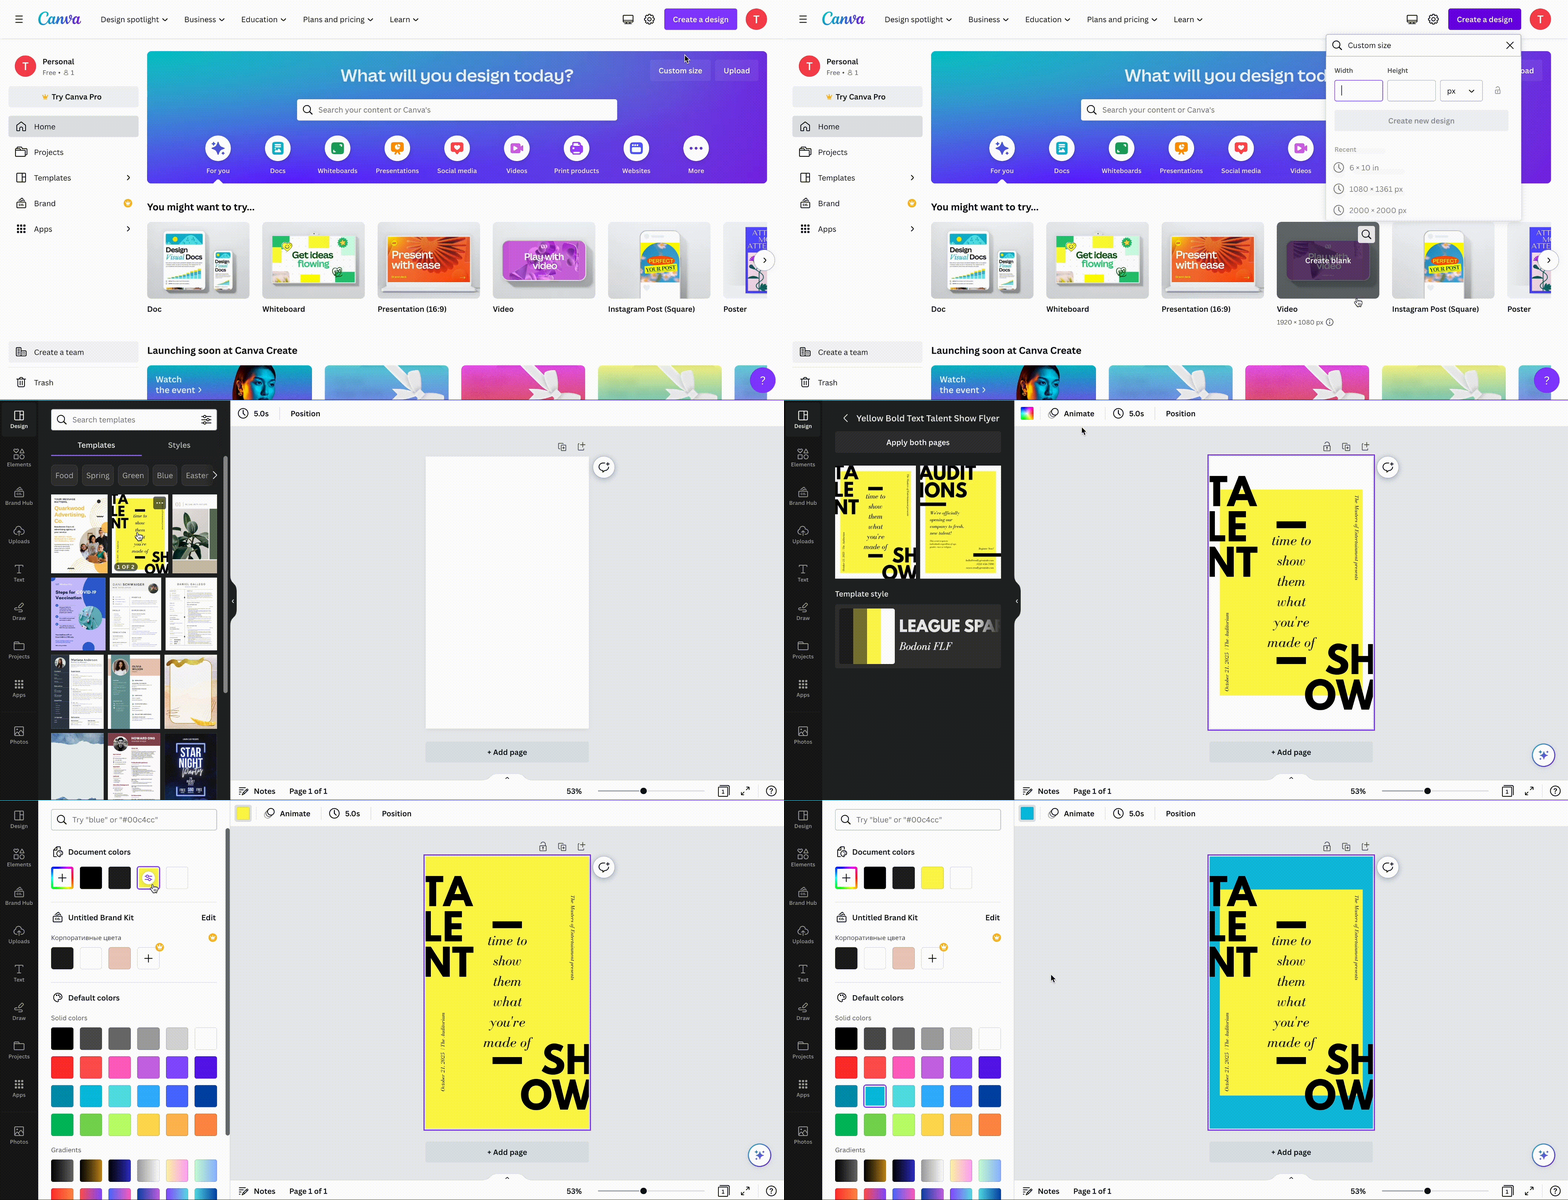
    Open the design in Canva.

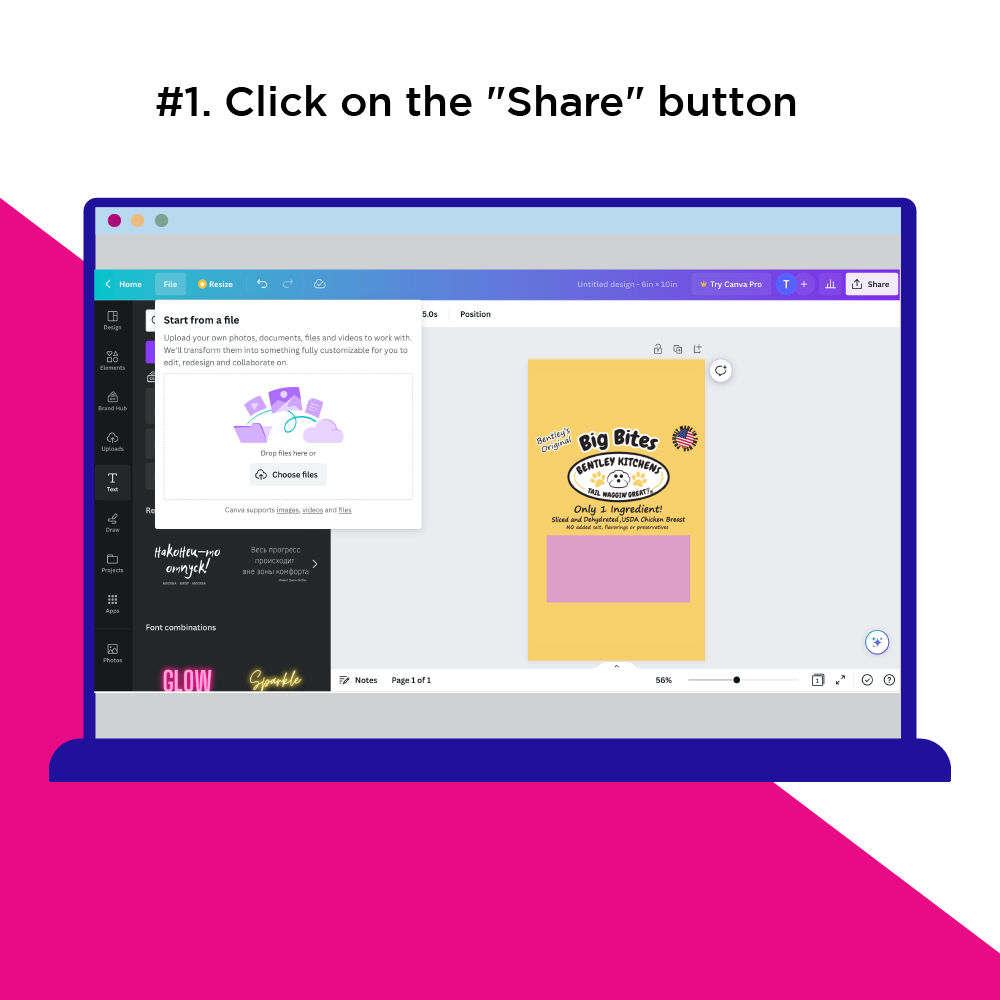
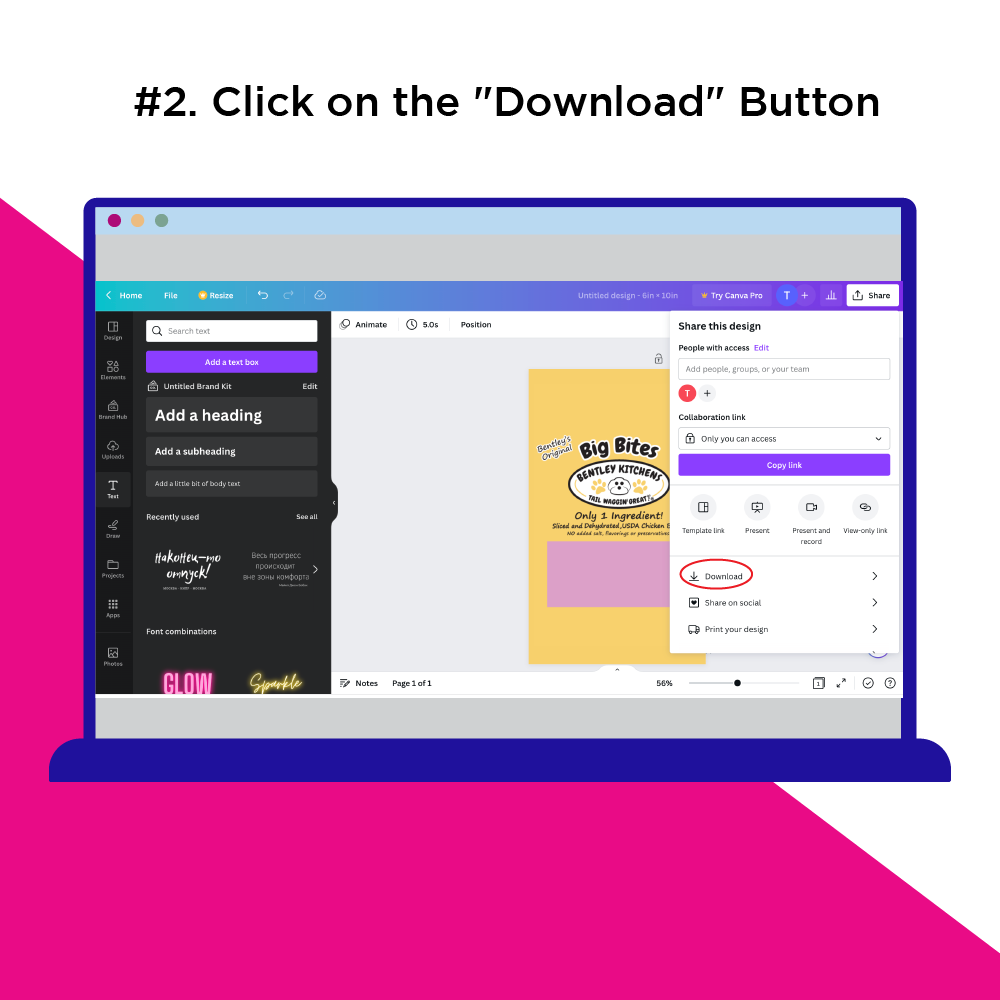
    # 1. Click on the “Share” button at the top right corner of the screen.# 2. Click on the “Download” Button

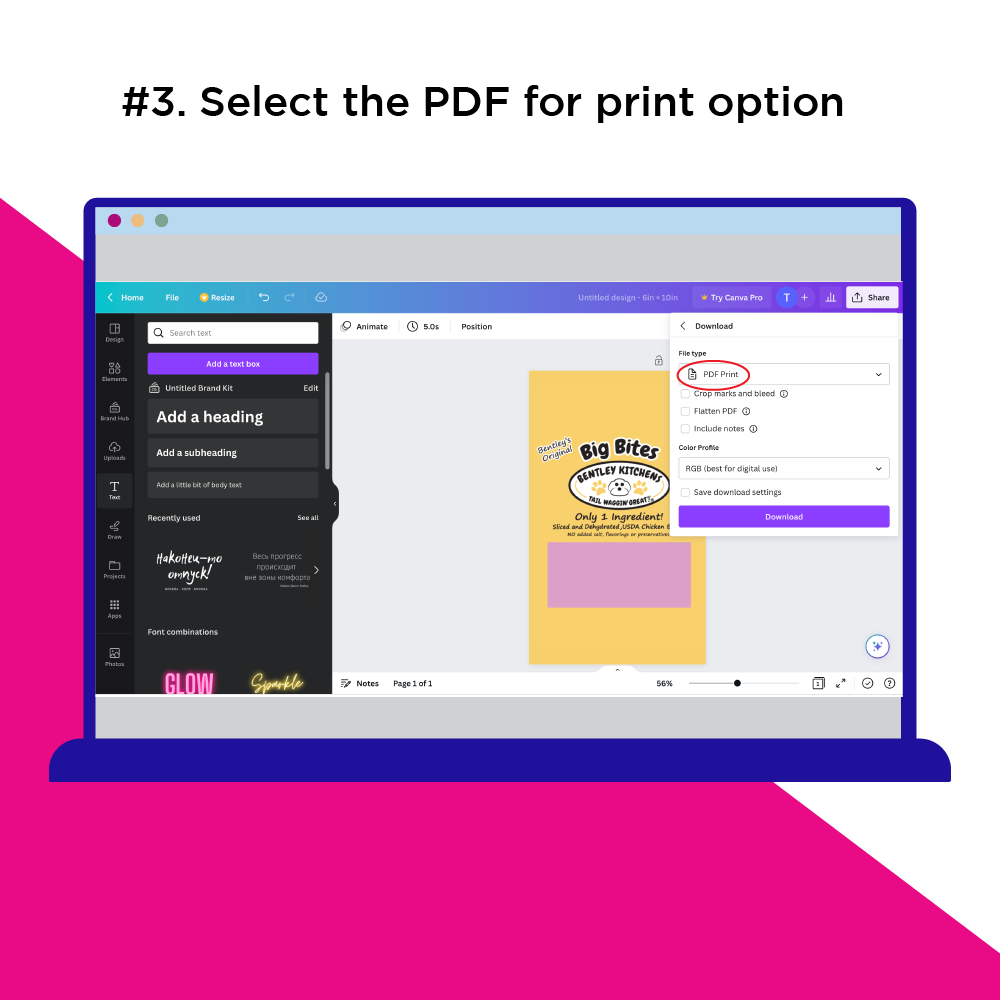
    # 3. Select the PDF for print option. While SVG is a vector option we have found that SVG export is not as reliable as the PDF export option.

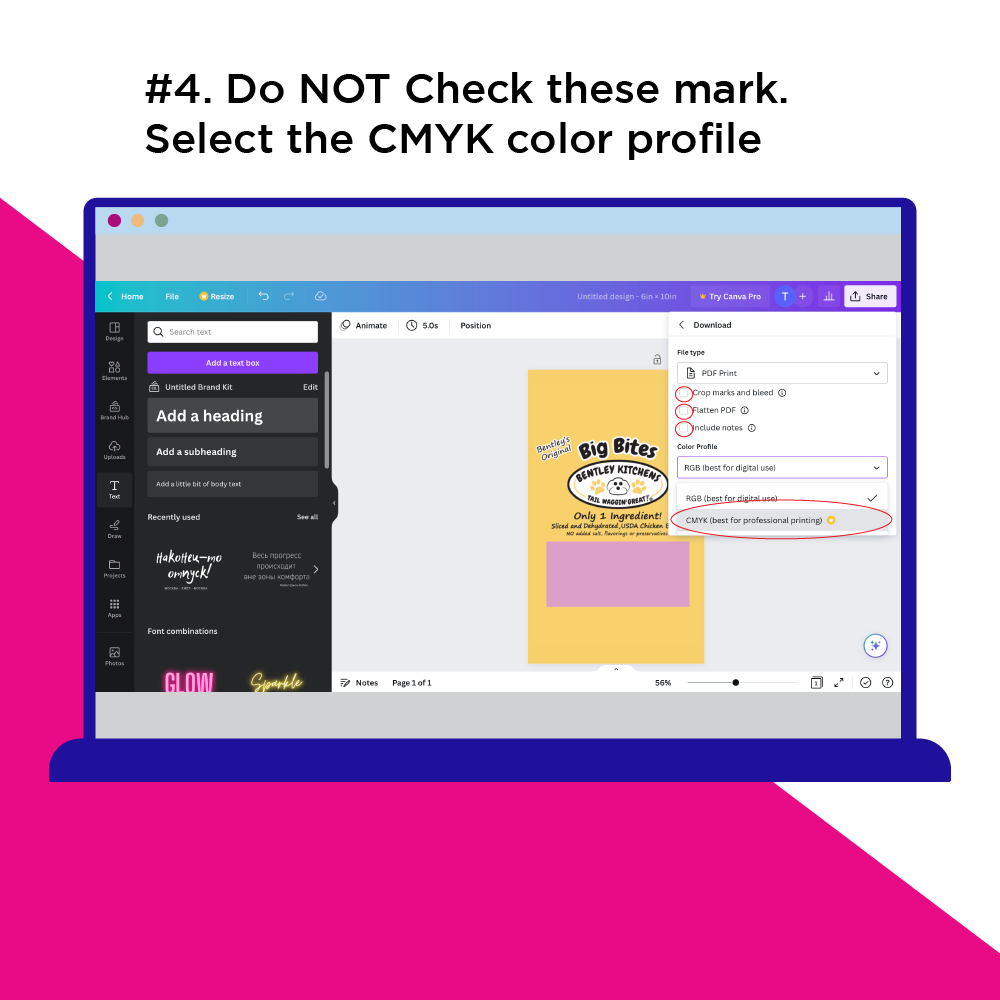
    # 4. Do not check mark “crop marks and bleed”, “flatten PDF”, or “Include notes” options as they add too many unnecessary objects. If you are on a paid plan select the CMYK color profile. Otherwise leave it on RGB.

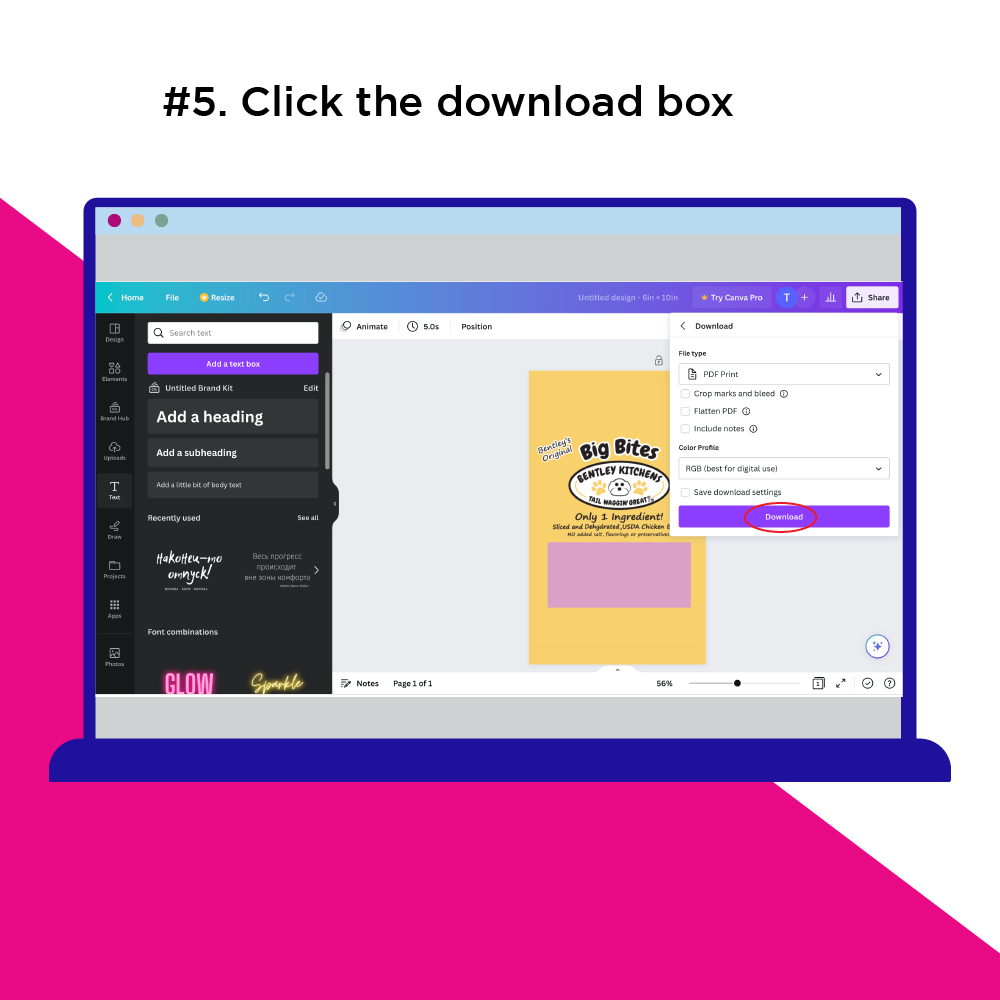
    # 5. Click the download box and you’re done!
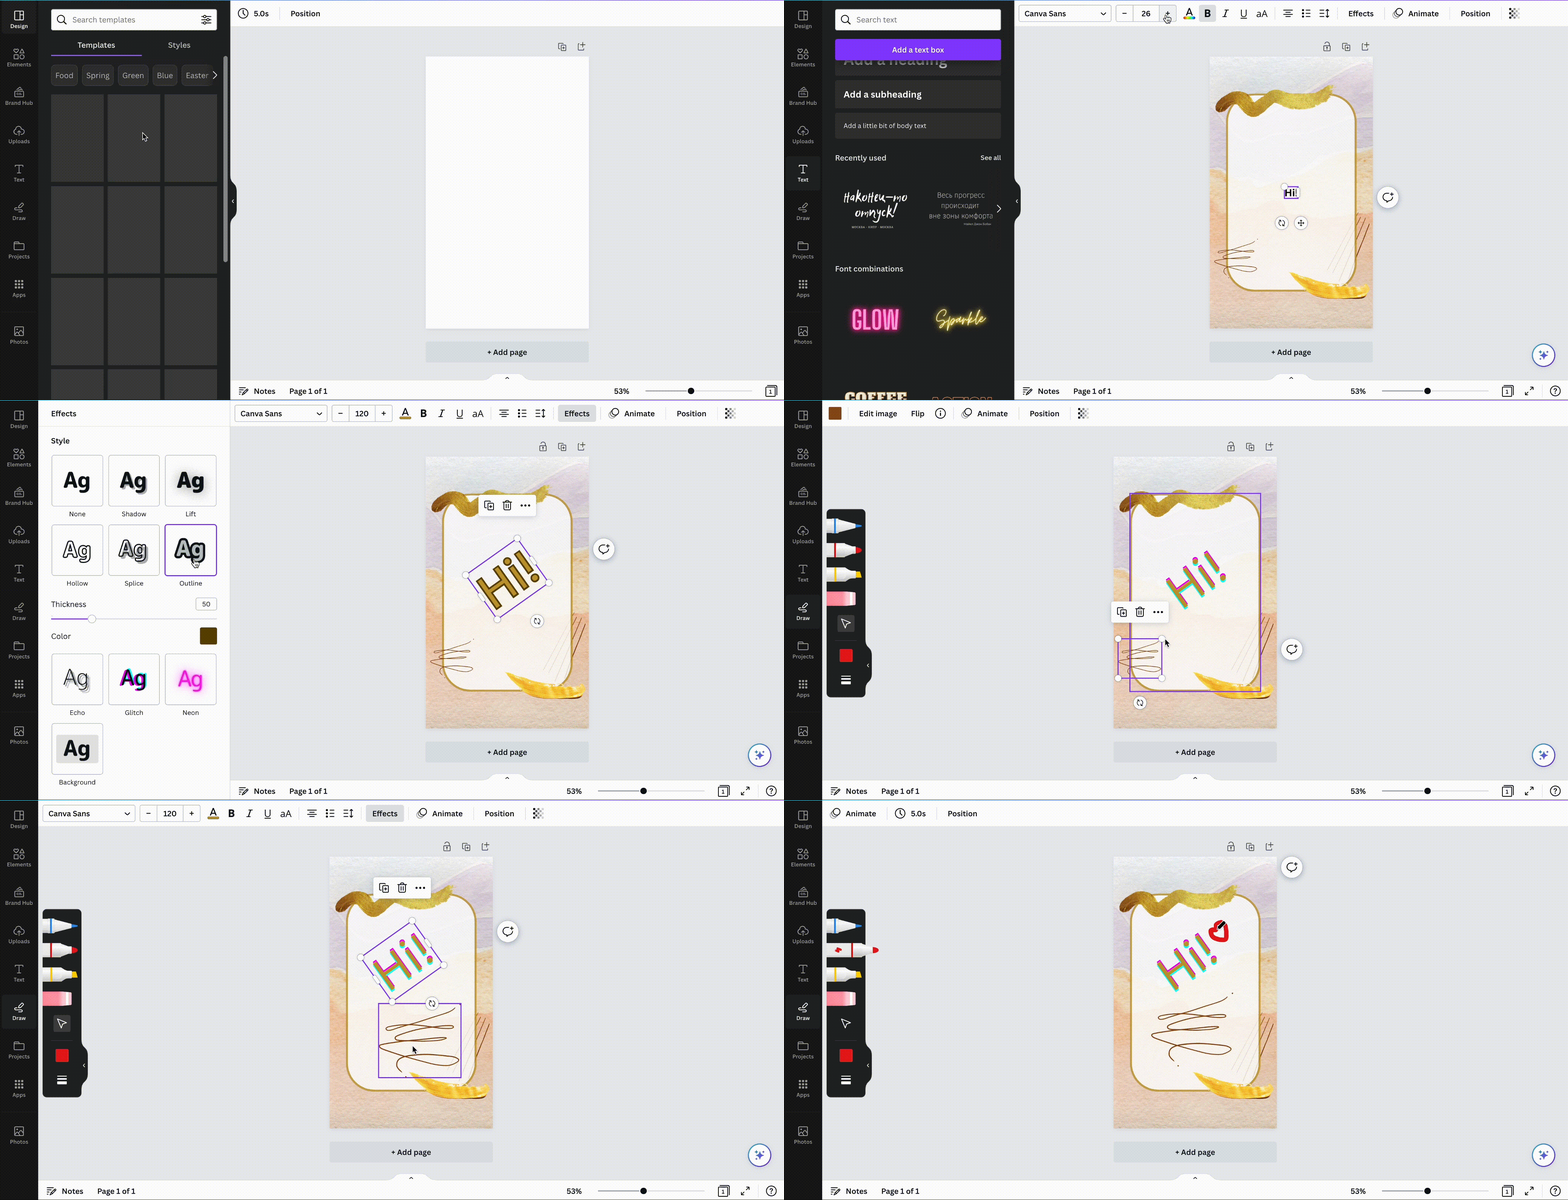
    Common issues relate to fonts: There might be font issues, because Canva has their own fonts. Also, the text can be made up of text objects for each character, which can be a pain to edit.
  • Pouch Designs Proofs

    Pouch Designs Proofs

    Proofing Pouch Designs

    What is Proofing? 

    Proofing is a preliminary version of a printed piece that shows the features and design of the final piece. It’s intended to be a confirmation of the print and bag specifications — think of proofing like a preview or sneak peek of your project. At CarePac, our printed pouches are made to order, so before we can make your pouches, we need to make sure all pouch specifications and printing are correct. 

    Proofing is an essential part of the design process, as we don’t want to print pouches that don’t meet your exact expectations. We hold ourselves to a high standard, and creating the perfect bag does require some input from you. During the proofing stage, you’ll need to make sure that everything is exactly the way you want it, from the font and the logo placement to the colors and customization features. Don’t forget to check the spelling! 

    Why is Proofing Important?

    Proofing is a critical step to ensure that the bag that CarePac is being told to make is the one you want. The last thing we want is to send you a bag that you can’t use because the size or configurations are all wrong. We recommend having multiple people on your team take a look at the proof – you never know what someone else might catch that you may have missed.

    Steps of the Proofing Process at CarePac

    At CarePac, we’re all about transparency, so here is what you can expect from our proofing process: 

    How are pouch designs proofed?

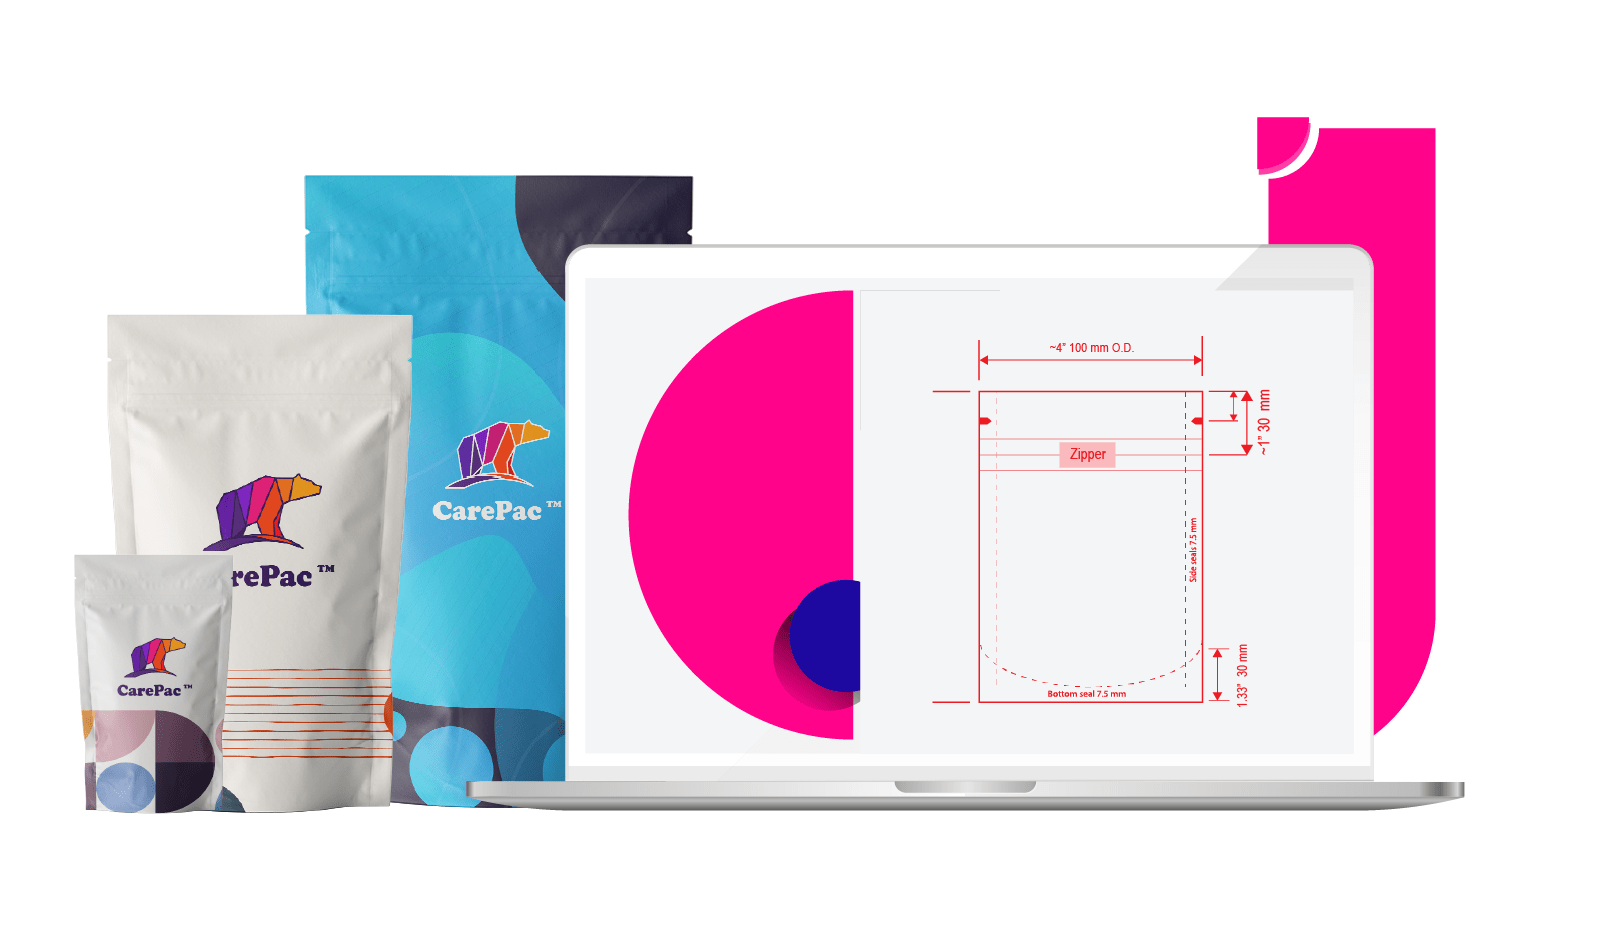
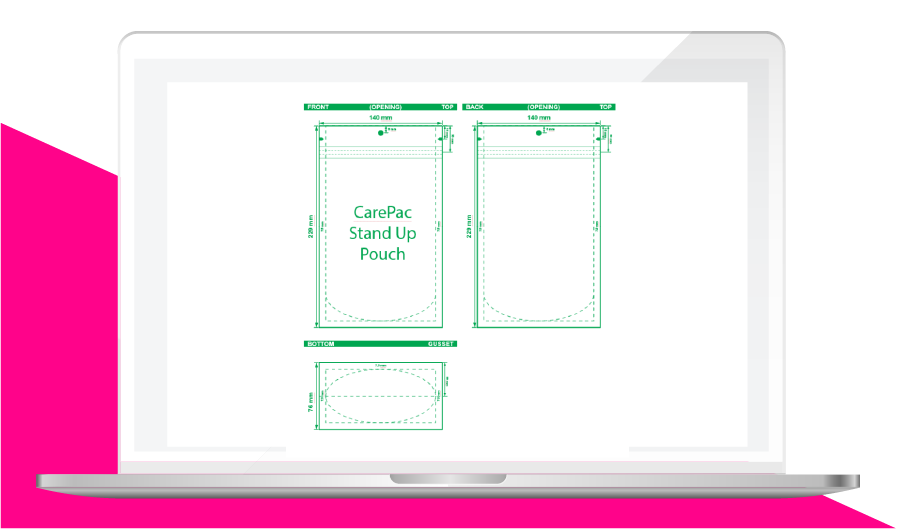
    The industry standard is using digital art files to proof, which is why we’ll send you a digital proof. This type of proofing is quick and efficient and typically works perfectly well. The design schematic is a to-scale layout of the bag showing the art, color and placement of various elements on the bag, including features like zippers and tear notches. 

    At CarePac, we use multiple-up dielines which show the different sides of the bag individually. This format makes proofing much easier to perform, as you can see all sides of the bag. Some competitors will show you a print layout which can be harder to proof because the back of the back will be shown upside down. 

    In addition to text and imagery, finishes, their location and other elements will also be depicted on the design file to be reviewed. Most bag features will be depicted on the bag dieline along with relative positions. 

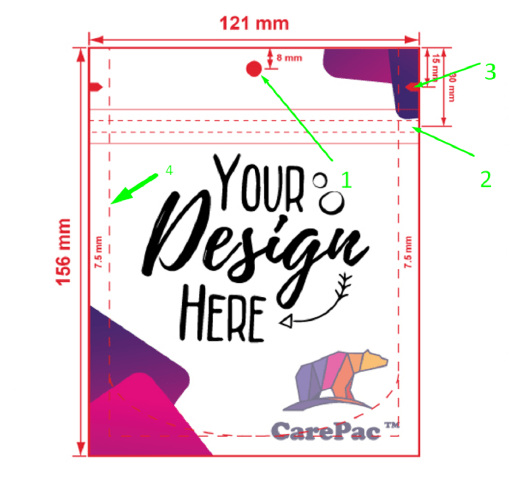
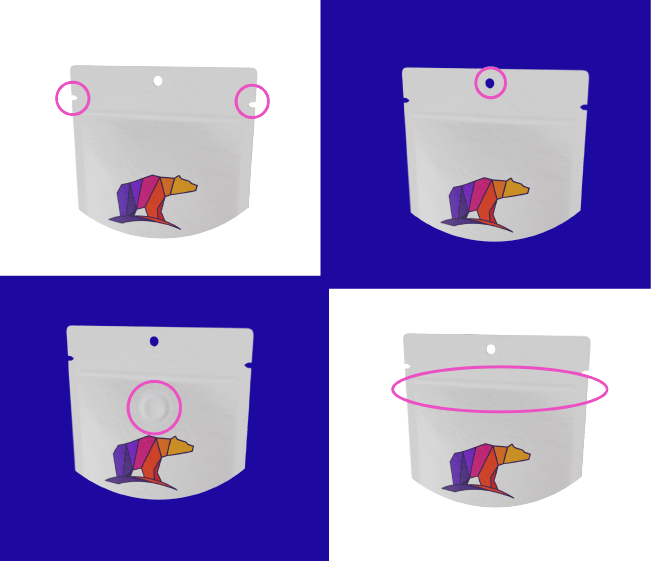
    In the picture below, we have four features:

    Side Seals are where the bag materialconnects together

    1. Hang hole 

    2. Zipper

    3. Tear Notch

    4. Side seals

    Optional Additional Proofing Steps

    Occasionally some projects require additional proofing steps due to their complexity or specific concerns. There are three main types of additional proofing: Draw Downs, Film Print Proofs, and Prototyping. You can learn more about each optional and additional proofing step below. 

    Draw Downs

    A draw down is where the color(s) used in a bag’s print design are placed by hand on the material to see how they appear on the film. Not all films can be used with draw downs because some films require additional treatment to get the ink to stick to the plastic. Draw downs are best accomplished with bags that incorporate a printed layer of paper in their makeup. 

    If you want to see exactly how the colors will appear on the film material, a draw down is the best (and only) way to see this. Producing a draw down does add expense (and time) to a print project, and is typically reserved for very large runs or if the ink or material is a concern. In most cases, reviewing the digital proof is satisfactory. 

    Optional Film print proof

    This process does create some delay as we cannot schedule additional steps of the production process like laminating, curing, or bag making until the film has been approved. Please keep in mind that film print proofing can add 1-2 weeks to the production beyond normal lead-times. (This estimate assumes that you’ll review your proofs in a speedy manner.) If, after receiving the film print proof, you want to make changes, there will be some cost for the machine time, labor, and materials used to produce the film print proof. This varies by the type of printing being used, and the complexity of the printing. 

    With film print proofs, after the design file is approved, we perform the actual printing of the material but then stop and send a cut-off of that film to you for review. 

    With a film print proof, you can see the actual print on the material that will be used to make your bags. Once you approve the film, then we will continue on with the production of the bags. 

    Optional Prototyping 

    For the ultimate in proofing, we offer CarePac Express. With CarePac Express, we offer very small quantities, as few as 100 bags, which can be made to your specifications and are fully completed bags. 

    Digital Proofing

    is Included!

    Although draw downs, film print proofs, and CarePac Express all incur an additional cost, standard digital proofing is included in our pricing models. If you need help understanding a digital proof or have any questions whatsoever about our proofing options, please don’t hesitate to reach out to your representative. For an instant online quote for your project, please click here. 

  • Design Proof Review Checklist

    Design Proof Review Checklist

    Design Proof Review Checklist

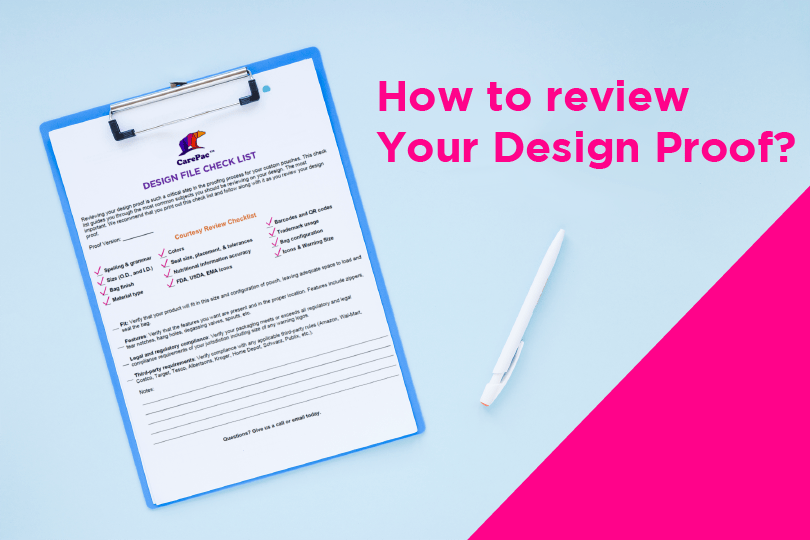
    Your design proof, also called a dieline, or Master art proof. Is a to scale schematic of your pouch. The design proof shows you all the elements which are expected to be present on the finished pouch. Reviewing your design file in detail is very important because once you sign it, you’re telling us to make the pouch based on the design. If you later find a mistake, like a spelling mistake, it could be too late to change, or could incur costs to you. In this article we’ll cover some of the most important steps you should take when reviewing your proof. We also offer a complementary design proof review check list which you can download below. 

    First things first: Check your Pouch Size

    Since your design proof is to-scale, the dimensions listed on the proof will be the finished size of the bag. The biggest mistake customers make is not checking that they size of bag they are ordering will actually fit their product. The best way to confirm sizing is to take whatever bag you’re basing 

    What if I don’t have a bag to base sizing from?

    The best advice would be to review the samples that we sent you to confirm if any of those work. If you’re not working from a sample we sent, then we suggest going to a big box retailer and purchasing pouches that you think might fit your product, then testing it out. 

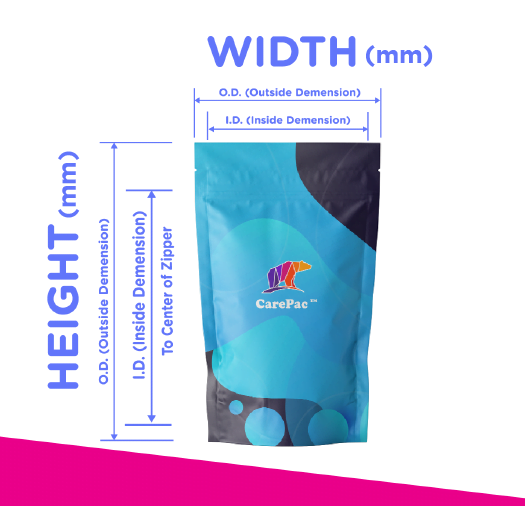
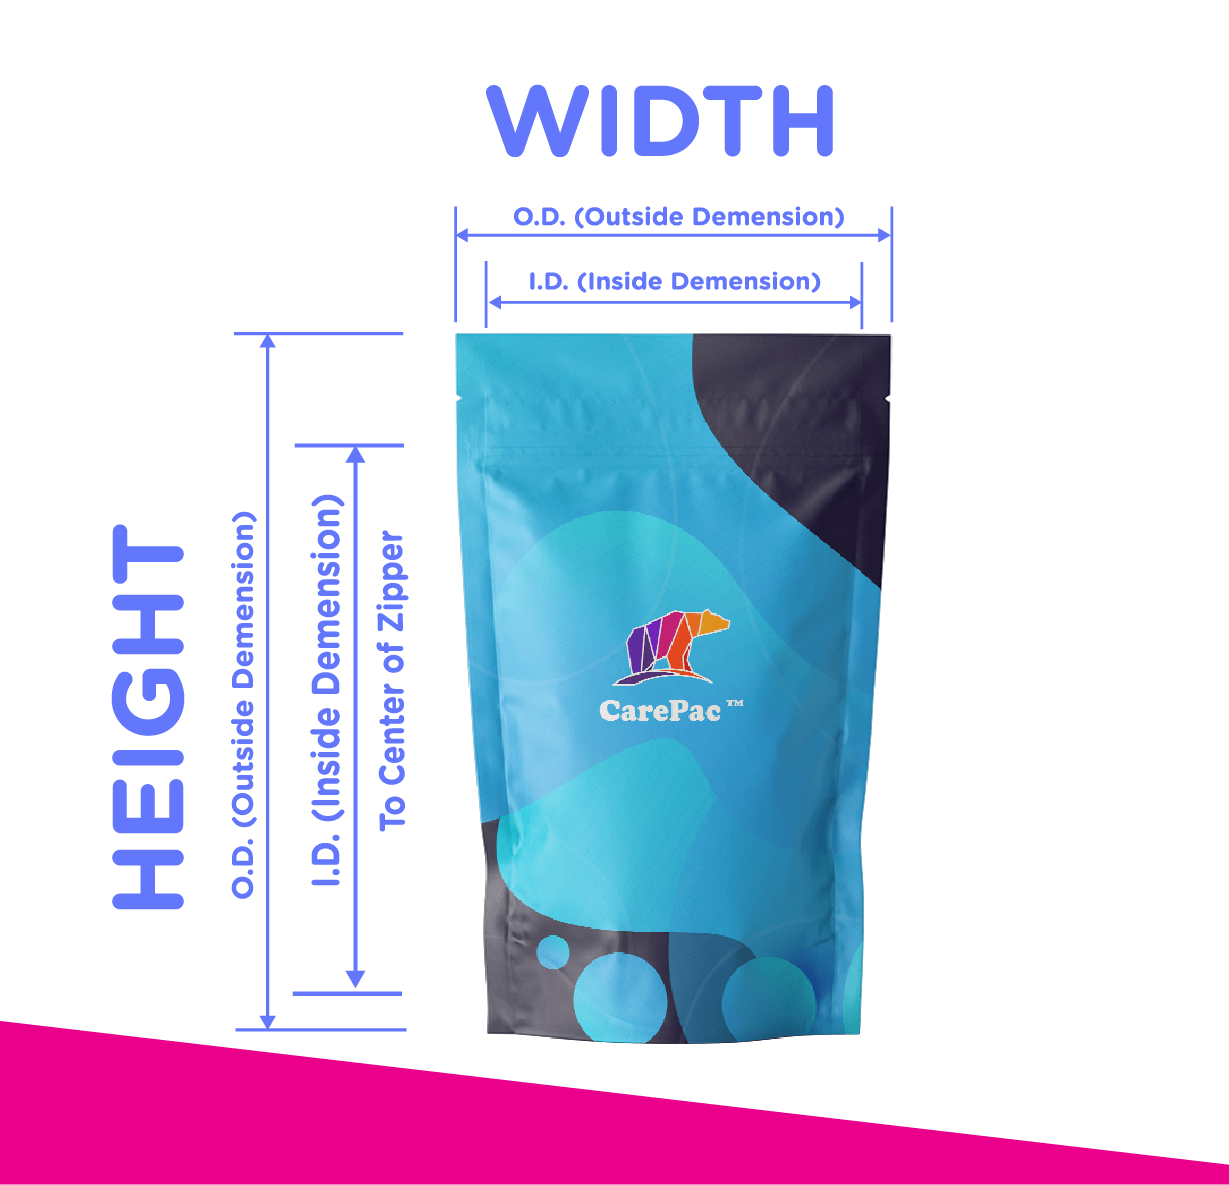
    Make sure you’re not confusing O.D. size and I.D. size.

    O.D. is outside diameter, and refers to the size of the pouch edge to edge with no additional material existing beyond that size. I.D. is inside diameter and refers to the interior usable space. The I.D. will vary depending on the size of your bag seals, position of the zipper or other closure and whether your pouch is a stand up pouch or a flat pouch. This is why it’s critical to have reviewed and confirmed your sizing before proceeding. 

    Spelling and Grammar

    It might seem obvious, but every day a customer will catch a spelling or grammar mistake that they didn’t notice previously. While these mistakes may not always be the end of the world, they project a unprofessional appearance so, it’s best to have two or three people read over the pouch, preferably people who didn’t write the content. This is because our minds will often fill in words to our own writing without us even noticing. But these mistakes will stand out to a reader who is unfamiliar with the content. 

    Material Type & Design

    During your proofing you’ll want to confirm the type of material your pouch is made from. The material of your pouch is listed on your sales order which accompanies your proof. One problem that occurs is during the development process, customers often switch between materials as they decide what is best for their pouch.  

    Bag Configuration

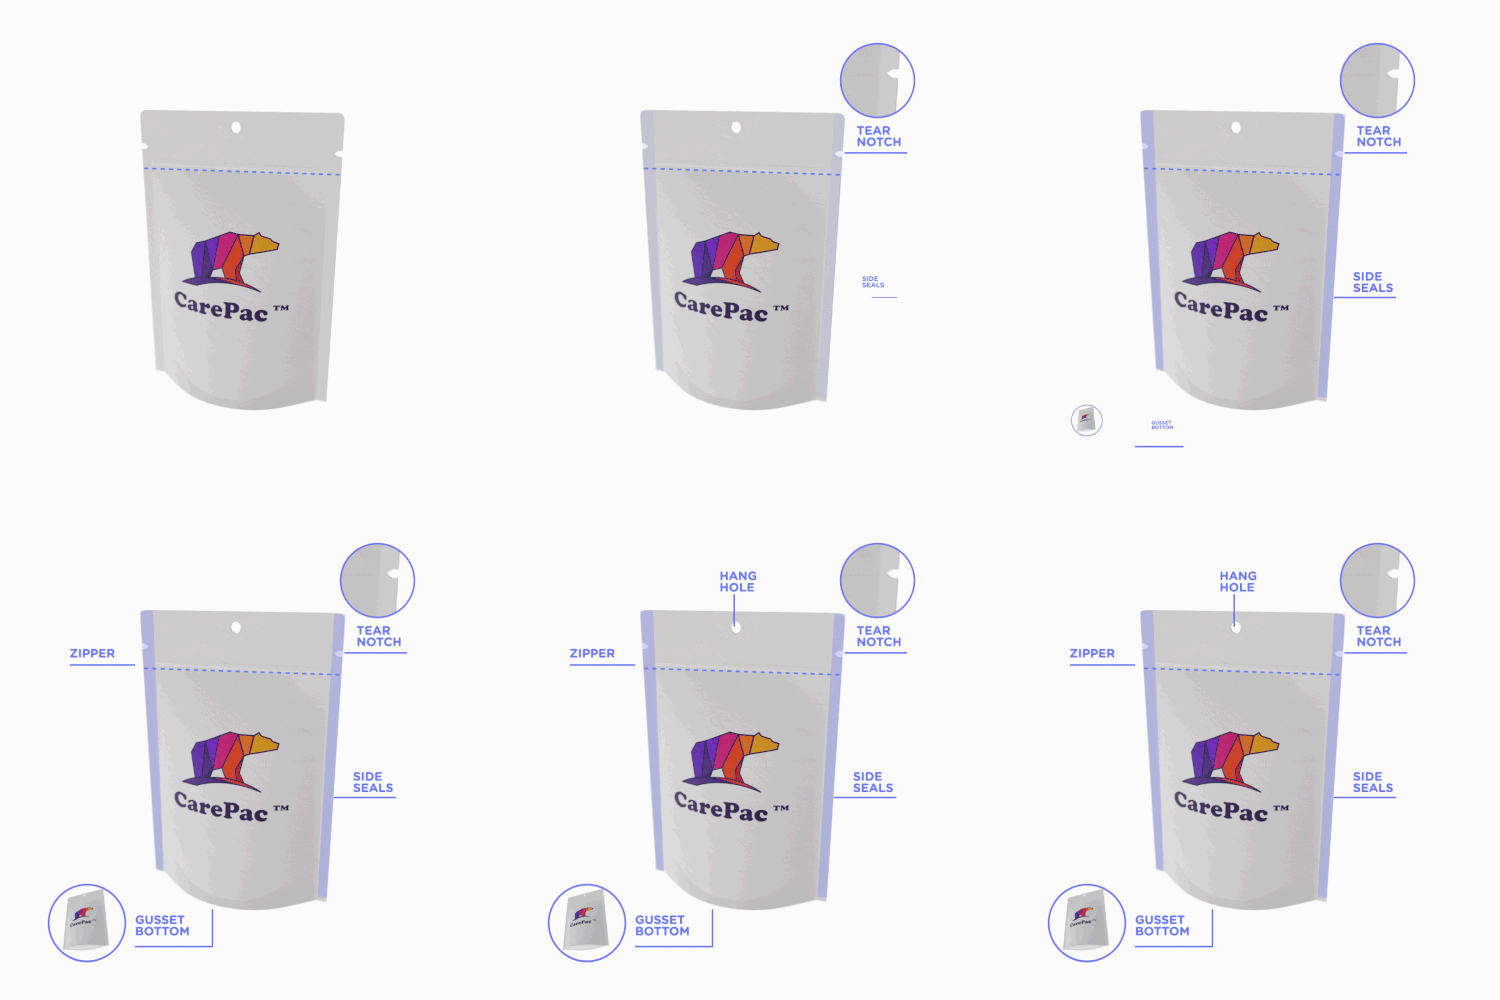
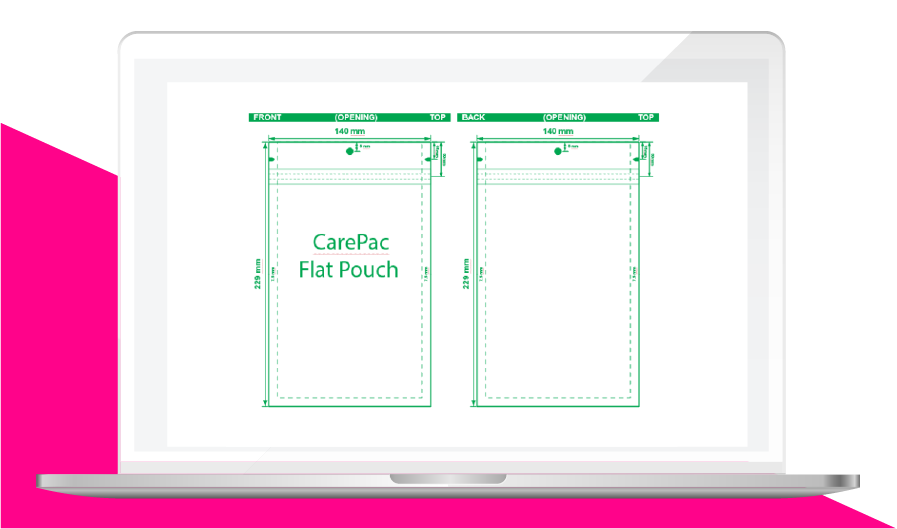
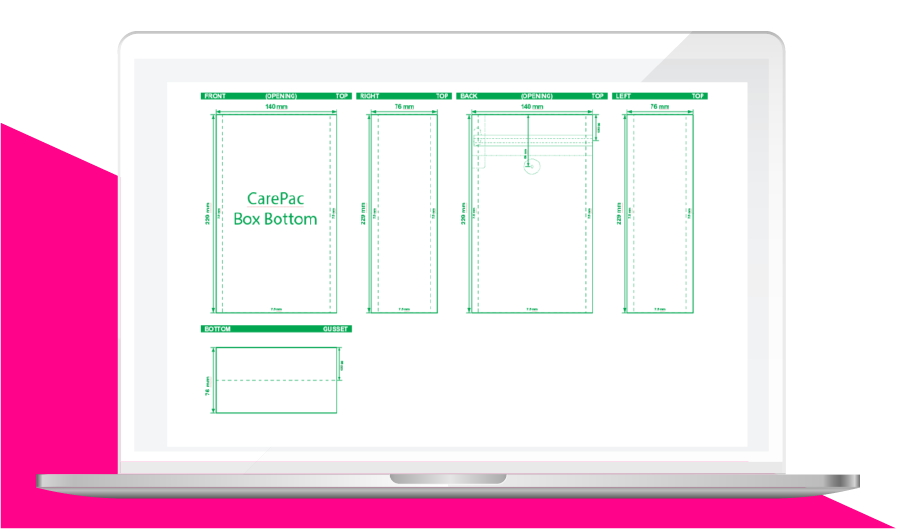
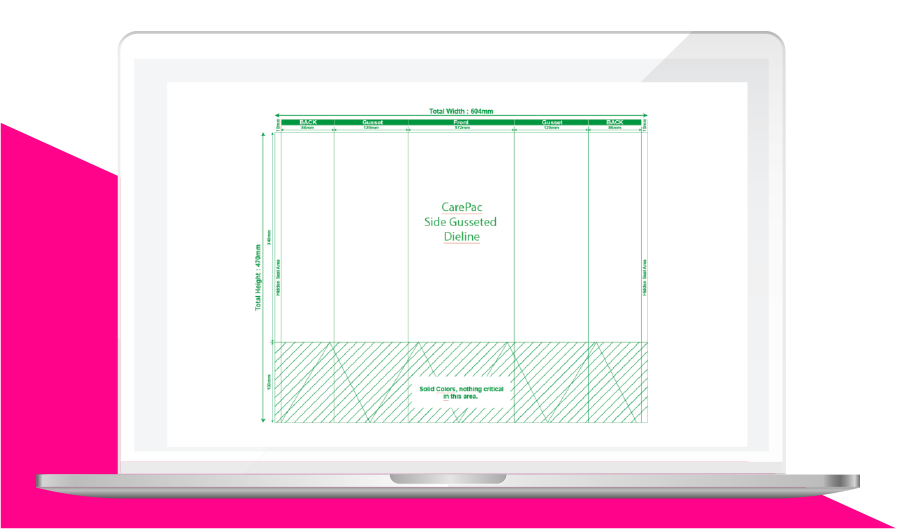
    Now is the time to confirm that the pouch you’re ordering is the proper configuration that you want. The digital design proof will show all the sides of the pouch, so if you don’t see a gusset, then your pouches doesn’t have one. In the diagrams below we’re showing you what some of the most common pouch configuration design schematics look like. 

    Gusseted Pouch

    Lay Flat Pouch

    Box Bottom Pouch

    Side Gusseted

    Print/Proofing Review

    When reviewing the print on your pouch there are several items to specifically take time and double check: Bag Finish, Colors, Barcodes and QR Codes, brand trademark usages, Nutritional and compliance information, and where the folds are. 

    Colors

    The colors being used on your design will be listed on your design proof. Each design proof includes a color bar which designates each color which is being used in the design. There are some differences between the colors used in digital and those used for plate printing. Also some types of bags like box bottom pouches require multiple sets of color plates. 

    Digital Colors

    Pouches which will be digitally printed will be created using a White Cyan, Magenta, Yellow, and Black ink combination. This is often referred to as five color process (or many times mistakenly called four color process). 

    Pantone Colors

    Pantone colors are commonly used by customers to increase overall color fidelity and consistency. Pantone colors applicable to flexible pouches will be from the Formula Guide Solid Coated, or Formula Guide Solid Uncoated.  Pantones from other Formula Guides are typically not compatible with flexible bag printing. 

    Printed Pouch Finish

    Your pouch finish, and the position of any Spot Finish will be indicated on your design files as a separate set of graphic bag schematics. It’s important to check that the finish indicated is the finish that you wanted us to produce for your brand before you order. 

    Barcodes and QR Codes

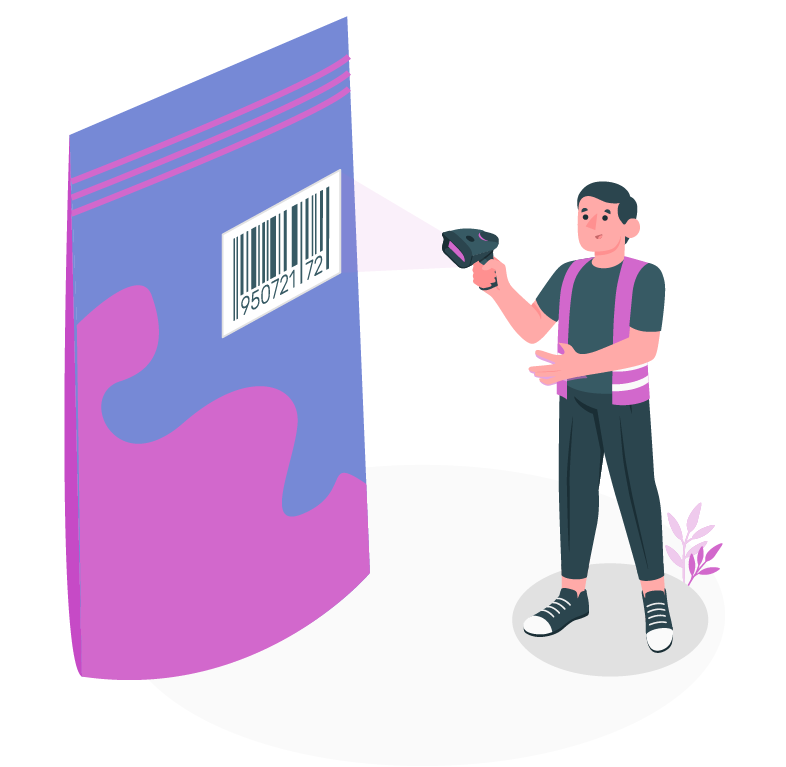
    Now is the perfect time to confirm that your Barcodes are correct, and have been placed on the correct designs. You don’t want to later find out that the your vanilla flavor’s barcode graphic is actually on the chocolate flavor bag. Scan your barcode or read your QR code on your screen to ensure it has the correct information encoded into it. 

    Trademarks

    Now is also a perfect time to confirm that any trademarks you use on the bag are properly licensed before you put in the order so you don’t get in trouble later. 

    Nutritional and Compliance

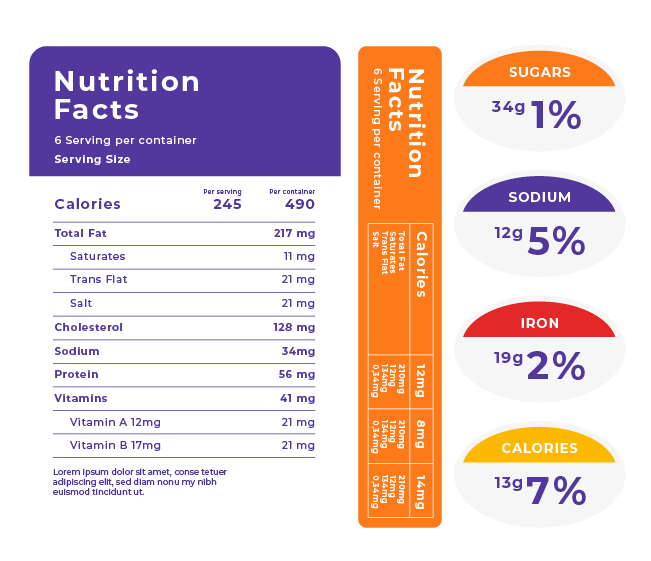
    Nutritional information needs to be accurate, otherwise you’re going to be relabeling the bags later with stickers which is time consuming and easily avoided. Those pesky compliance icons, symbols and consumer warnings should also be given a second look. Typically compliance warnings must be properly formatted and sized. Is your USDA icon the correct size? Is the font on your Surgeon general’s warning the right size? These are important and can be costly mistakes if you don’t double check. 

    Bag Features & Touch/Feel

    Getting back to the basics, the bag design schematic shows you the pouch that will be made, in a to scale rendering. The schematic also shows you all the features (i.e. zippers, tear notches, hang holes, valves spouts etc) that will be on the finished pouch, in addition to other aspects (matte, soft touch, etc.). If you don’t see a feature on the bag it’s not being made. 

    Dieline Review Checklist

    We hope this article has given you a nice overview of the dieline review process. We’re including a dieline review checklist which we believe is the most complete check list available and is based on years of experience. Click here to download the design file review check list. 

  • Digital Printing On Plastic Film

    Digital Printing On Plastic Film

    Digital Printing On Plastic Film

    Digital Printing on Plastic Film- What You Need to Know About How We Print on Plastics, Films, and Sheets

    digital packaging production digital printing press for flexible packaging

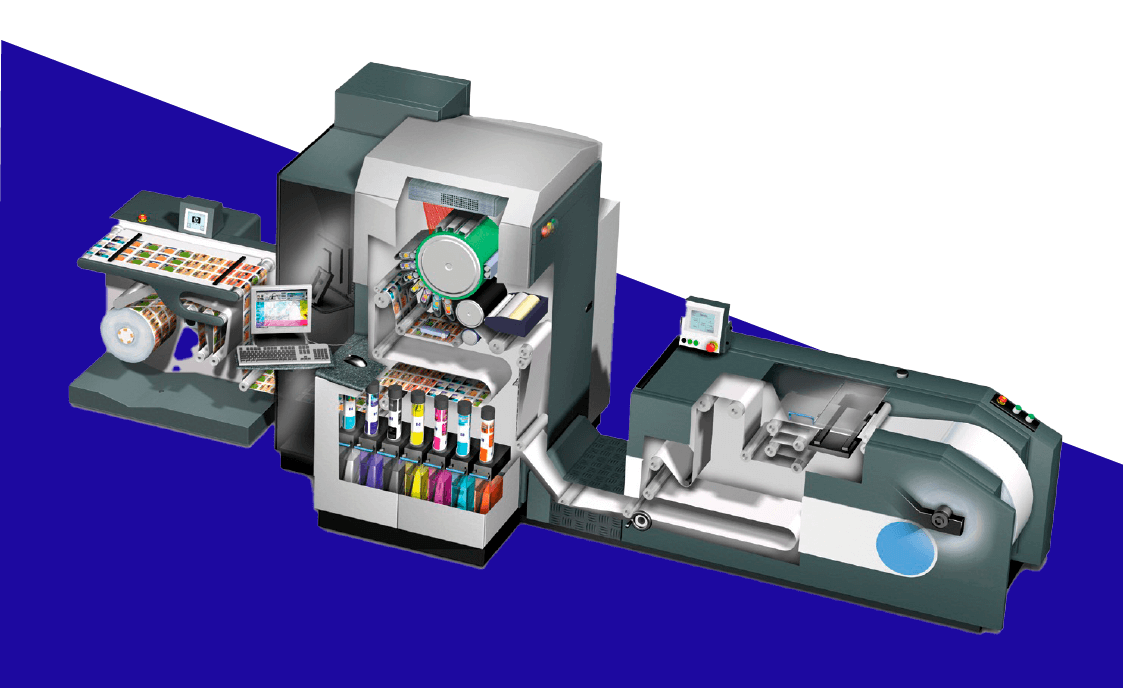
    With our innovative digital printing technology, CarePac can print short run printed pouch projects and high color count images with minimal setup and no plate costs. Not only does this improve efficiency but it benefits our customers in the form of quicker project turnaround and greater personalization. It’s the 21st century — your business has grown and changed, so isn’t it time your screen printing solutions evolve, too? 

    Inkjet Printing vs Traditional Plate Printing

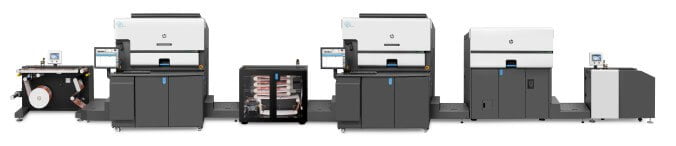
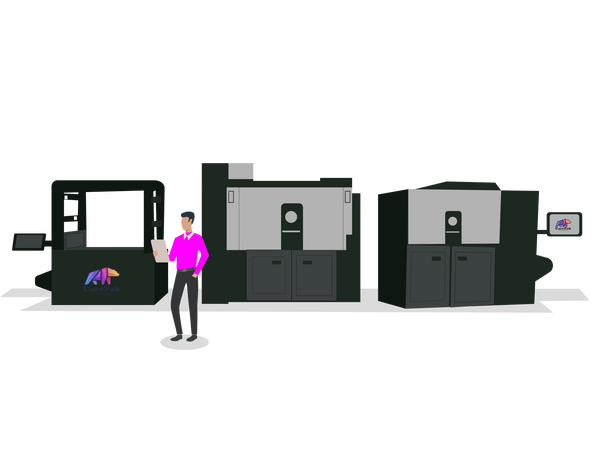
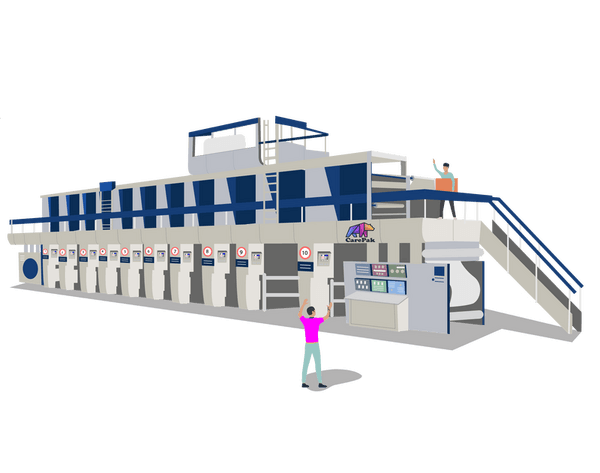
    The easiest way to understand the differences between digital printing and traditional printing is to think about the size of the machines themselves. Modern day inkjet printers are highly sophisticated pieces of machinery, and are small enough to fit on the top of your desk. Although our digital printers are much larger than an inkjet printer, they are much smaller than traditional plate printers, which often take up an entire room and require a ladder (!!!) to use. 

    Digital Printing For Packaging Pros And Cons Printing Methods

    Put simply, digital printers are more compact. They’re easier to set up and run. With digital printing, our team simply has to turn it on and run material and supplies through it. Plate printing, on the other hand, is more involved and can be difficult to calibrate and set up. This is one of the reasons that smaller printer runs, and projects involving alot of different designs can lend themselves to digital printing. 

    These differences probably mean very little to you (you’re not the one doing the printing, after all!). But when you think about the trickle down effects of these material and time savings, it’s a no-brainer that digital printing is great for many projects.  Quicker turnaround? Check. Looking for more customization capabilities? Check. It’s a win across the board! Read on to learn more. 
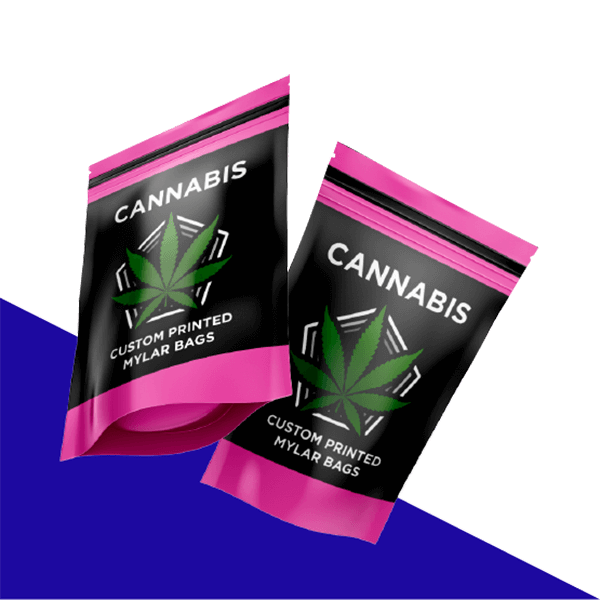
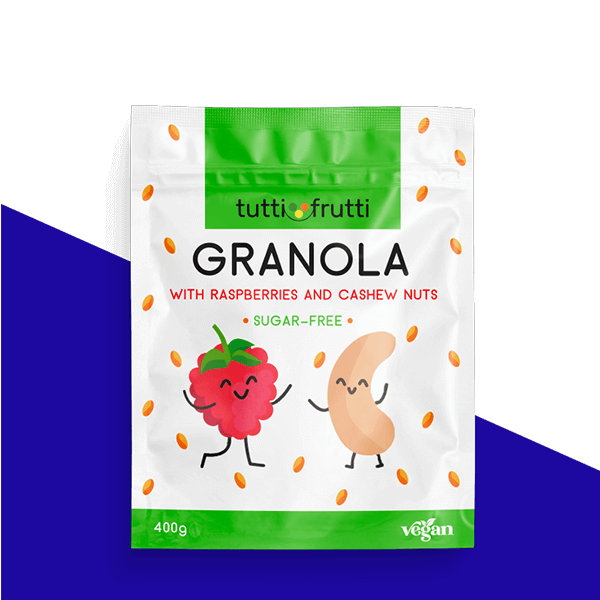
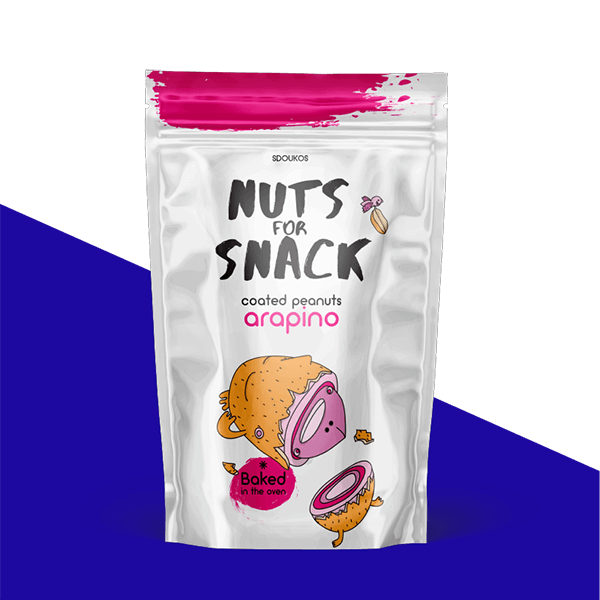
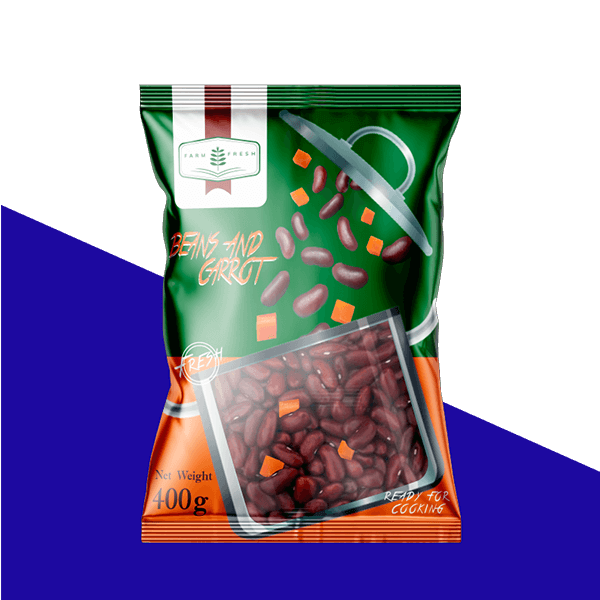
    Custom Digital Printed Mylar Bags Eye Catching Weed Stand Up Pouch doypack cannabis packagingdigital printing granola pacakaging 3 side seal pouch with zipper for cereal, oat and cinnamonColourful Snack Nuts Bag Plastic Packaging Digital Printing Stand Up Bag With Zipper Doy Pack Bottom Food Grade Custom PouchGlossy Digital Printed Plastic Snacks Packaging Pillow Pouches Heat Sealed Pouch

    Evolve with CarePac’s digital printing

    Our digital printing solutions mean that more power is in your hands. You can choose from a wider range of high-quality materials, from paper and plastic sheet to plastic film and compostables, all of which have excellent durability and stand up or lay-flat characteristics. Our professional materials, combined with our digital printing technology, mean your bags will have better ink adhesion, UV resistant properties, scratch resistance, and fewer defects overall. Getting your toes wet in fully custom printed bags can be easier with digital printing, than it is with plate printing. Because you’ll spend less time worrying about your bag printing project and more time focusing on what really matters: running your business and selling your product.

    Breaking Down the Process of Digital Printing for Food Packaging

    Digital Printing

    Digital printing is the process of printing digital-based images directly onto your package. Artwork is separated into four ink colors: cyan, magenta, yellow and black (CMYK+W) This type of printing is best for small runs, or where you have a lot of different designs. Some advanced coatings, and techniques (Spot UV, Spot Matte) are not possible with digital printing. 

    Pros:

    • No setup costs.
    • Shortest lead-times. 
    • Great for start-ups and seasonal SKUS.
    • Great at printing raster images and photos.
    • Perfect for short runs, some as low as 200 pouches. 
    • Physical proof available.
    • Can be used with most material.

    Cons:

    • Higher costs.
    • Not advised for higher quantities.
    • Limited finish options and printing effects. 
    • Unable to exact color match PMS colors and some other ink limitations.

    Breaking Down the Process of Plate Printing for Food Packaging

    Plate Printing

    Plate printing is commercial printing where the design of your bag is separated into multiple color plates. Plate printing yields the lowest per unit costs available. Brands you see in Walmart, Target, and so forth generally use plate printing. Most jobs can be completed with three to six plates. Use of metallic color may require additional plates. Use up to 10 colors.

    Pros:

    • Lower per-unit cost than digital printing.
    • It is the most economical choice when scaling your business.
    • All Finish options are available.
    • Works with almost any material.
    • Metalized colors available
    • Full range of print effects, metalized, holographic, etc.
    • True PMS ink colors can be used.
    • Exceptional print durability and better ink opaqueness.  

    Cons:

    • Minimum order quantity 5,000 pouches. 
    • One-Time Plate costs (typically $150 each)
    • Exceptional print durability and better ink opaqueness.  

    Consideration

    Digitally Printed

    Plate Printed

    Spot Gloss / Spott Matte

    No

    Yes

    Gloss Lamination

    Yes

    Yes

    Matte Lamination

    Yes

    Yes

    Color Options

    CMYK

    CMYK, Spot, Pantone

    Spot Varnish

    No

    Available

    Reverse Trap

    Yes

    Yes

    Good for Short Runs

    Yes

    No

    Per Unit costs

    Higher

    Lowest

    Durability of Ink

    Moderate

    High

    Advantages and Applications of Digital Printing

    Six Benefits of Digital Printing for Flexible Packaging Production No Plate Less Cost Fast Turnover

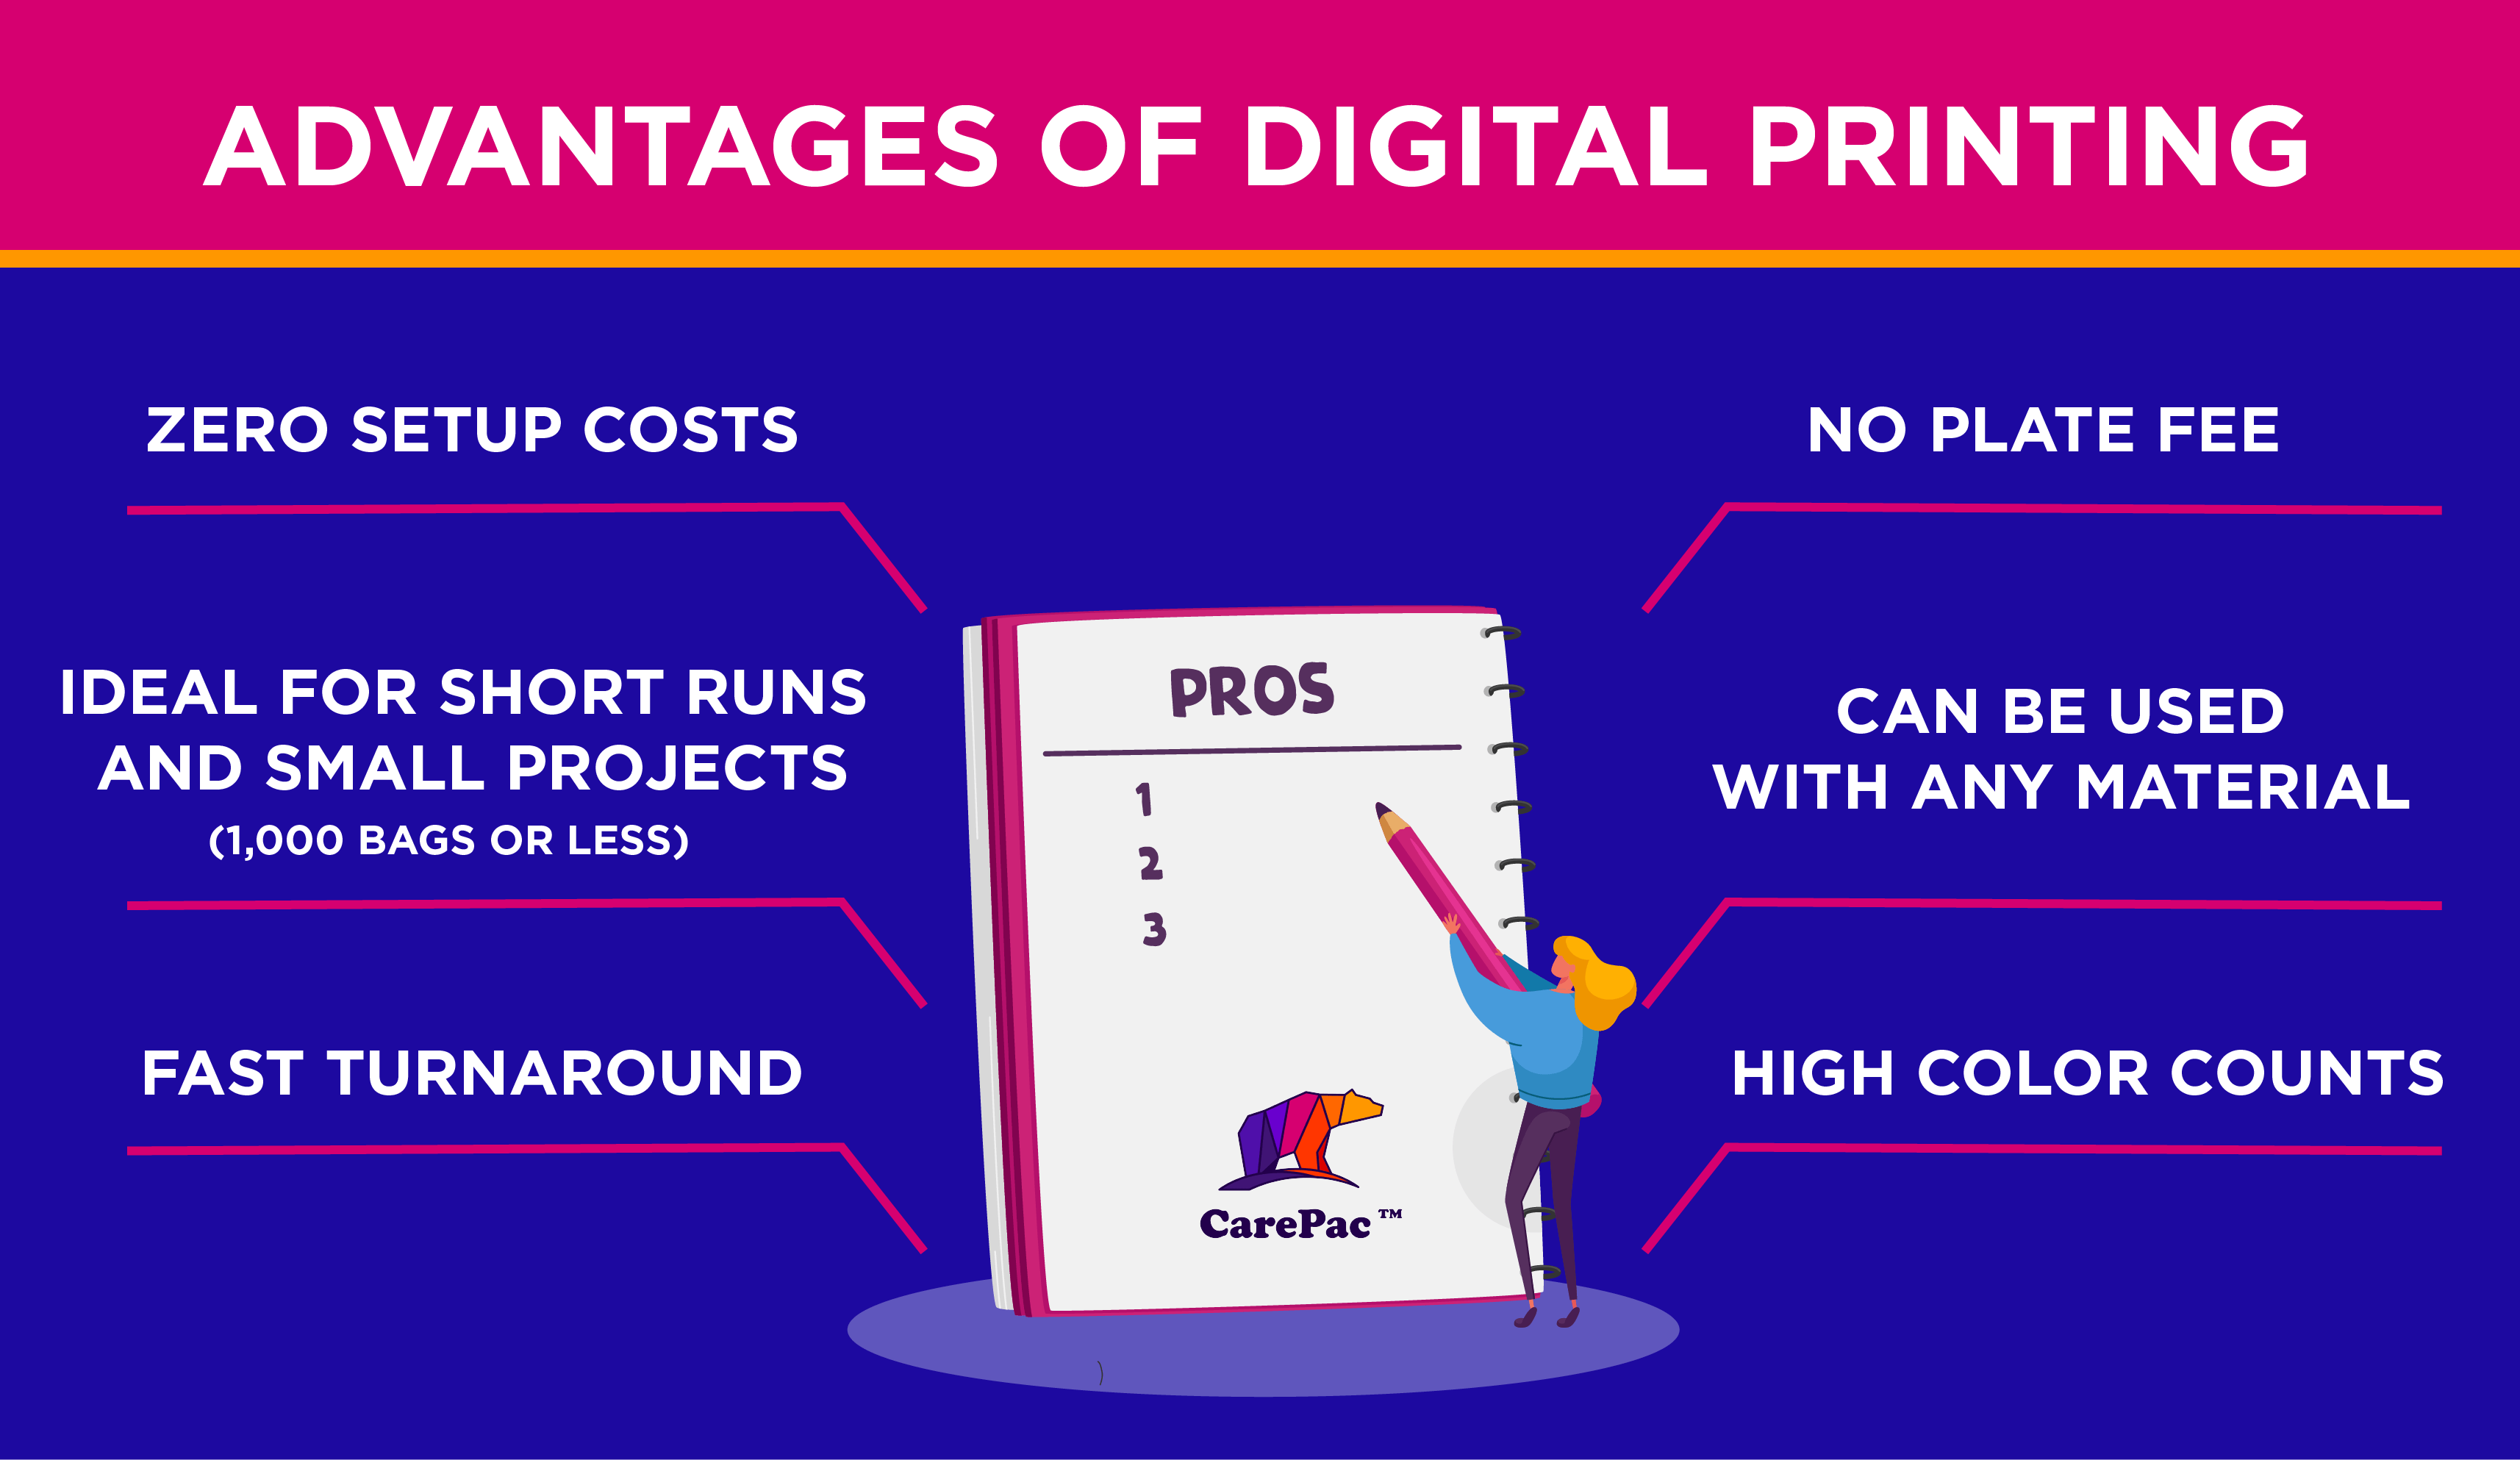
    There are some unique advantages of digital printing that uses a plastic sheet. There are zero setup costs with printing on plastic, and it can be used with any material, including plastic inkjet sheets. Since we can print as few as 1,000 bags or less on thin plastic films, it’s ideal for short runs (think: seasonal, slow-selling products, trial runs, industries with frequent regulatory changes that can make certain bag designs obsolete.) Additionally, plates aren’t used in this process, so you won’t be charged a plate fee. Our digital printing solutions are great for prototyping and start-ups with high color counts. Since the price per unit tends to be higher, many of our customers are those with smaller projects. With digital printing, you’ll get the fastest turnaround (about three weeks!). 

    Disadvantages of Digital Printing

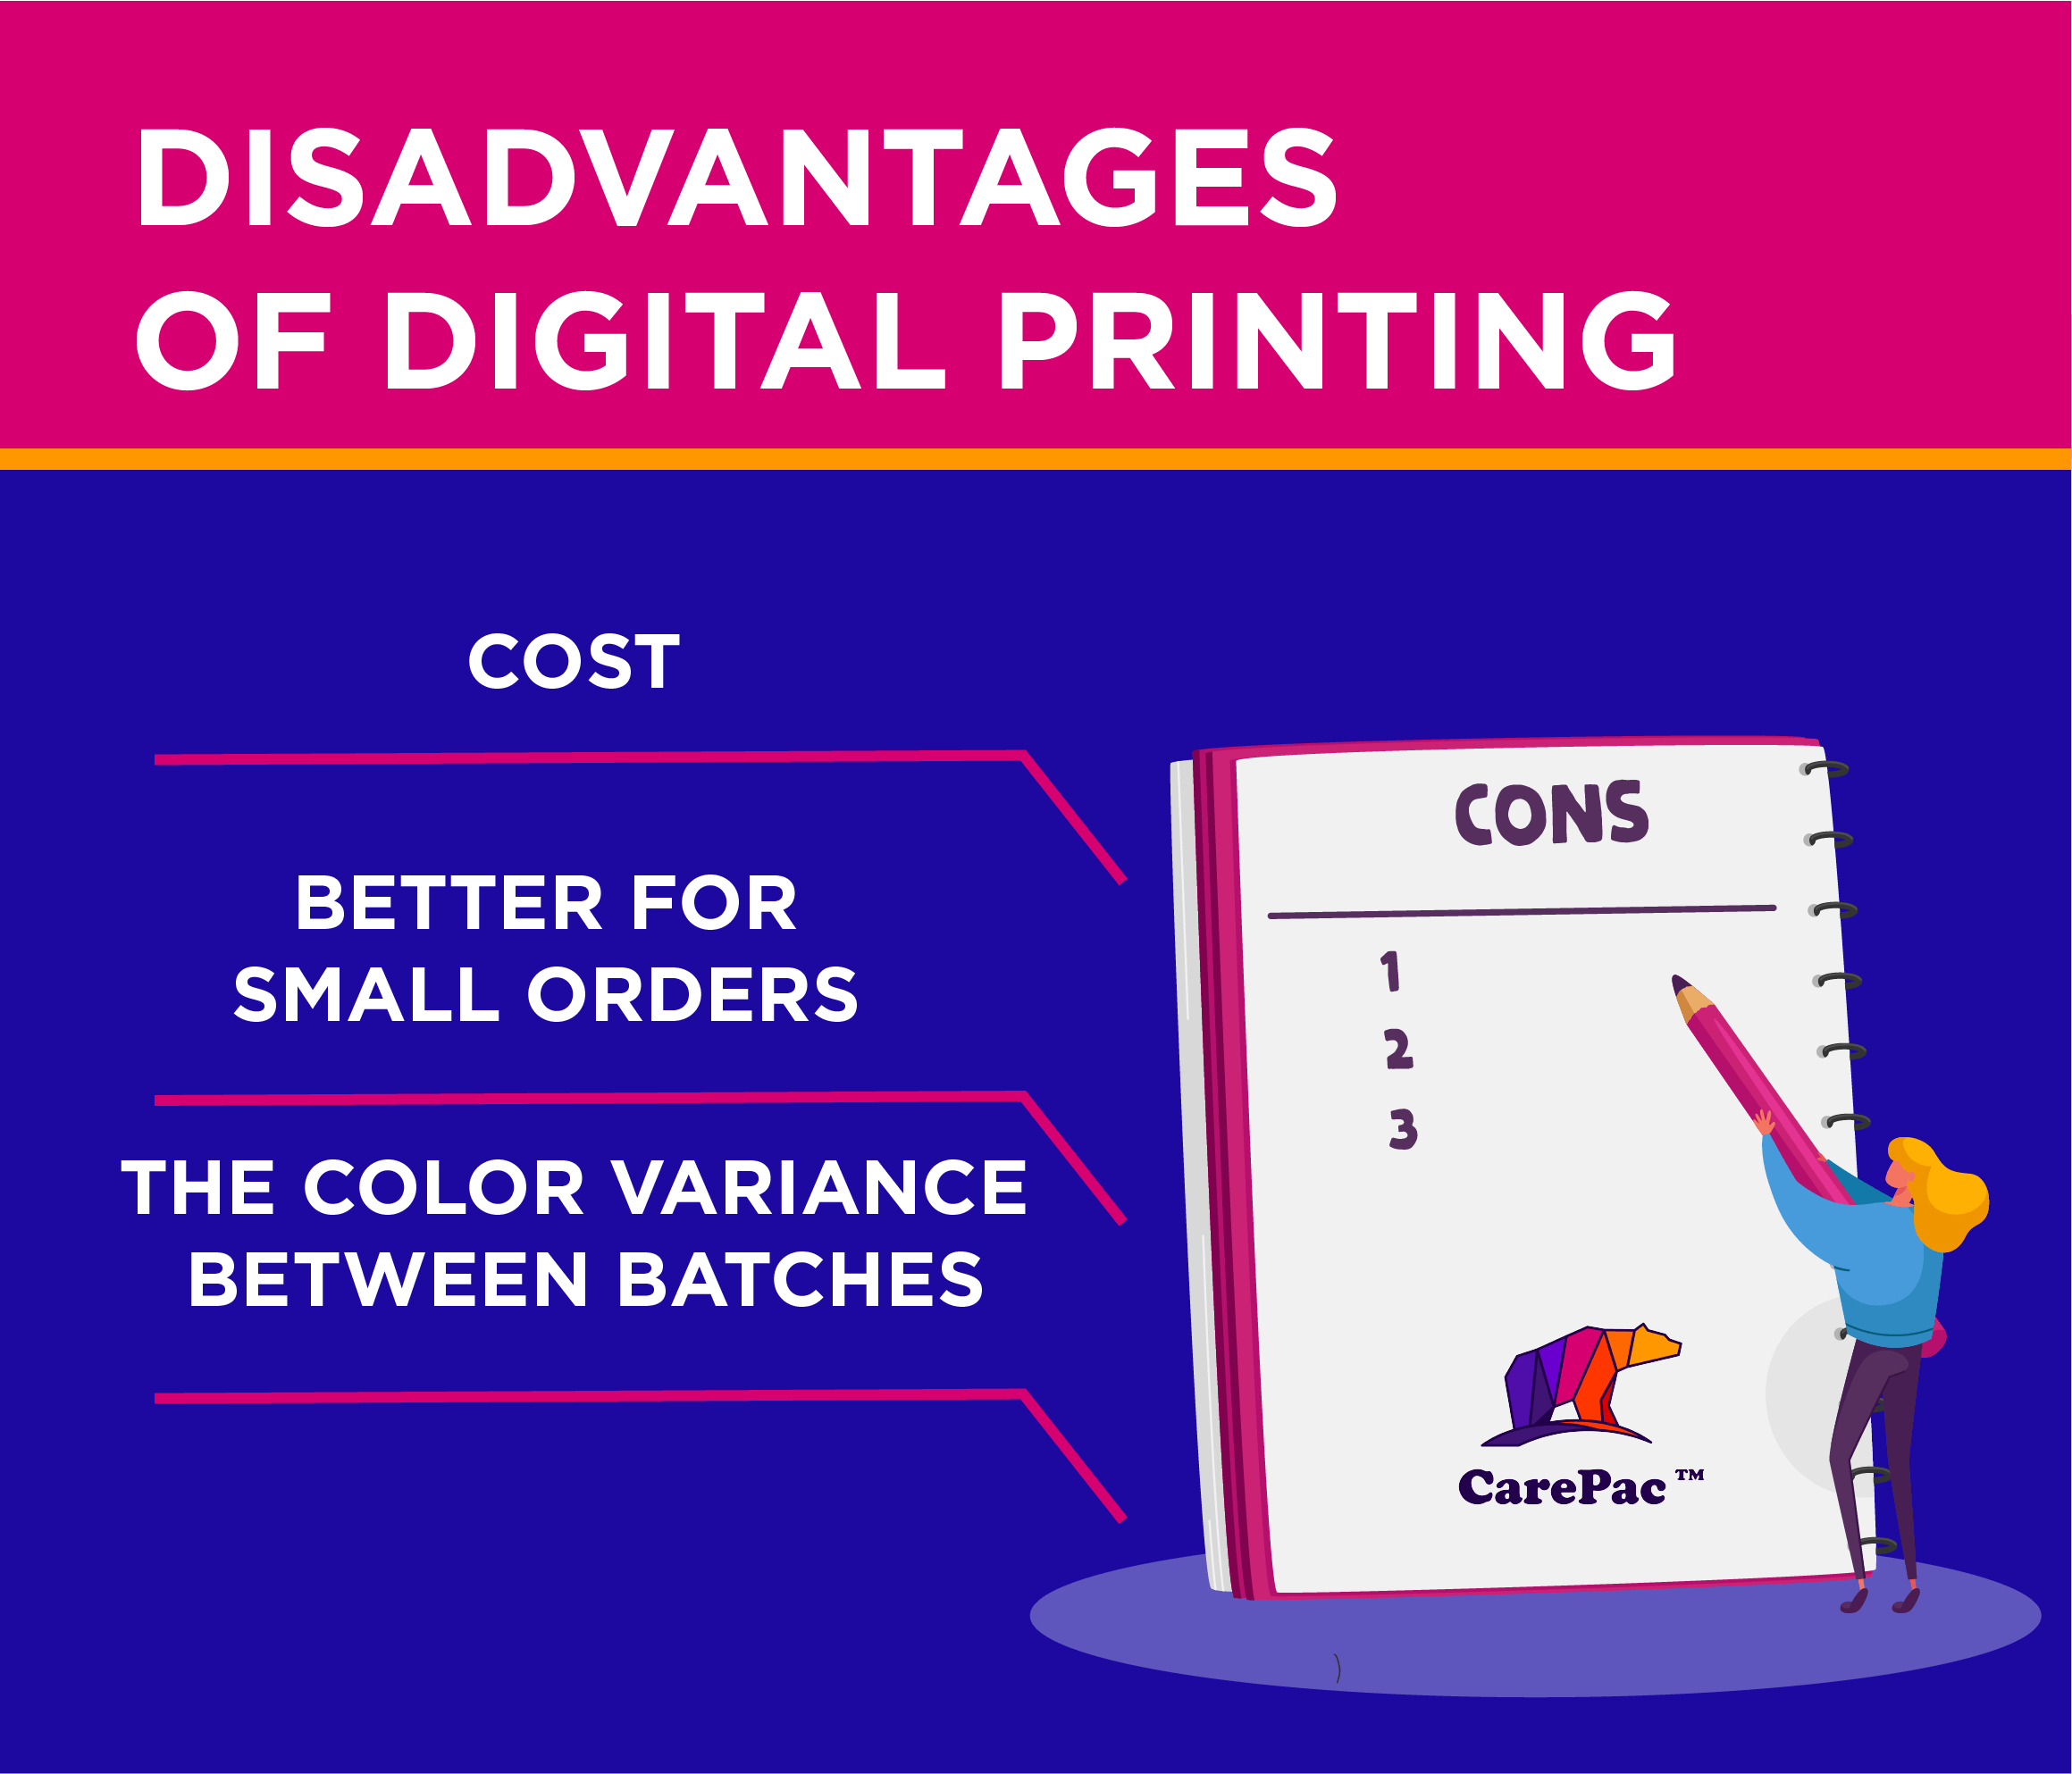
    The advantages of digital printing should be obvious by now, so what are the disadvantages? We’d be lying to you if we said printing on smooth plastic sheets was the perfect printing option for everyone. As with everything, there are some unique disadvantages to digital printing. The primary disadvantage is the cost — the quick turnaround, low MOQs, and greater flexibility does come with a slightly higher price tag. Ultimately, this isn’t the best option for very large orders.
    3 Disadvantage of Digital Printing for Flexible Packaging Production Limit for Small Order Color Quality Expensive

    The other disadvantage of digital printing is the color variance between batches. While there is rarely much variance within a single order, your next order may look slightly different. This has to do with the level of color calibration at the time of printing. This color variation is more apparent with lighter colors, so if your project mostly uses primarily dark colors you probably won’t even be able to notice the difference! Also the whites ink used with digital printing will be less opaque than other print processes.

    Shrink materials and plastic films for digital printing

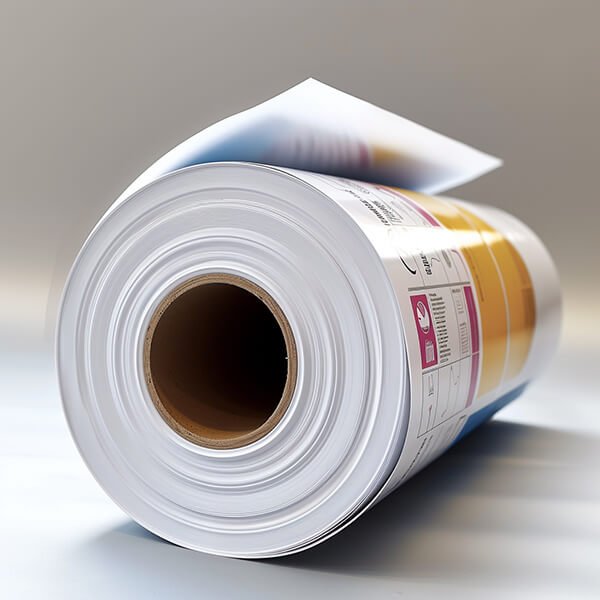
    For our digital printing projects, we don’t actually print individual bags. Instead, we print rolls of material that’s laminated and converted separately into bags. Although any base material can be digitally custom printed, here are some of the most common materials and plastic film sheets we use for our digital printing projects: 

    PET/VMPET/NY/PE

    Care Silver

    This is our line of metalized PET films, and is an economical and effective option for pouches. Care Silver is free from toxins, including BPA, TSE and sulfur, and Phthalates. 

    PET/PA/PE

    Care Clear

    Clear barrier films are the backbone of barrier packaging. Our clear base barriers are affordable and provide protection against moisture and oxygen. 

    PET/AL/PA/PE

    Care Foil

    Like clear barrier films, foil barrier packaging materials offer an incredible barrier to oxygen and water. Our CareFoil material gives you the barrier of aluminum with the added strength of mylar. 

    Looking for a material that isn’t on this list?

     
    Browse all our materials, or reach out to us for more information. Our helpful customer support team is ready to answer any and all of your questions.

    CarePac offer Digital Pouch Printing Services - Custom Printed Flexible Packaging For Lay Flat & Stand Up Pouches

    Digital printed bag features, services, and configurations

    At CarePac, we love customization and ensuring that the bag you design has all the features you want. The below customization options aren’t limited to our digitally printed bags, either. Whether you custom order digital printed bags or go with one of our in-stock bags printed with plates, below are just some of the features you can include on your bag. Have something else in mind? Get in touch! We’re flexible!

    Popular configurations

    Our bags will protect your products from coming into contact with moisture, oxygen, and other contaminants and can be purchased in a variety of configurations, including stand up pouches, 2-seal pouches, tamper evident pouches, child resistant pouches (great for the cannabis industry!), and side gusseted bags, among others. View all our bag configurations here. 

    Popular features 

    We’re proud to offer a wide variety of fully customizable features that can help you market and sell your product. Some of those features include zippers, hang holes, tear notes, degassing valves (a must if you’re in the coffee industry!), and pull tab zippers. For a full list of all our features, check out all our configuration options here.

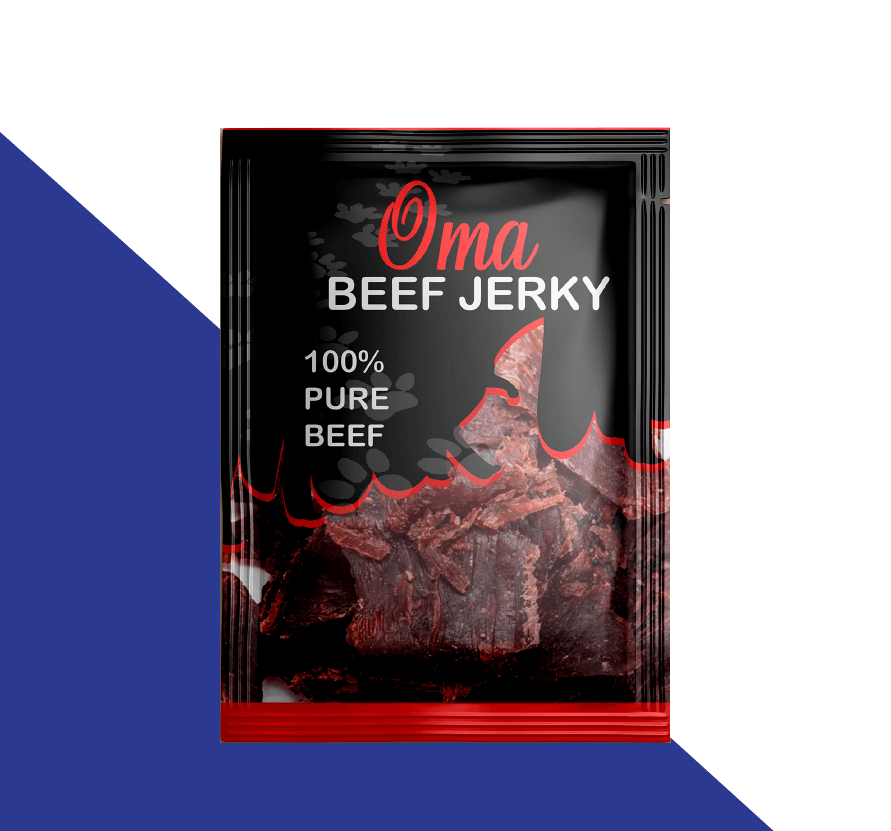
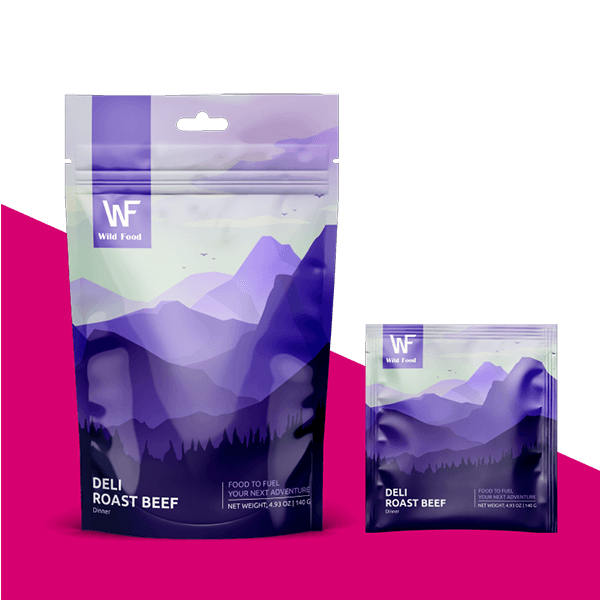
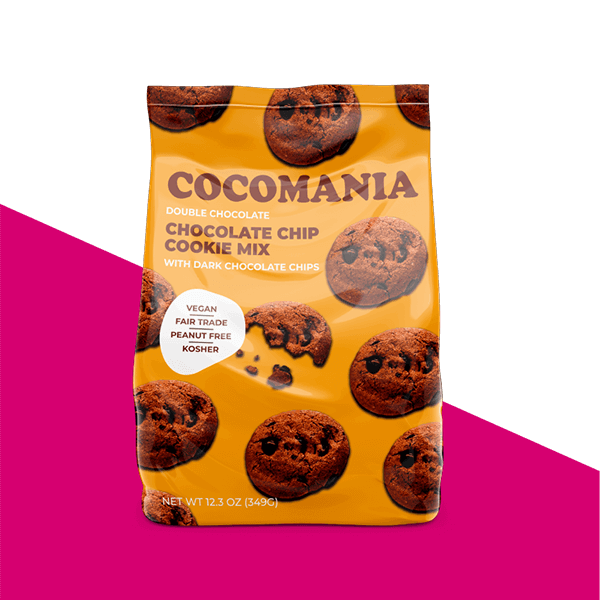
    Digital Printing Matte Mylar 3 Side Seal Beef Jerky Snack Packaging Zipper PouchFood Safety Pouch serve as Camping Food Pouches Digitally Printed PackagingColourful Snack Nuts Bag Plastic Packaging Digital Printing Stand Up Bag With Zipper Doy Pack Bottom Food Grade Custom PouchDigital Printing Aluminum Foil Cookie Packaging Quad Seal Flat Bottom Stand Up Pouch Top Sealed

    Experience the CarePac difference…today

    CarePac specializes in custom digital printing projects for a variety of industries, from cannabis wholesalers to food and beverage distributors. We have exceptional customer service reps who are committed to making sure your order is completed to absolute perfection.

    Matte Finish high end artisanal look Digital Printed Stand Up Pouches

     With our CareDesign® process  you can rest assured that your digital print project will be done right, no matter what. 

    From nailing down the right colors to making sure the logo is in the right place, we understand you put a lot of time into perfecting the look and feel of your product packaging. With vivid colors, quick printing, and a variety of materials to choose from, we have the tools, the technology, and the expertise to make your project a reality. Ready to experience the CarePac difference? Get a quote today!