Category: Other Packaging Topics

  • Coffee Bag Design: Ideas, Materials & Examples for Roasters

    Coffee Bag Design: Ideas, Materials & Examples for Roasters

    Coffee Bag Design: 15 Brand Examples + How to Build Packaging That Sells

    Some of the Best Coffee Packaging Designs

    Coffee bag design is one of the most important branding decisions a roaster makes. Before a customer tastes your coffee, your packaging has already shaped their perception of your product’s quality, value, and personality. Whether you’re launching a new roast, refreshing an existing brand, or preparing to order custom coffee bags, the right design can help you stand out in a crowded market and drive more sales.

    Effective coffee bag design goes beyond looking good on a shelf. It helps customers quickly understand what sets your coffee apart, reinforces your brand story, and creates a memorable first impression in both retail and online environments. Every choice, from bag shape and material to color palette, typography, and graphics, contributes to how customers perceive your product.

    In this guide, we’ll look at standout coffee packaging examples from successful brands and break down the practical decisions behind their designs. You’ll see how different companies use packaging to communicate quality, attract their target audience, and build brand recognition, while also learning how to apply those same principles to your own coffee bags.

    The best coffee packaging balances function and branding. Customers should be able to quickly identify your coffee, understand its key characteristics, and remember your brand after the purchase. By studying what works—and why—it becomes much easier to create packaging that not only looks great but also supports your business goals.
    What Makes a Great Coffee Bag Design?

    A great coffee bag design does more than catch someone’s attention; it helps them make a purchasing decision. The best designs communicate key information quickly, making it easy for customers to identify your brand, understand what’s inside the bag, and feel confident about the product they’re buying.

    Clarity

    Clarity is the foundation of effective coffee packaging. Your logo, coffee name, roast level, and other essential details should be easy to find and read at a glance. If customers have to search for basic information, they’re more likely to move on to another product.

    Differentiation

    Differentiation matters just as much. Coffee shelves are crowded, and online shoppers often scroll through dozens of products before making a decision. Strong colors, distinctive graphics, unique typography, or a well-designed bag label can help your product stand out from competitors while remaining professional and recognizable.
    Aligned With Your Brand

    The design should also align with your branding. A premium single-origin coffee may call for a refined, minimalist look, while a playful specialty blend might benefit from bold illustrations and vibrant colors. The packaging should accurately reflect the experience customers can expect from the coffee inside.
    Works With the Package

    Finally, great design works with the package itself. Graphics, labels, and messaging should complement the bag format, available print area, and functional features. When branding and structure work together, the result is packaging that looks better, performs better, and creates a stronger impression with customers.

    Coffee Bag Shapes & Formats

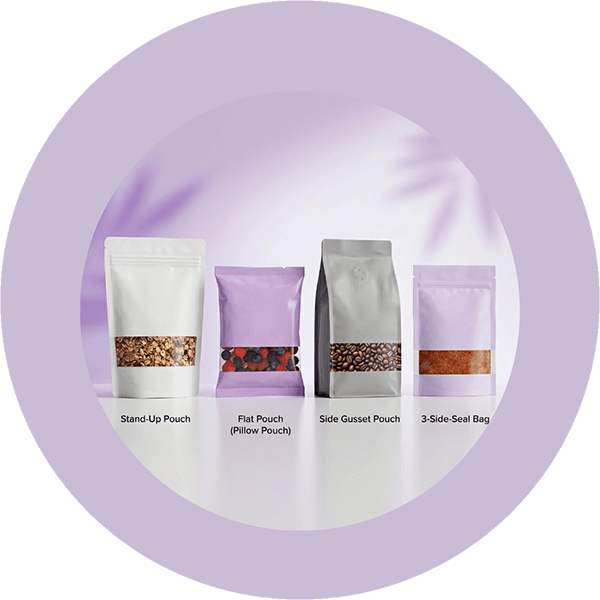
    Before you choose colors, graphics, or labeling, it’s important to choose the right bag format. The structure of the package influences everything from shelf presence and perceived value to filling efficiency and shipping costs. Some formats are designed for high-volume production, while others help specialty roasters create a more premium presentation.
    Side Gusset Bags

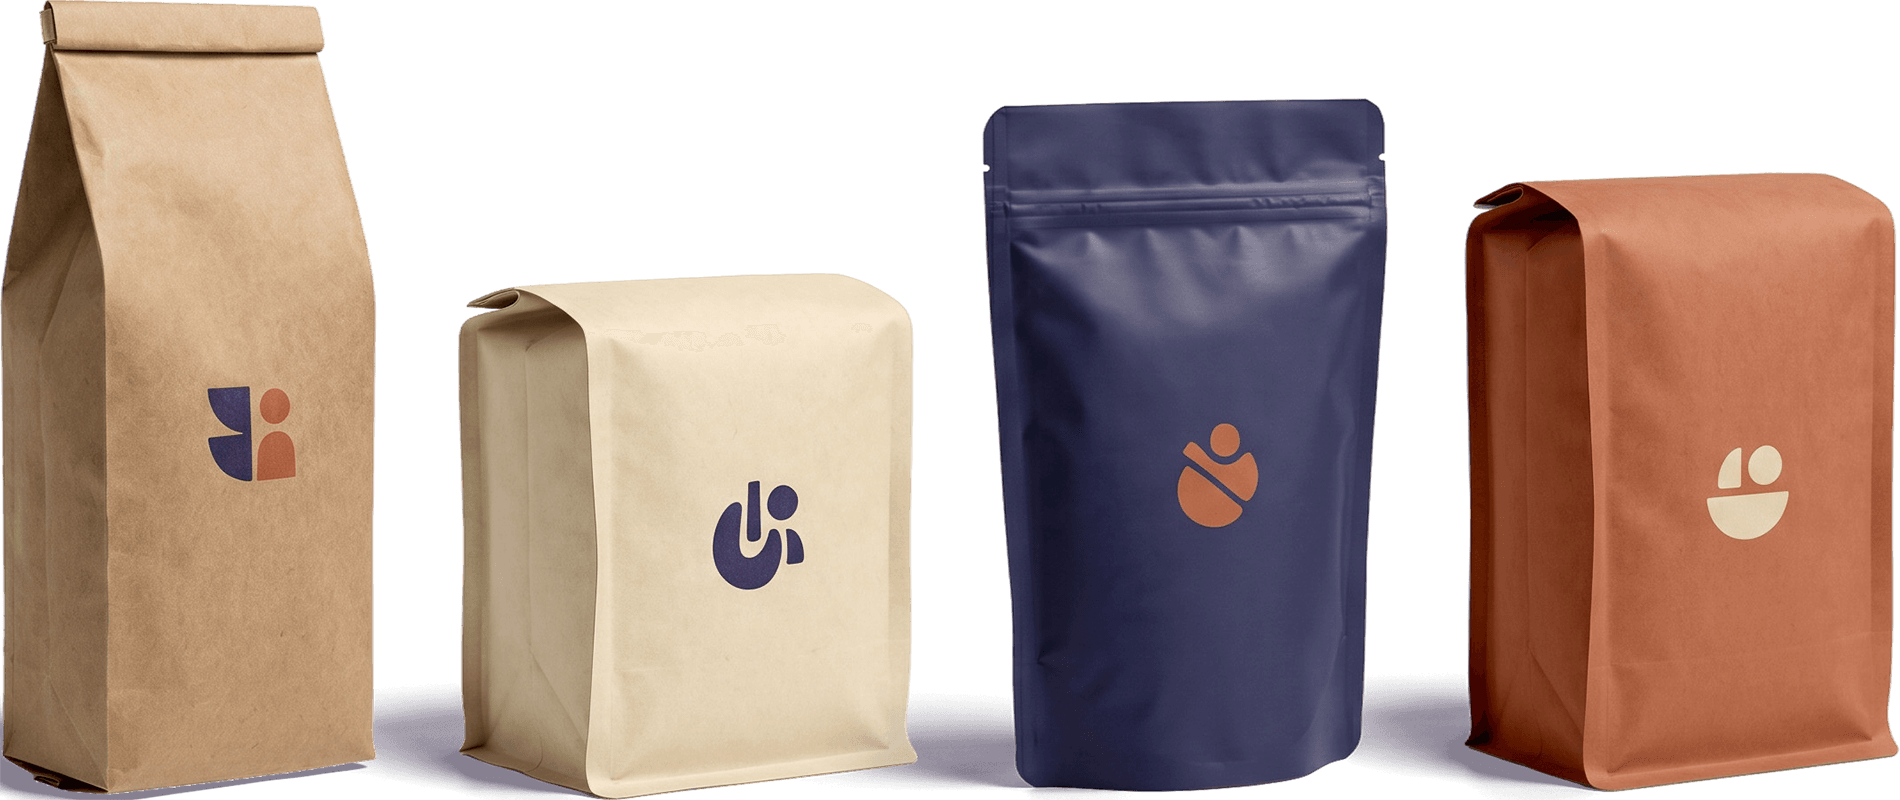
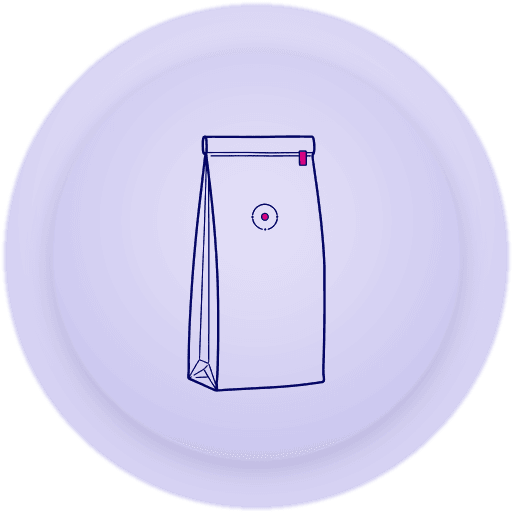
    Side gusset bags are one of the most recognizable coffee packaging formats. The sides expand as the bag fills, creating the classic coffee shop shelf appearance that many consumers immediately associate with coffee.

    For roasters producing higher volumes, side-gusset bags are often a cost-effective choice. They maximize storage efficiency, work well with automated filling equipment, and provide ample space for labels or printed graphics. The primary design challenge is that much of the available surface area wraps around the sides, making layout planning especially important.
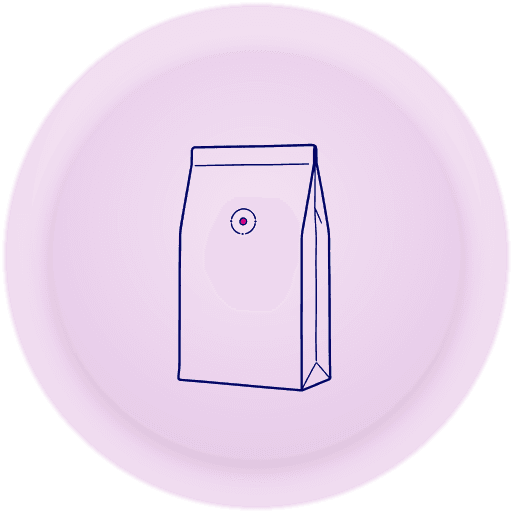
    Flat Bottom / Square Bottom Bags

    Flat-bottom bags, sometimes called square-bottom bags, have become increasingly popular among specialty coffee brands. Their stable base allows them to stand upright while providing large, uninterrupted panels for branding and product information.

    These bags typically create a more premium appearance than traditional side gusset bags and offer excellent shelf presence in retail environments. Designers have more room to work with, making it easier to showcase logos, illustrations, tasting notes, and other visual elements without feeling crowded.
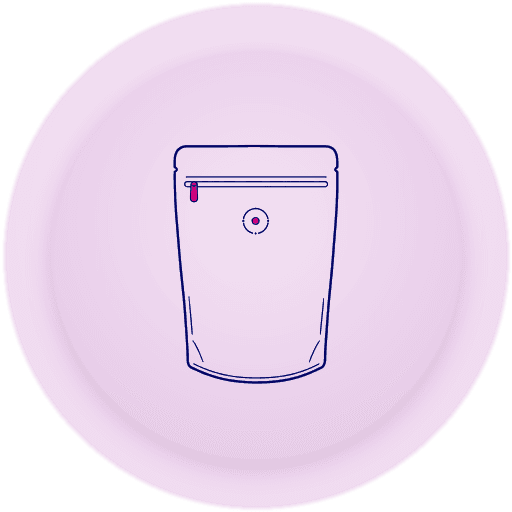
    Stand-Up Pouches

    Stand-up pouches combine flexibility, convenience, and strong visual impact. Their bottom gusset allows them to stand on shelves while maintaining a lightweight, efficient package structure.

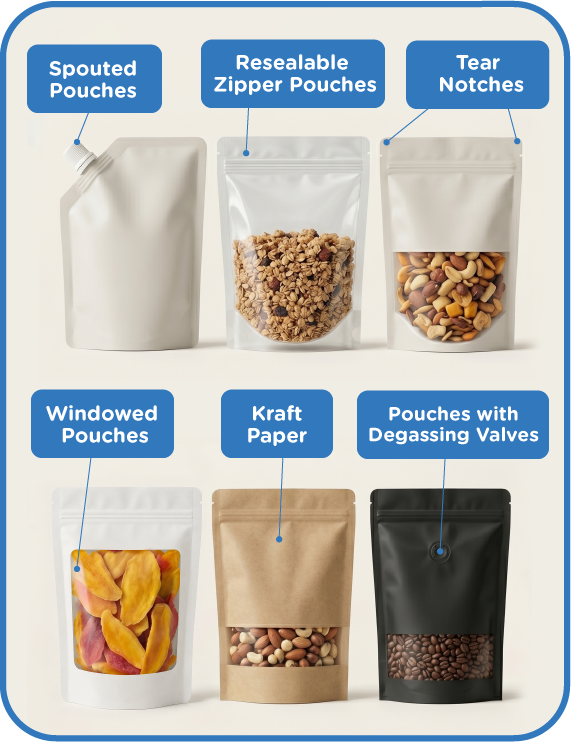
    Many direct-to-consumer and e-commerce coffee brands favor stand-up pouches because they ship efficiently and offer ample front-facing space for branding. They’re also highly compatible with common coffee packaging features such as resealable zippers and one-way degassing valves, making them a versatile option for a wide range of products.

    Quad Seal Bags

    Quad seal bags feature four sealed vertical edges that create a rigid, box-like appearance. This structure helps the bag maintain its shape even as the product is removed, resulting in a polished, high-end presentation.

    For brands pursuing a premium or luxury positioning, quad seal bags offer some of the strongest shelf presence available. The multiple panels create opportunities for organized messaging and sophisticated graphics, while the rigid structure conveys quality and attention to detail. Although they often come at a higher cost than other formats, many specialty roasters view them as an investment in brand perception and retail impact.

    Key Graphic Elements in Coffee Bag Design

    Once you’ve selected a bag format, the next step is deciding how your brand will appear on it. The most effective coffee packaging doesn’t happen by accident; it comes from making deliberate choices about how customers will see, understand, and remember your product. Whether you’re briefing a designer or reviewing concepts, these are the key graphic elements that deserve your attention.
    Logo & Logomark Placement

    Your logo is usually the first thing a customer notices, making it the visual anchor of the package. It should be visible from a distance, easy to recognize, and positioned consistently across your product line.

    When evaluating a design, consider how the logo will appear across different bag formats and sizes. A logo that works well on a large flat-bottom bag may become difficult to read on a smaller pouch. Strong coffee brands create systems that scale effectively across multiple package types while maintaining consistency and recognition.

    Typography

    Typography does more than display information. It communicates personality before a customer reads a single word.

    Serif typefaces often signal tradition, craftsmanship, or premium positioning, while sans-serif fonts tend to feel modern, approachable, and contemporary. The most important consideration, however, is legibility. Roast names, origin information, and product details should remain easy to read on retail shelves and in online product photos.

    Color

    Color is one of the fastest ways to influence perception and differentiate products.

    Dark packaging often communicates premium quality, sophistication, and bold flavor profiles. Natural kraft materials can suggest artisanal production, sustainability, or small-batch craftsmanship. Bright, saturated colors are frequently used by newer specialty roasters looking to disrupt category expectations and stand out in crowded retail environments.

    A well-developed color system can also help customers quickly distinguish between blends, roast levels, and seasonal offerings.

    Information Hierarchy

    Customers shouldn’t have to search for the information that matters most.The strongest coffee packaging follows a clear hierarchy: brand name first, coffee name or roast second, and supporting details afterward. Information such as origin, processing method, altitude, tasting notes, certifications, and brewing recommendations should be organized in a way that feels intuitive rather than overwhelming.

    When reviewing a design, ask yourself: what does a customer notice in the first three seconds? If the answer isn’t clear, the hierarchy probably needs work.

    Illustration vs. Pattern vs. Minimal Design

    The visual style you choose tells customers what kind of brand you are before they ever taste the coffee.

    Illustration-heavy packaging often communicates creativity, storytelling, and personality. Pattern-driven designs can create a cohesive visual system across multiple products while maintaining strong shelf impact. Minimalist packaging strips away distractions and focuses attention on typography, materials, and product information.

    None of these approaches is inherently better than the others. The right choice depends on your brand positioning and target audience. As you’ll see in the brand examples later in this guide, some companies use bold artwork to create instant recognition, while others rely on restraint and simplicity. Koffee Kult, for example, demonstrates how limiting color and visual complexity can actually make typography and branding more memorable.

    15 Coffee Bag Designs Worth Studying

    If you’re planning new coffee packaging, one of the best places to start is by studying what already works in the market. The goal isn’t to copy another brand’s look—it’s to understand the decisions behind it and identify ideas that align with your own positioning, audience, and product lineup.

    The examples below showcase a variety of successful coffee bag design styles, from minimalist typography and premium monochrome packaging to bold illustrations and highly recognizable color systems. Each brand takes a different approach to branding, information hierarchy, and shelf presence, but all of them use packaging strategically to communicate value and attract customers.

    As you review these examples, pay attention to what each design is trying to accomplish. How does it stand out? What does it communicate about the coffee inside? And what elements could inspire your own packaging strategy? These aren’t just attractive coffee bags—they’re practical lessons in how effective packaging can shape customer perception and strengthen a brand.
    1

    Intelligentsia

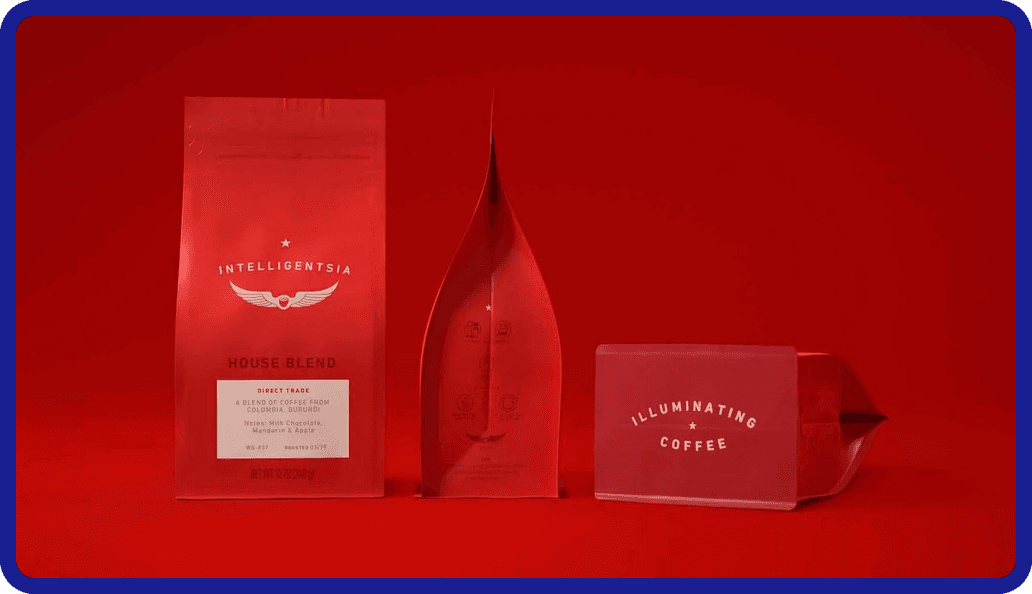
    Intelligentsia Coffee is a far-reaching brand united by its solid logo design and confident red packaging. In this strategy, their wingtip logo is central to the packaging design, backed by a deliberate choice in bold color. The typographic elements are low-contrast, simple, and easy to read on closer inspection, as if the bag wants to catch your eye with the royal red and immediately give you the necessary information. Intelligentsia sources from multiple farms, sporting a “democratic” approach to artisanal coffee. Using a square bottom configuration makes the bag stand out and emphasizes details more. When you’re looking for coffee blends and you see these wings, you know it’s Intelligentsia.

    Takeaway:

    Intelligentsia Coffee shows how a strong, consistent logo paired with bold color and clean typography can create instant brand recognition and clarity, with its red square-bottom bags and winged mark making the product immediately identifiable across diverse coffee offerings.

    2

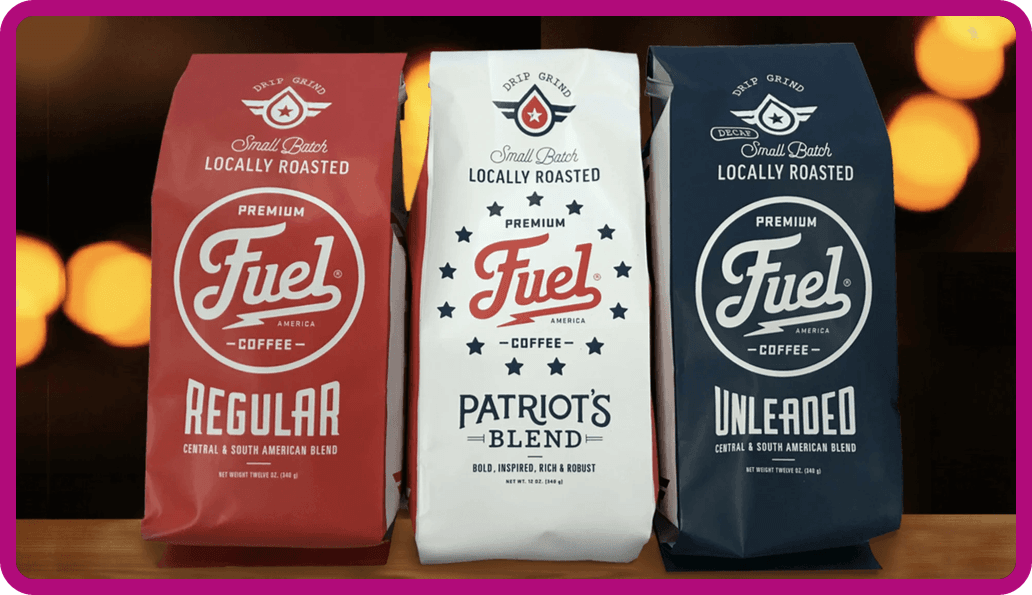
    Fuel America

    To contrast the driving force of a logo, Fuel America’s wordmark-centric identity borrows from the vintage American automobile and “trucker” aesthetic to deliver playful but legible typography. Their wordmark is front and center, decorated with circular layouts and modified lettering that calls attention to itself. This side gusseted style uses the information to decorate the bag, without losing the ability to read it quickly. You’ll notice that while Fuel America has its own logomark at the top of the bag, the wordmark is what catches the eye first and foremost.

    Takeaway:

    Fuel America demonstrates how a wordmark-led coffee bag design can use vintage-inspired typography and circular layouts to create a playful, highly legible identity, in which the brand name itself becomes the primary visual hook while still maintaining a clear, functional packaging structure.
    3

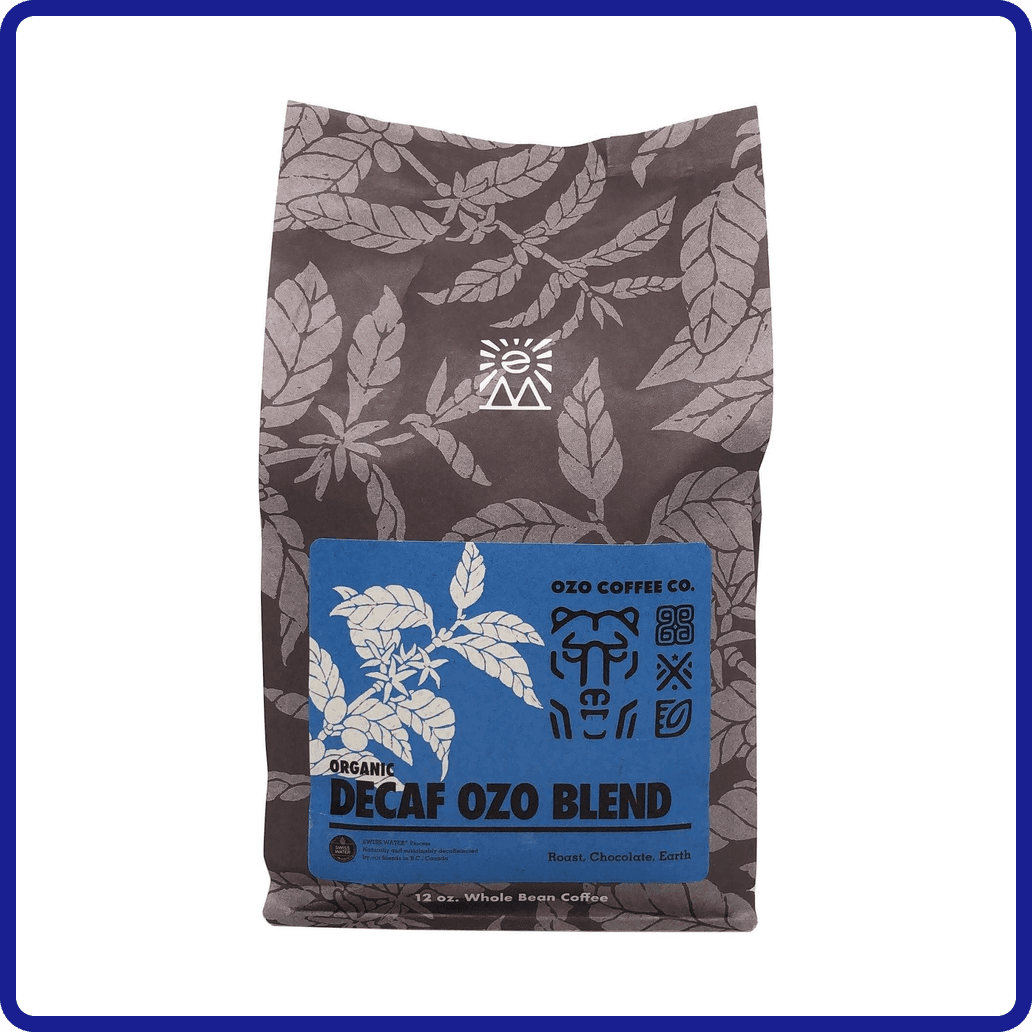
    Ozo Coffee

    Ozo Coffee has made the rounds online for their “glyph system,” which they’ve transitioned into a smaller role for their new bag designs. This brand is a great example of pattern designs, with the earth-toned grainy florals covering their entire square bottom bag. On the label, their “glyphs” are still used to signify the specifics of their coffee sourcing: region, origin, processing, taste, and elevation.

    These are a series of icons and symbols with a “key” to decode each shape, developed so that the dedicated buyer is rewarded for reading into the design. It’s not necessarily a game like the back of a cereal box because it actually provides the patient eye with more information on the brand. That’s an accomplishment on its own, but their use of these glyphs and florals to texturize and add intrigue to the overall look is what marks them as a great example of pattern usage.

    Takeaway:

    Ozo Coffee is a strong example of how pattern-driven coffee bag design can add depth and visual texture while still carrying meaningful product information, using earth-toned floral patterns and a refined glyph system to turn the packaging into both a visual and informational experience.

    4

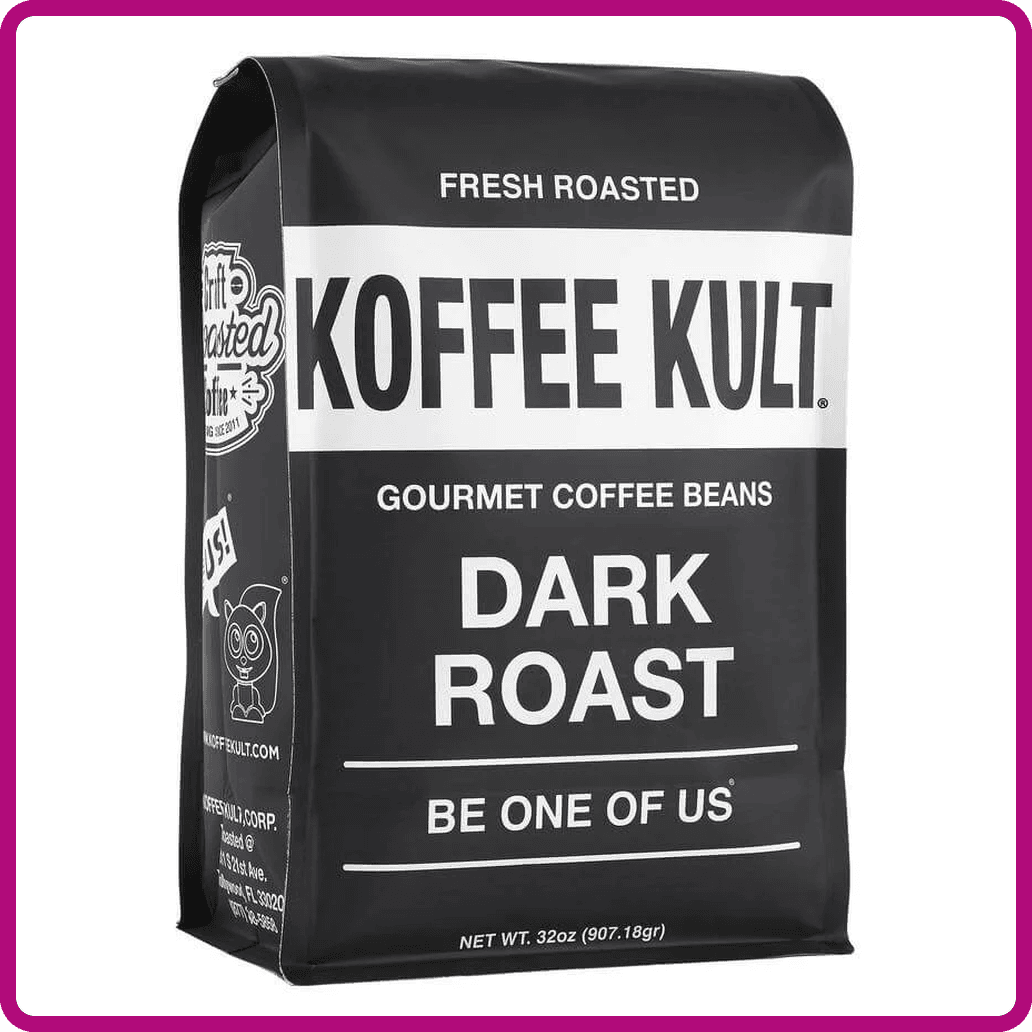
    Koffee Kult

    Koffee Kult grabs attention by running the opposite direction from other bags on the shelf: simple black-and-white with strong modern typography. The letters are doing the work in this presentation without being shaped or warped for decoration. Typography is an entire industry built around making letters legible, playful, professional, or nearly any aesthetic a business might need. For this square bottom bag, the use of the tried and true, simple yet effective modern typeface accomplishes so much on its own. Koffee Kult complements this with small playful drawings on the side folds.

    Monochromatic designs represent a deliberate choice not to use color. This trend is used to great effect by many brands, where the choice of what color to pick can be avoided altogether and still be as visually competent as a bag in royal red, for example. When color is removed, a strong focus can be applied to the package design.

    Takeaway:

    Koffee Kult demonstrates how a monochromatic, typography-first coffee bag design can create strong shelf impact without relying on color, using bold black-and-white contrast and modern type to let the brand name itself carry the visual weight while reinforcing clarity and confidence.
    5

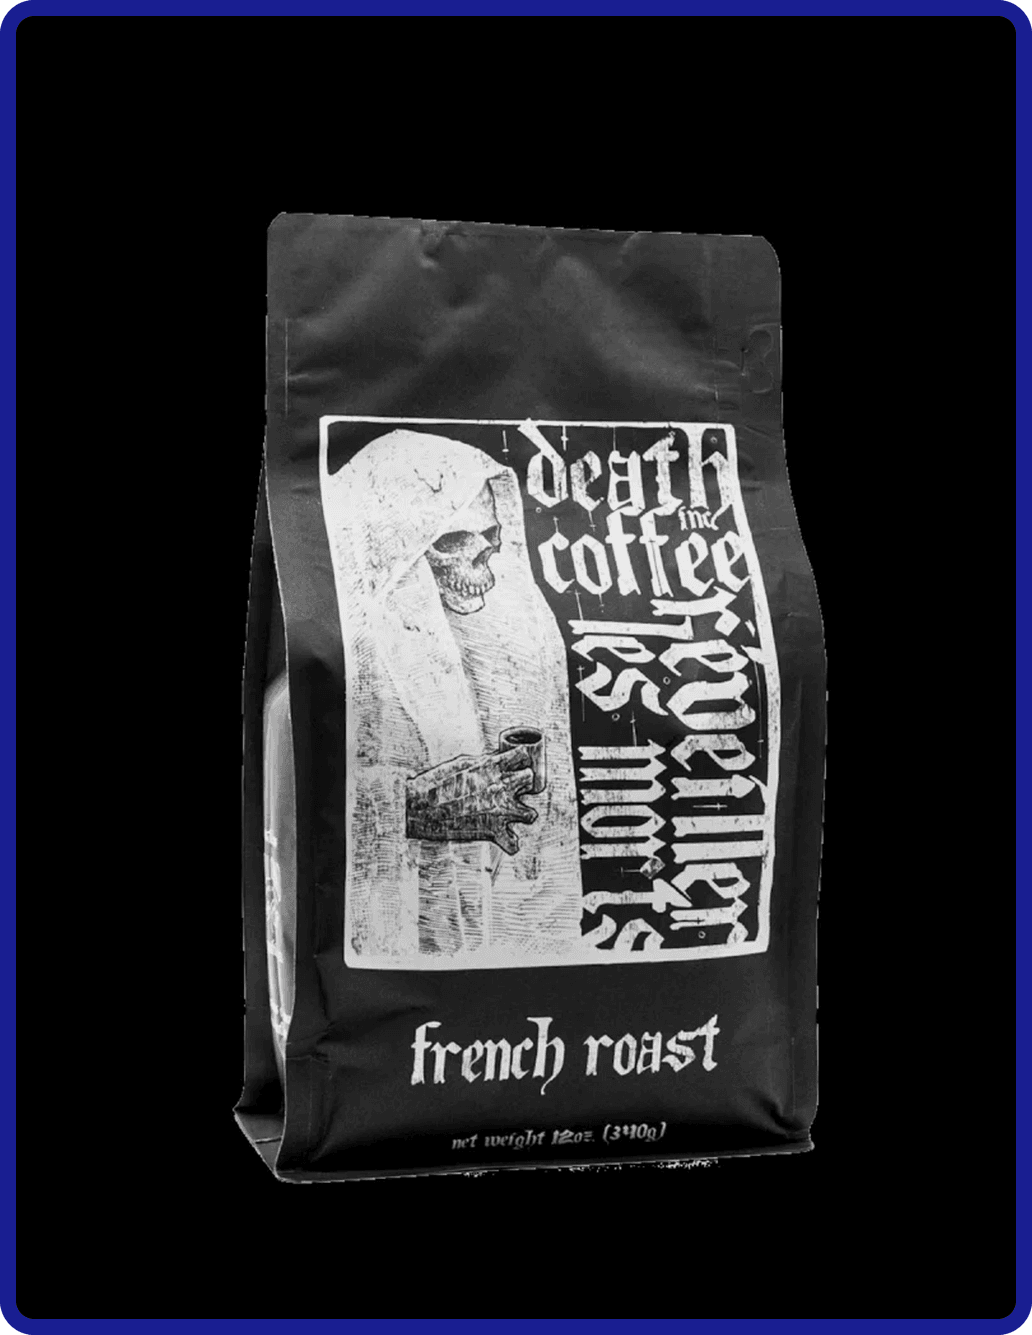
    Death Inc. Coffee

    The death metal aesthetic of skulls and blackletter calligraphy are well-executed by Death Inc. Coffee, with another set of monochromatic bag designs that rely on their illustrations to catch the buyer’s eye. Multiple illustrations across their selection give each roast its own curated appeal, and the sharp ink-work of the grim reapers dominates the focus of the box bottom bag. Strong illustration work will present a great use of the “negative space”: how the blacks and the whites are distributed in an aesthetically pleasing way.

    Death Inc. Coffee maintains an edge of visual interest with its monochromatic choice, rather than a contemporary focus. The typography here is scratchy, brutal, and more decorative than the extremely functional sans-serif fonts out there. The calligraphic letters are used primarily for style, but hearken back to the beginnings of typography when the digital touch didn’t exist.

    Takeaway:

    Death Inc. Coffee shows how a monochromatic, illustration-led coffee bag design can create powerful shelf presence through heavy contrast, detailed artwork, and expressive blackletter typography, using skulls, grim reapers, and dense ink work to turn each roast into a distinct visual statement while maintaining cohesion across the lineup.

    6

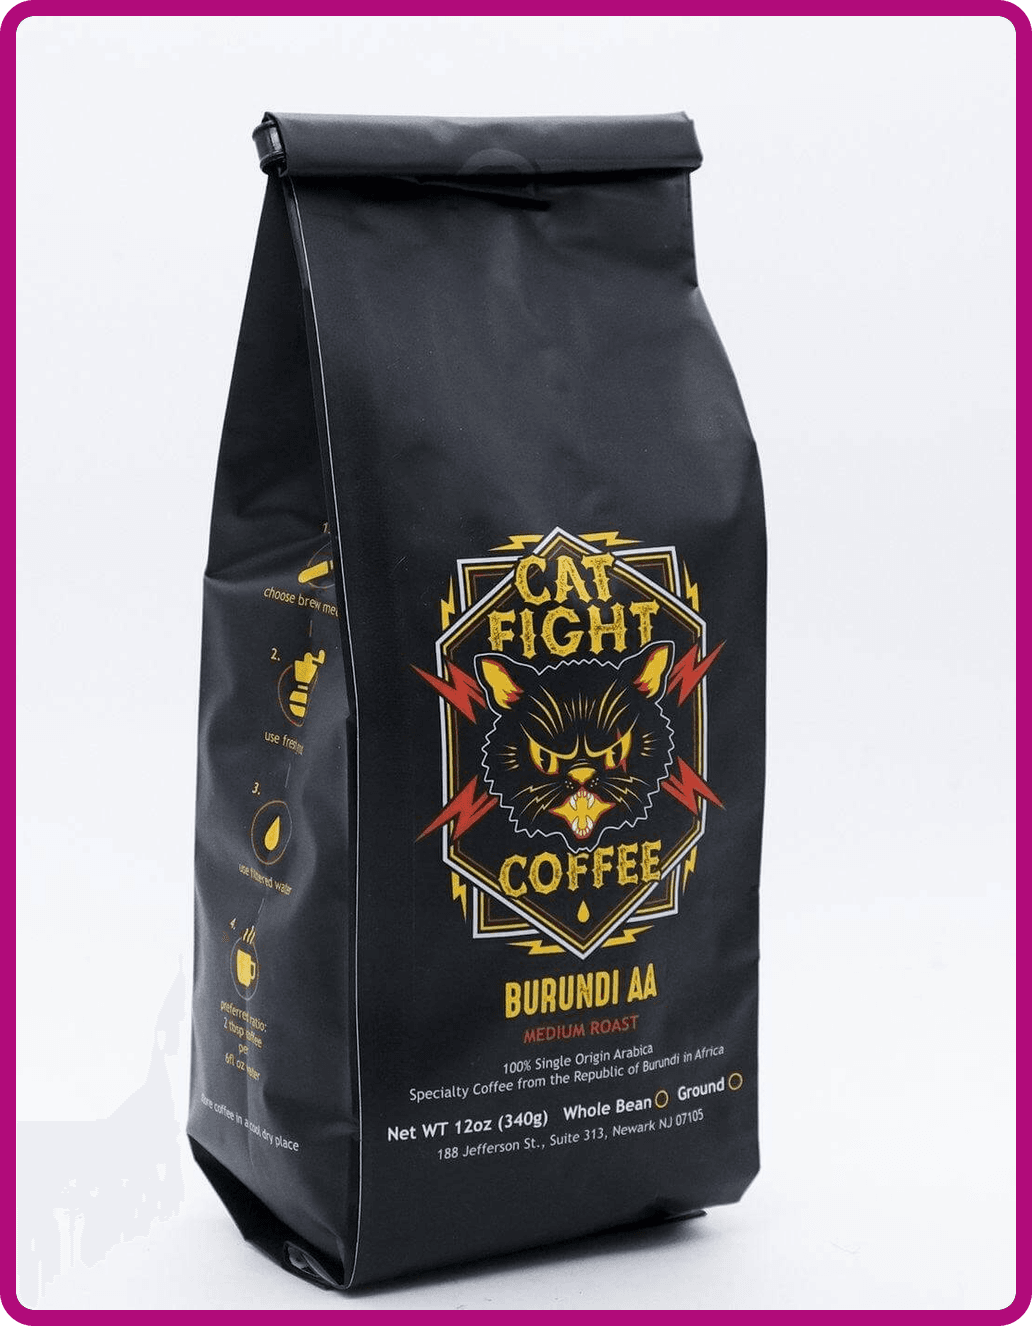
    Catfight Coffee

    Catfight Coffee has built its branding around immediate contrast and attitude, using a name and visual identity that are intentionally provocative and hard to ignore. The brand leans into bold, high-energy imagery—often featuring stylized cats in confrontational or boxing-inspired poses—to create a sense of competition, intensity, and personality right at the shelf level. Instead of trying to blend into the more muted, minimalist wave of specialty coffee, Catfight positions itself as loud, playful, and slightly irreverent, which helps it stand out in both retail environments and online marketplaces where attention is limited.

    From a branding perspective, Catfight Coffee’s strength lies in its consistent tone. The visual system typically relies on strong contrast, punchy typography, and a limited but aggressive color palette that reinforces the “fight” concept. This makes the packaging feel cohesive across blends while still giving each product enough variation to be distinct. It also communicates a clear brand stance: this is coffee with personality, not just product information. For customers, that clarity can be powerful—either they resonate with the energy instantly, or they self-select out, which is often exactly what a strong brand identity is designed to do.

    Takeaway:

    Catfight Coffee demonstrates how a provocative, high-energy brand identity can use bold visuals, aggressive tone, and consistent contrast-driven packaging to stand out instantly on the shelf while clearly signaling a personality-led coffee experience that quickly attracts the right audience and filters out the rest.
    7

    Oddly Correct

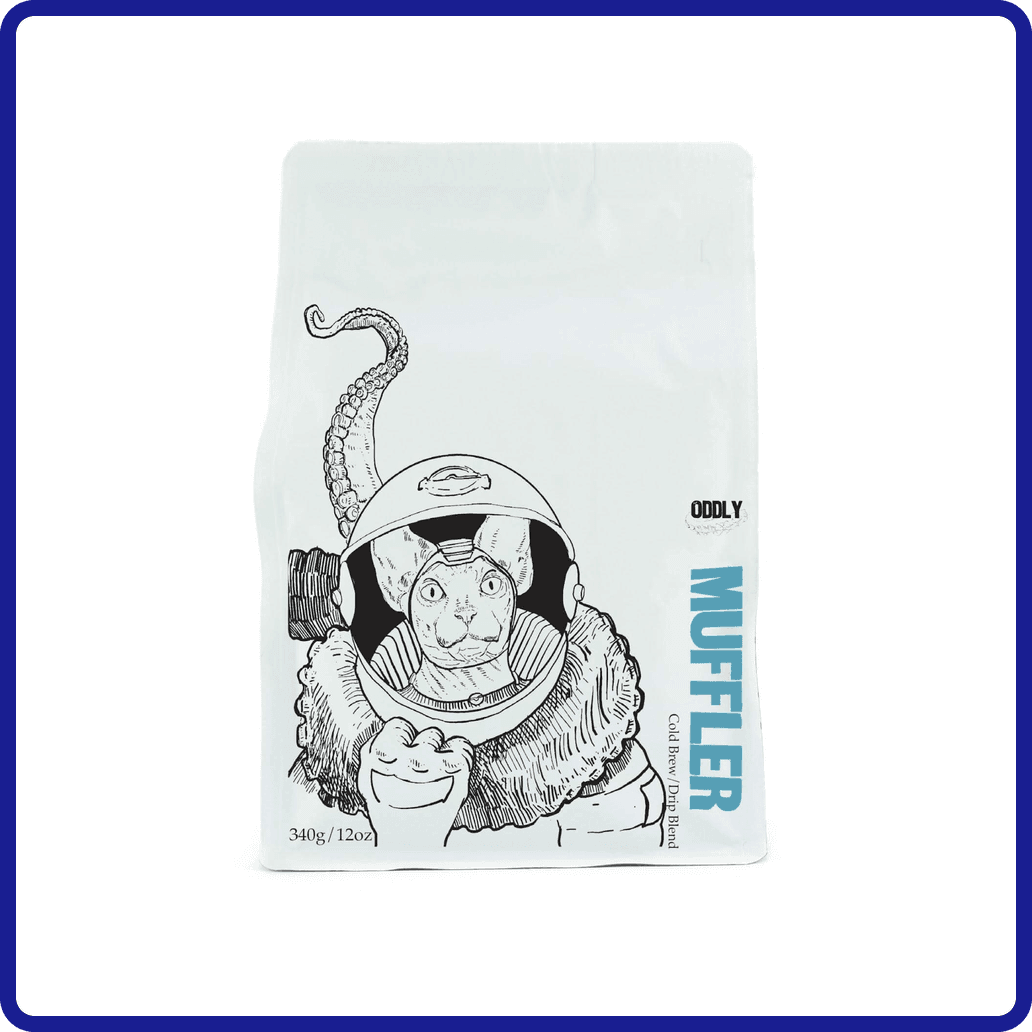
    There’s a simplicity in black, white, or even paper brown bags when they’re chosen over bold matte or gloss colors; a reliable trend that is unlikely to disappear soon. Oddly Correct Coffee places itself on the shelves as a “low-brow/high-quality” brand. Their white square bottom bags are penned with eccentric and thin-lined ink illustrations of space cats, antlered bears, and turtles who all love coffee as much as you do.

    Well-selected illustration is a strong compliment and proven guide for any brand on this list. The past three bags have proven the uses of art for the sake of branding, with each their own unique take on the medium, as well as strong use of the monochromatic. Illustrations tell a story where patterns may serve as pure decoration or texture.

    Takeaway:

    Oddly Correct Coffee shows how a minimalist, monochromatic coffee bag design can still feel distinctive and memorable by pairing simple white packaging with eccentric, story-driven illustrations, using playful line art to reinforce a “low-brow/high-quality” identity that turns restraint into personality and branding clarity.

    8

    Maiden Coffee Roasters

    Each of the previous bag designs represented a different use of logo, type, pattern, or illustration to stake their claim on the shelves, along with deliberate use of color (or black and white). While there is no right answer and each brand’s visual layout has spoken well for itself, sometimes the nuance of design elements is what achieves results.

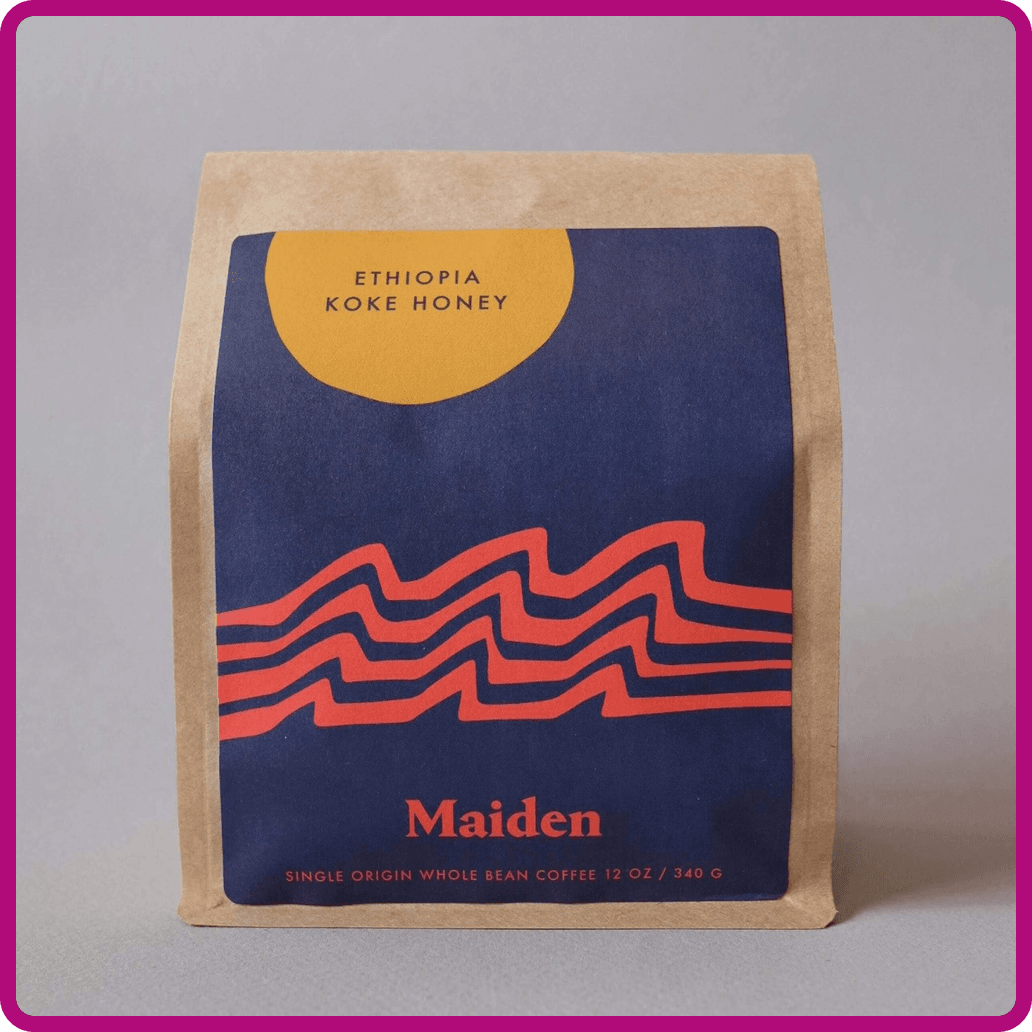
    Maiden Coffee Roasters, for example, has a strong wordmark that can stand on its own. But their main bag designs consist of smooth, geometric nature shapes that sweep across and seem to pass through the print area. They play with slightly subdued primary reds, yellows, and blues; and Maiden elects to strengthen all this real estate by placing only the roast location, in small capitals, wherever the composition allows them to fit.

    Maiden’s new line of square bottom bags utilizes the wordmark first and foremost in gold, with these subtle colors backing them for a cleaner look that still rests in the realm of “Well thought-out, but not pretentious.” They confidently stride out into olive greens, ambers yellows, and oceanic teal while feeling united to their original brand identity.

    Takeaway:

    Maiden Coffee Roasters illustrates how a balanced, design-led coffee bag strategy can evolve across formats while staying visually consistent, using a strong wordmark foundation paired with subtle geometric shapes and restrained color palettes to create packaging that feels intentional, cohesive, and approachable without becoming overly decorative or self-serious.
    9

    Devocion Coffee

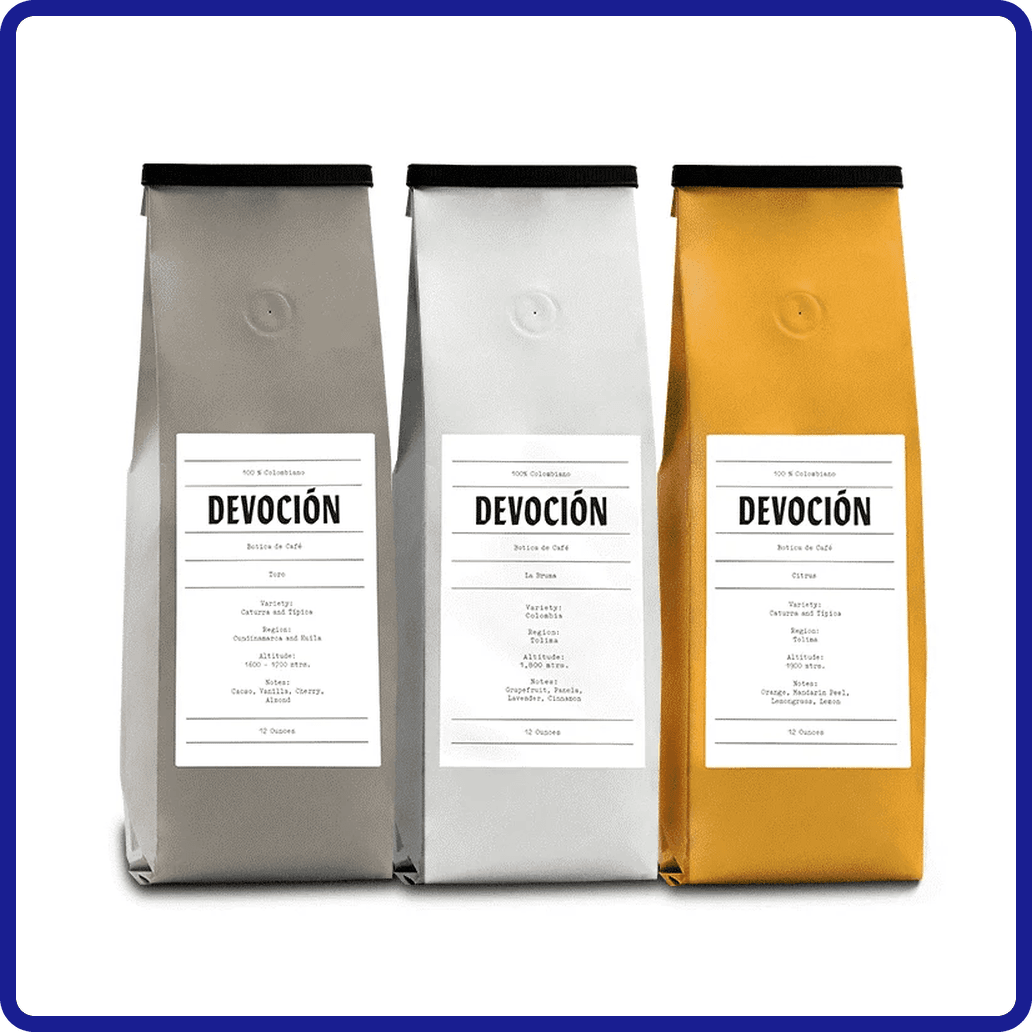
    Somewhere between the timeline of typographic standards lies Devocion’s wordmark: A typeface that might represent the legibility, efficiency, and contemporary nature of Helvetica, but with echoes of hand-drawn Gothic calligraphy from centuries past. All this to say: Devocion’s bags are very simple in design. Everything you need to know is punched on to the bag in small letters, on a traditional elongated bag colored in earth tone or their trademark yellow.

    This simplicity is used to great effect. These side gusseted bags aren’t trying to lure your eye with illustration or pattern; they’re just speaking for themselves. Designs like these emphasize a “come and see” attitude, where the package design isn’t represented as the selling point per se. If your brand’s wordmark can speak volumes, and your coffee bag provides all the information necessary without drawing attention to itself, then the roaster is drawing interest to what they actually do. The focus is on the bean, even though the bag is well-designed.

    Takeaway:

    Devoción demonstrates how a wordmark-led, minimalist coffee bag design can build confidence through restraint, using simple typography, earthy or signature yellow tones, and clean side gusset formats to shift attention away from decoration and toward the coffee itself, creating a “come and see” approach where clarity, origin, and product integrity become the primary branding tools.

    10

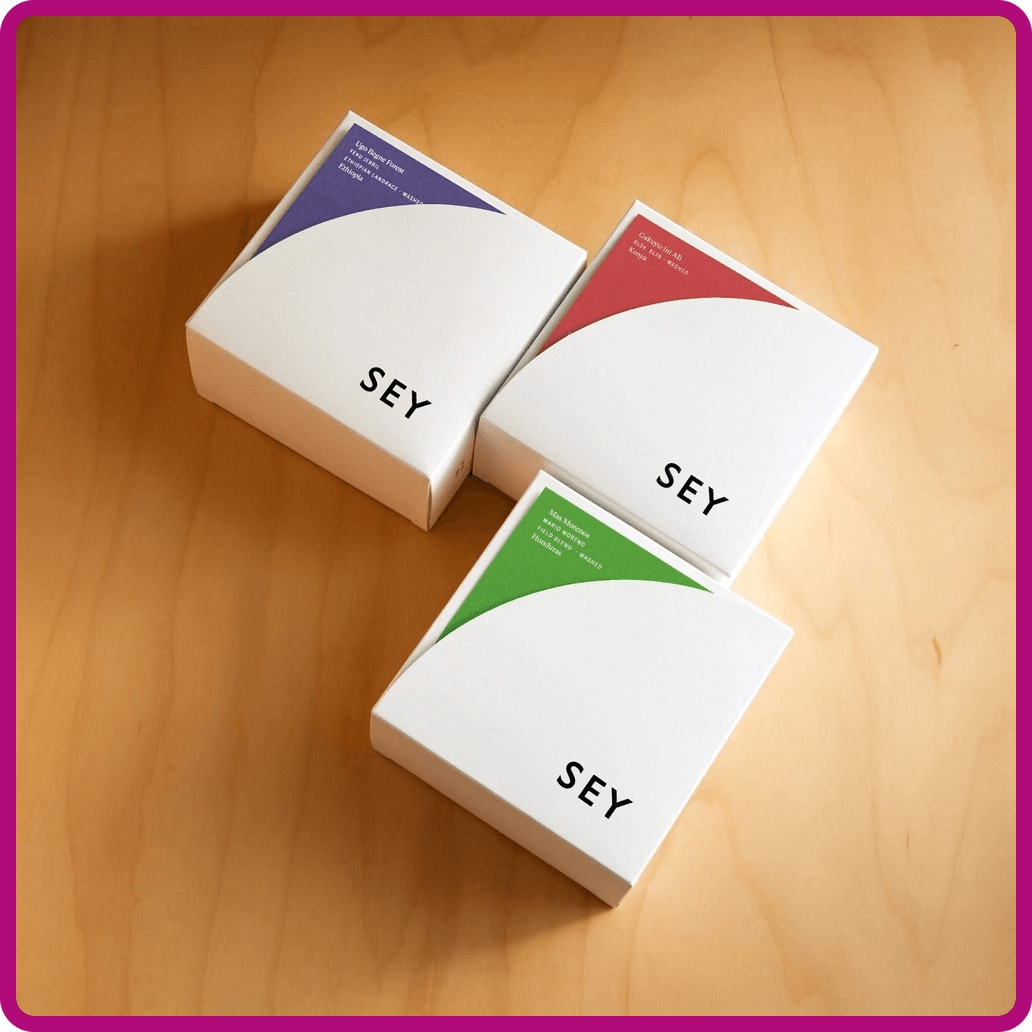
    SEY Coffee

    Another Brooklyn-based roaster, SEY Coffee presents itself to the artisanal coffee drinker with sustainable practice at the forefront of their philosophy. Up until now, the aesthetics have been the driving force in this article, for good reason. Done well, they are visual cues to a brand’s ethos. SEY Coffee’s focus on sustainability is perhaps one of the most important factors in proving that coffee brands do have a mission statement besides sales.

    SEY Coffee presents its roasts in square white boxes denoted with mellow, sweet colors. The three-letter wordmark sits opposite the roast information. You will always know where the beans are sourced from immediately from the package. And, judging on the simplicity in delivering this information, there’s not much more SEY Coffee wants to sell you on, which makes for an excellent package design.

    Takeaway:

    SEY Coffee shows how a mission-driven, sustainability-focused coffee bag design can use minimal structure, soft color accents, and highly organized information hierarchy to communicate transparency and origin first, with a clean wordmark and restrained packaging approach that reinforces trust, clarity, and intentional simplicity over visual excess.
    11

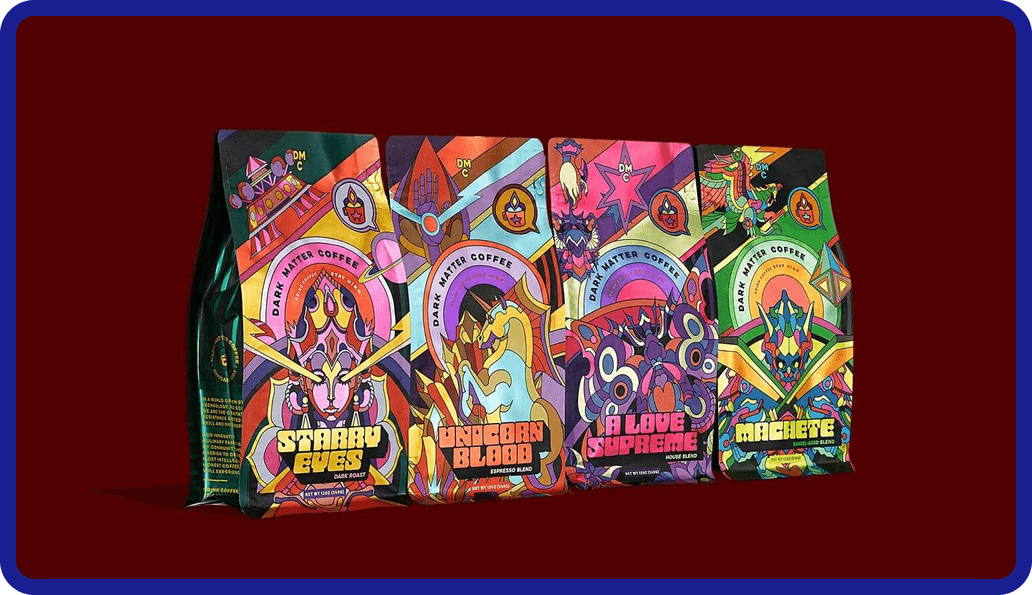
    Dark Matter Coffee

    Coming in with a shotgun blast of psychedelic color, Dark Matter Coffee attempts to astral-project its beans off the shelves with non-primary magentas, pinks, cyans, and greens. The wild color-play of these illustrated bags creates an undeniable allure. The groovy, abnormal titling follows suit and travels back to the 70s and 80s while naming each roast. The illustrations themselves depict mystical beings and creatures of cosmic fantasy, and combined coatings of gloss and matte truly push the limit of a visual hierarchy in this category.

    In all of this organized chaos, you can still make out the brand, the roast, and all of the necessary information. The visual interest of the square bottom bag itself is so strong that it could make a buyer enthusiastic before even trying the blend. If the shelf is a competition of visuals, Dark Matter Coffee races to the top of bags that “pop,” gravitating the consumer’s eyes by sheer force of will and hue.

    Takeaway:

    Dark Matter Coffee demonstrates how an aggressively colorful, illustration-heavy coffee bag design can use psychedelic palettes, layered finishes, and cosmic-themed typography to create maximum shelf impact, proving that even highly experimental visuals can still maintain clear hierarchy when brand, roast, and essential information are structured within the chaos.

    12

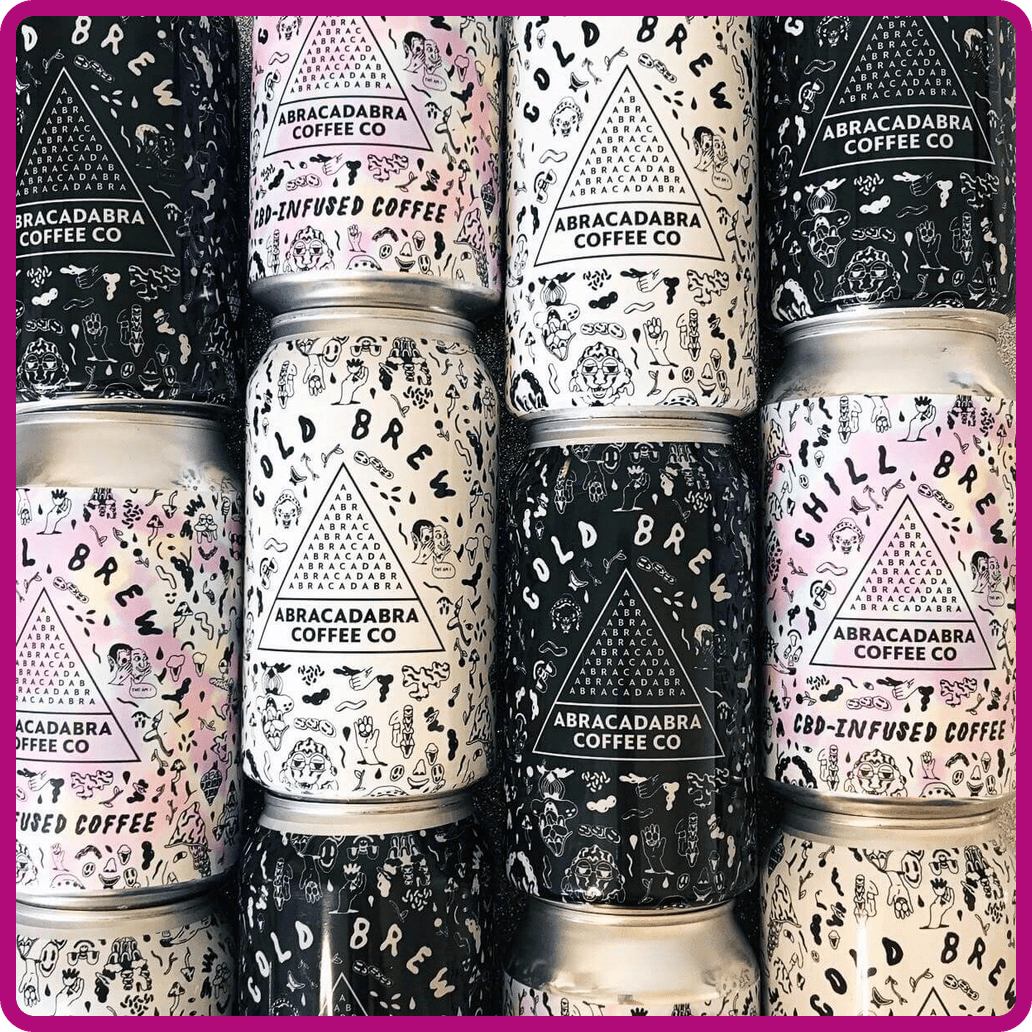
    Abracadabra Coffee Co.

    Abracadabra Coffee Co takes a similar approach to color, but captures the aurora in a hazy pearlescent coated label on plain black-and-white designs. The Vermont roaster creates a unique logo out of letters (where definitions of wordmark and logomark become blurred), and uses this as the texture to stand out. They’re colorful but contained

    Their cold brew cans surround the logo with an overflow of sketched imagery: hands, noses, faces, and other symbols texturize the white or the black coating. This layout creates a layered complexity that doesn’t bog you down. In Abracadabra’s case, all this information still feels straightforward, not fueled by its decoration, but instead using that intrigue to generate interest in their coffee practice and ethos.

    Where brands like Koffee Kult or SEY take the road of minimal space, these two brands exemplify the opposite. All of these brands are highly effective and well-designed, but their different use of design rules slowly reveal how vast your palette of design is, how much choice you have, and where you can narrow your focus and find your own voice. Again, there is seemingly no wrong answer as long as intent and smart design guide the way.

    Takeaway:

    Abracadabra Coffee Co shows how a controlled use of color and texture in coffee bag design can still feel expressive and layered, combining pearlescent finishes, integrated wordmark-logomark typography, and dense illustrative detailing on cans to create visual intrigue while maintaining clear structure, hierarchy, and brand readability.
    13

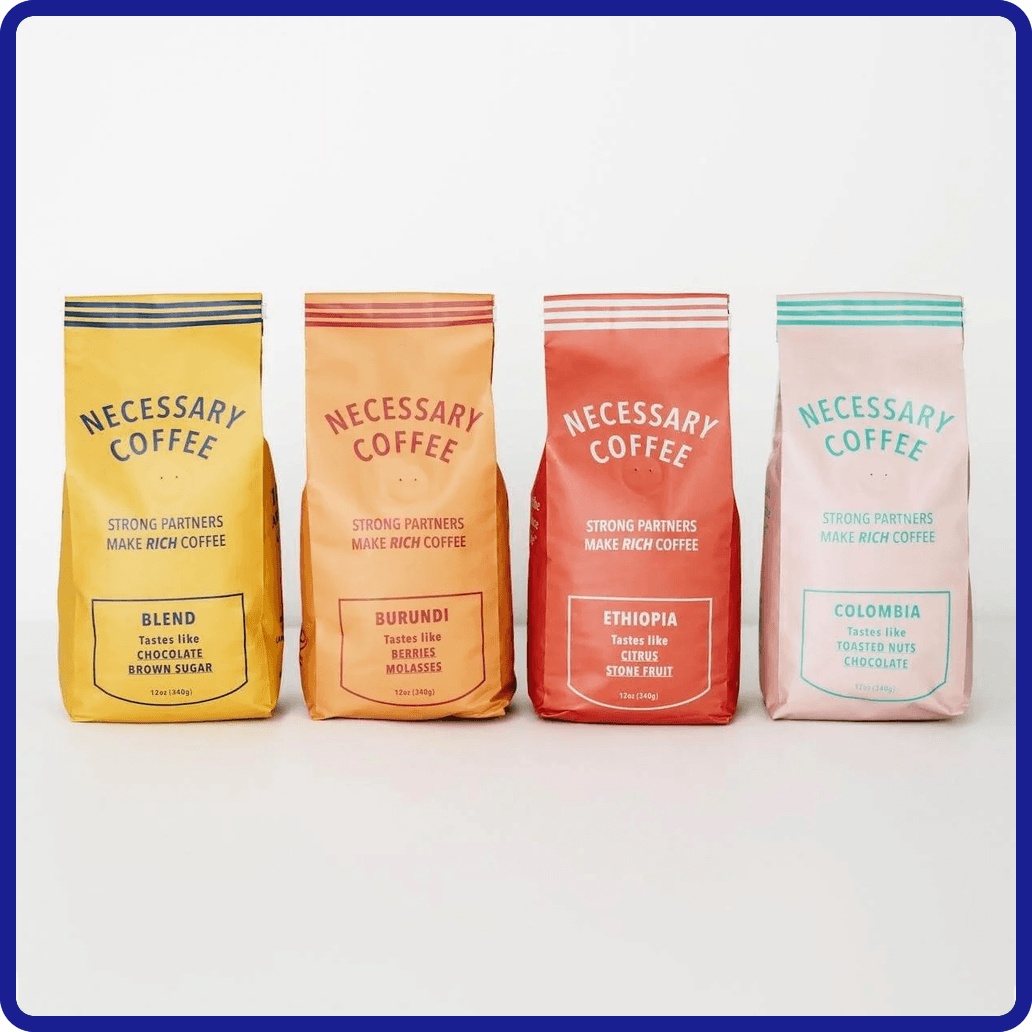
    Necessary Coffee

    Many of the top coffee brands in the world have traveled long and far on the basis of safe design. Folgers, for example, has kept its design plain, homey, and rooted in the 19th Century American consumer approach before decoration became a common advertising technique. Nowadays, graphic design innovates by looking at the past, the future, and everything in between.

    In the case of Necessary Coffee, their bags hearken back into the honest and frontier-like beginnings of product design. The simple type and linework presents its product plainly, but with the austere and humble side gusseted style that befriends basement shelves and camping tents. They succeed on a vintage minimalism and a two-color setup of their bag designs.

    Takeaway:

    Both Folgers and Necessary Coffee show that simple, familiar coffee bag design can be just as effective as more experimental branding by building trust through clarity, consistency, and restraint rather than visual complexity. Their success comes from confidence in minimalism and tradition, proving that strong branding doesn’t always require innovation—just clear, intentional execution.

    14

    Onyx Coffee Lab

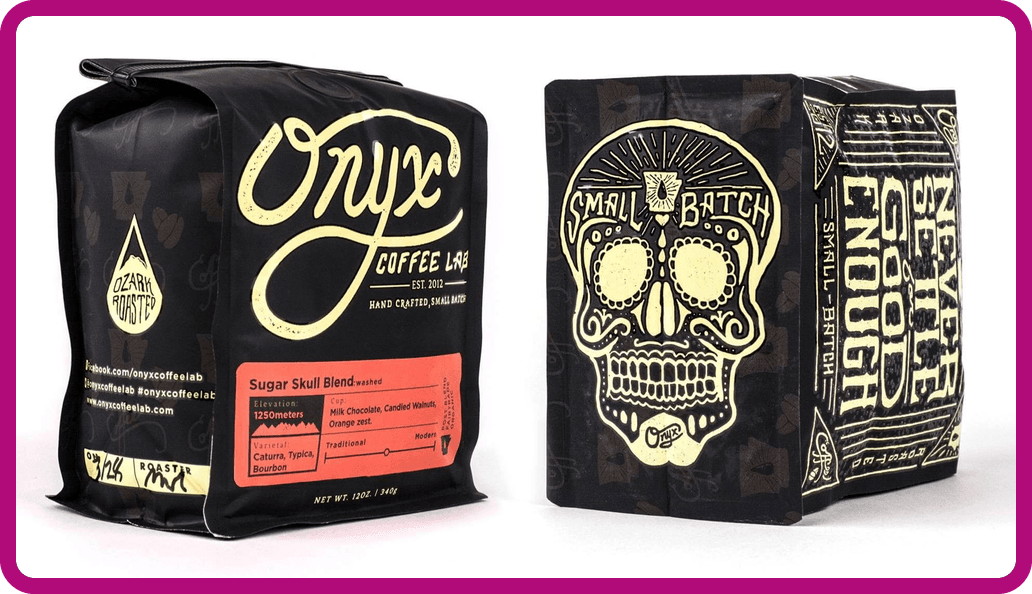
    Onyx Coffee Lab may be the best all-rounder on this list in terms of maintaining visual interest and inviting the consumer to learn more. Onyx combines the black side gusseted bag, playful lettering, vibrant color accents, illustration, and pattern-work on a legible bag design. On paper, all these elements should lead to something rather “ornate,” but Onyx has taken a good swathe of trends and distilled it into its own visual identity. Onyx smooths the “edge” and hones tattoo parlour visuals just enough to appeal to a wider audience.

    Their recent coffee box offerings sport a much more luxurious appeal as one-half embossed floral patterns and one-half gorgeous imprinted wordmark. Both of these looks, tattooed and embossed, are achievable through Onyx’s commitment to balanced design. Much could be said on the efficacy, but largely it all boils down to the fact that Onyx Coffee Labs sends a clear message, and can jump between the aesthetics because of the solid foundation of graphic design work they’ve given to their brand.

    Takeaway:

    Onyx Coffee Lab demonstrates how a balanced coffee bag design can successfully combine multiple visual styles—typography, illustration, pattern, and color—without feeling cluttered, creating a cohesive identity that is both visually engaging and easy to understand at a glance.
    15

    PT’s Coffee

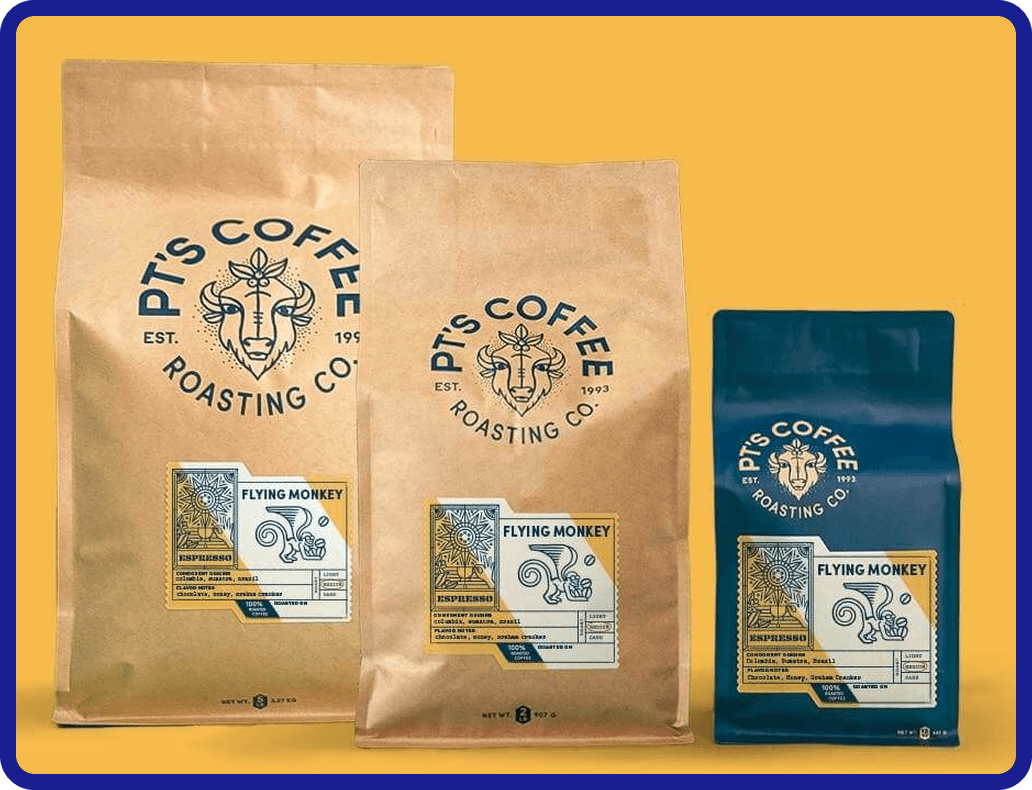
    There have been enough examples of black-and-white bags and ultra-colorful bags. Like Intelligentsia’s design has proven, sometimes one color is all you need. Here, PT’s Coffee chooses a denim blue to lead their wordmark/logomark combination in a circular layout. The superb monoline illustrations add depth and decor to the label. Every element of PT’s Coffee has been treated with thoughtful design so that the whole system is undeniable. And while this circular type and logo is popular, PT’s Coffee is comfortable and honest with their presentation. Trend or not, this is their voice.

    These are a series of illustrations designed to characterize the Kansas roaster’s Midwestern agrarian roots, while also tagging important roast details. The work done on the label and the logo are worthy of their own analysis, but the color is what draws the eye first. The blue is interchangeable to the complementary light brown, and larger square bottom bags sport a classic exposed brown paper that matches the scheme just as well. All of these components work in a wonderful harmony, led by that denim blue that exists either as a matte coat or as print on bare paper.

    Takeaway:

    PT’s Coffee shows how a single, distinctive color—paired with a strong circular wordmark, thoughtful illustration, and consistent system design—can create a cohesive coffee bag identity where simplicity and restraint do not limit visual impact but instead sharpen brand recognition and authenticity.

    Coffee Bag Materials & Packaging That Protect Freshness

    Once you move past visuals and branding, material choice becomes one of the most important decisions in coffee bag design. It directly impacts shelf life, flavor retention, shipping performance, and whether your coffee arrives tasting the way you intended. A great design on the wrong material will still fail if the product inside loses freshness.

    Foil vs. Kraft vs. Clear Laminates

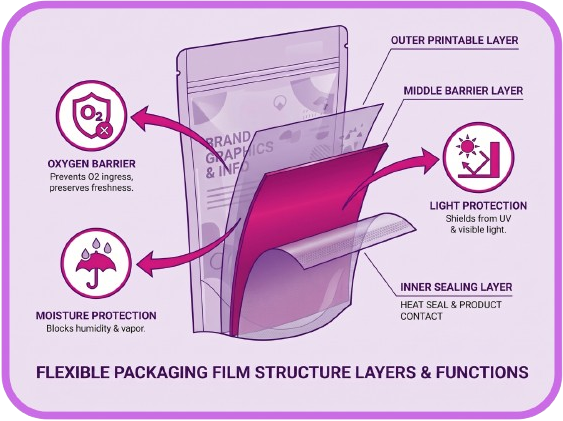
    Foil-lined bags are the industry standard for high-performance coffee packaging because they provide the strongest barrier against oxygen, light, and moisture. They’re typically used for specialty coffee where freshness and flavor integrity are non-negotiable. Kraft paper bags, on the other hand, signal a more natural or artisanal positioning, but they must be paired with an internal barrier layer to properly protect the coffee. Clear laminate or windowed designs are less common for long-term storage but can work well for retail visibility or sample products where product appearance matters more than extended shelf life.

    Oxygen and Moisture Barriers

    Coffee is extremely sensitive to oxygen and humidity, which means barrier performance is not optional—it’s essential. High-quality multilayer films prevent oxidation, which preserves aroma and flavor, while moisture barriers protect against environmental changes during shipping and storage. The better the barrier, the longer the coffee maintains peak freshness after roasting. This is especially important for roasters distributing through retail or national e-commerce channels.

    Degassing Valves

    Freshly roasted coffee releases carbon dioxide for several days after roasting. A one-way degassing valve allows this gas to escape without letting oxygen in, preventing the bag from swelling or bursting while preserving internal freshness. Most retail-ready coffee bags include a valve, and its placement should be considered early in the design stage to avoid interfering with branding, typography, or key visual elements.

    Sustainability Options

    Sustainable coffee packaging has become a major priority for roasters, with kraft paper, recyclable mono-material films, and compostable laminates offering more environmentally conscious alternatives. However, these materials often involve tradeoffs in barrier performance, meaning roasters must balance environmental goals with shelf-life requirements. In many cases, hybrid constructions are used to achieve both sustainability and adequate protection.

    Food Safety Compliance

    Regardless of material choice, compliance with food safety standards is non-negotiable for commercial coffee packaging. Materials that meet FDA CFR 73 guidelines, along with BPA-free and phthalate-free requirements, are standard expectations for retail distribution. Suppliers like CarePac provide packaging options that meet these regulatory standards, enabling roasters to focus on branding and product quality without compromising safety or compliance. In practice, these certifications are not a premium feature—they are table stakes for getting coffee onto store shelves and into customers’ homes with confidence.

    How Custom Coffee Bags Strengthen Your Brand
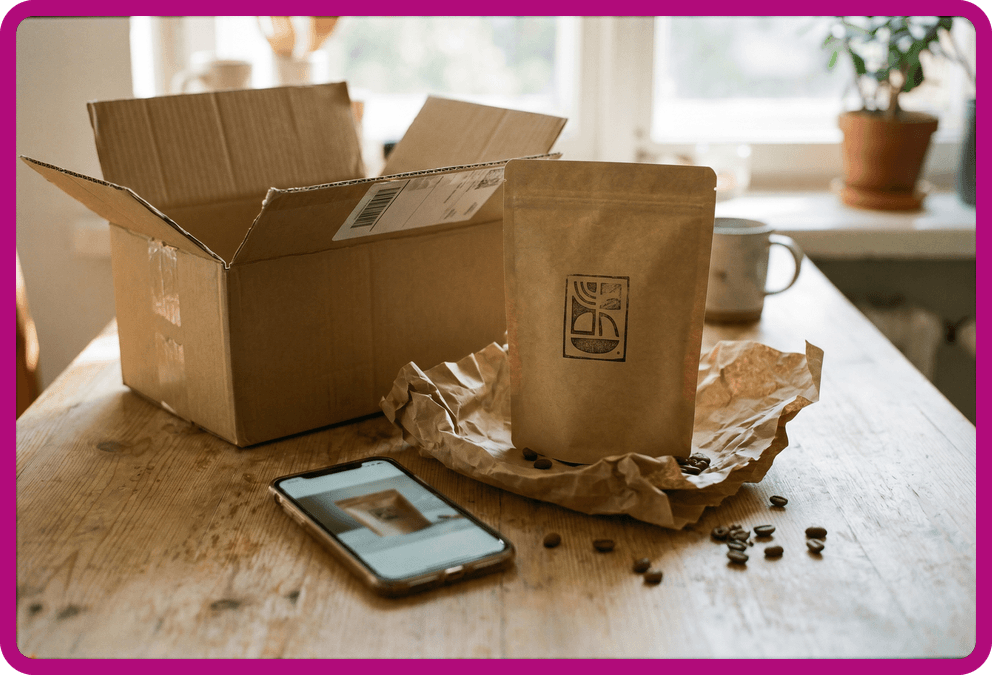
    In a crowded coffee industry, custom coffee bags are often the first, and sometimes only, chance to make an impression. When consumers are faced with dozens of coffee brands on a shelf or scrolling through options online, packaging becomes the primary differentiator. A strong design helps your product stand out immediately, but more importantly, it communicates what kind of brand you are before a customer ever reads a label or tastes the coffee.

    Packaging also plays a direct role in positioning. Material choices, finishes, and structural design signal price tier instantly. Matte black foil with embossing suggests a premium offering, while kraft materials and minimal ink can communicate a more approachable, artisanal feel. In many cases, customers subconsciously assign value based on your packaging long before they understand the details of the coffee itself, making your packaging one of the most important branding tools in your business.
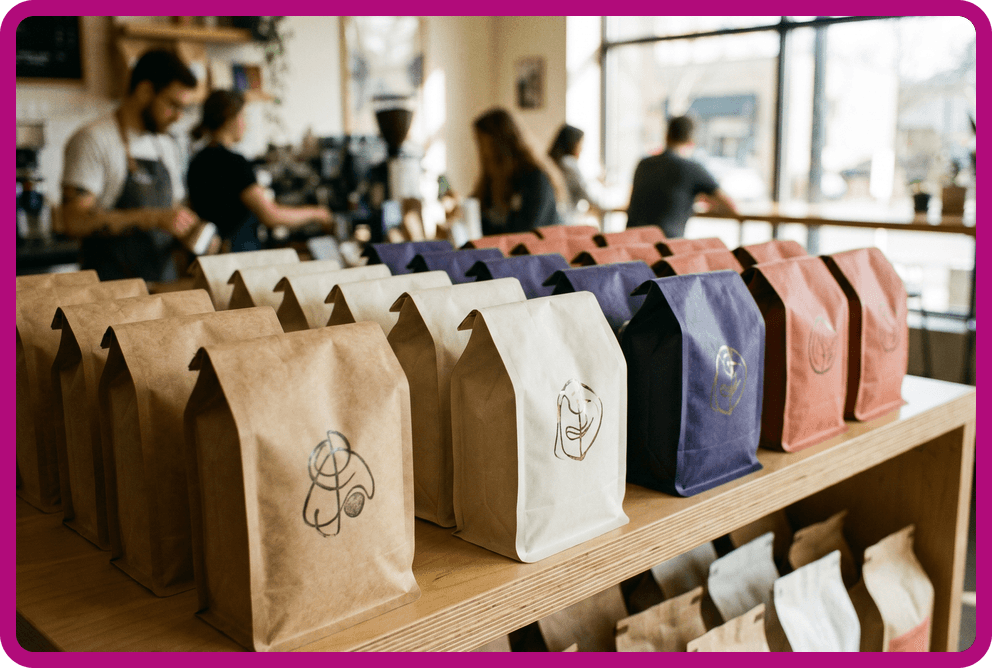
    There are also important differences between direct-to-consumer and retail environments. DTC packaging is often judged in photos, unboxings, and repeat shipments, where clarity and brand recognition matter most. Retail packaging, by contrast, has to perform in a competitive shelf environment where physical presence and quick readability are critical. The best coffee brands design with both contexts in mind, ensuring their identity remains strong no matter where it appears.

    Finally, consistency across SKUs is what turns individual bags into a recognizable system. Rather than treating each roast as a separate design exercise, successful coffee brands build a cohesive visual language that scales across products. This approach strengthens recognition, builds trust, and makes your packaging instantly identifiable as your own—whether it’s seen in a café, a grocery aisle, or an Instagram post.

    Choosing the Right Coffee Bag Design for Your Business
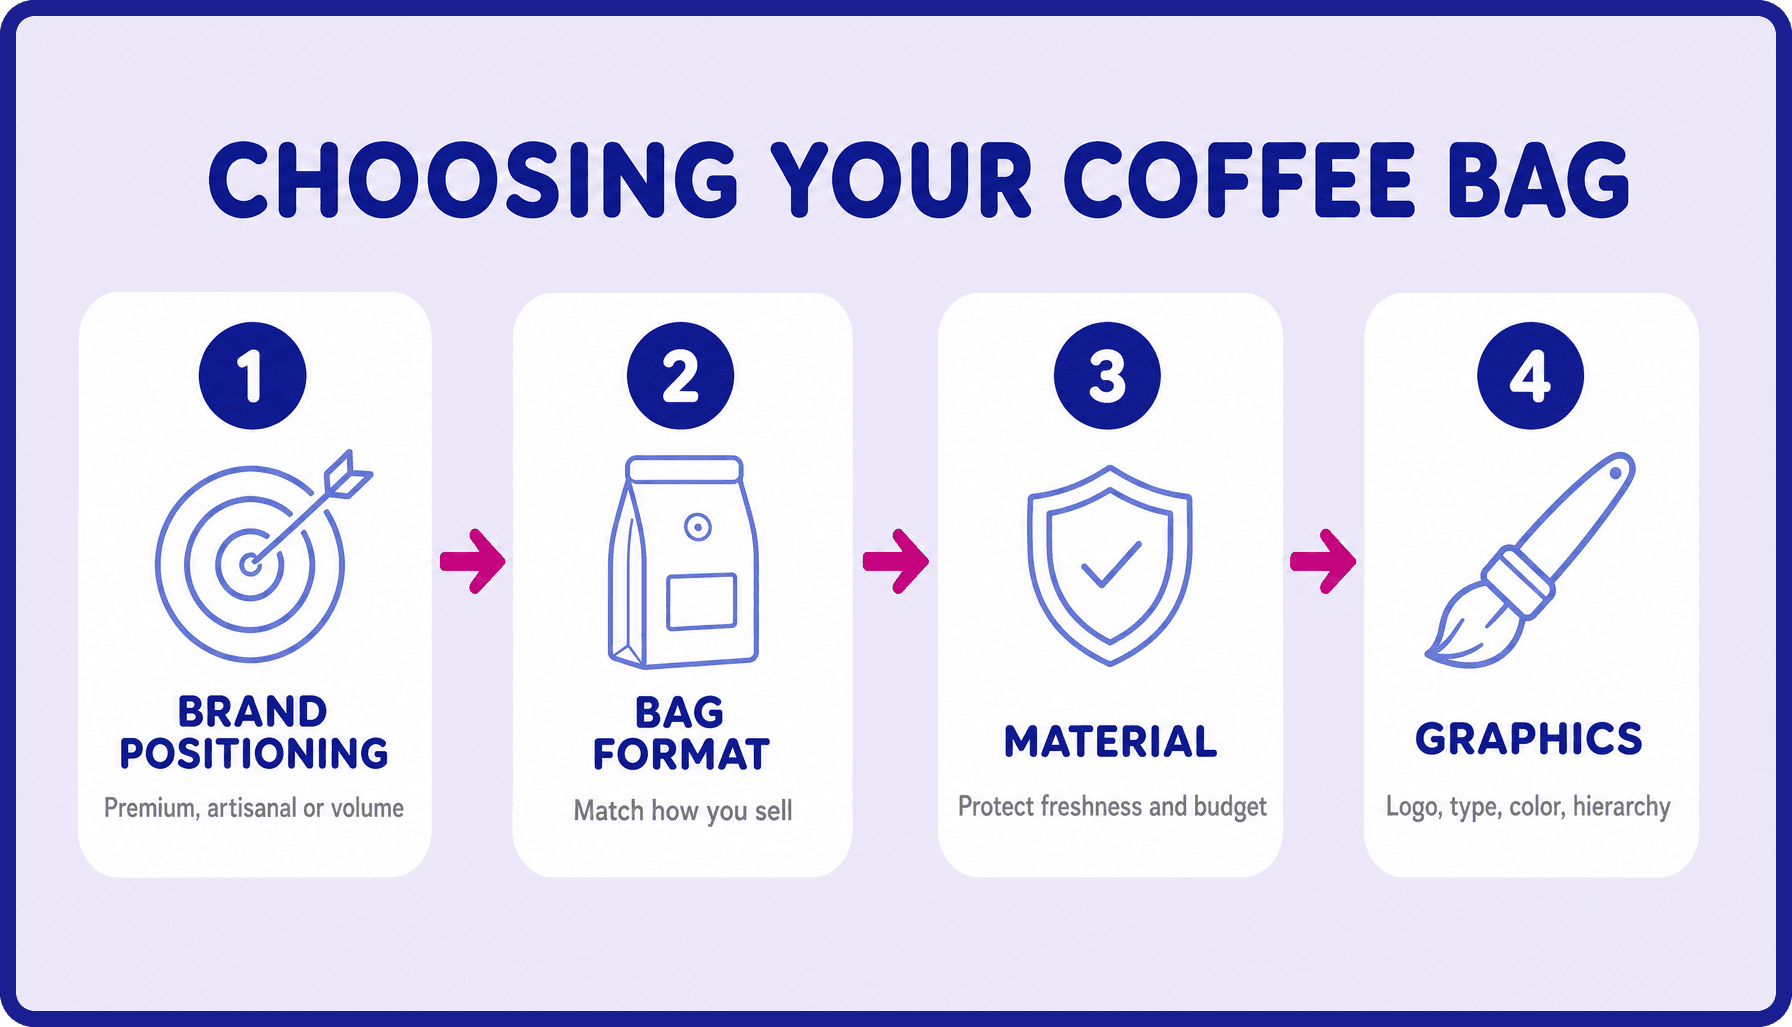
    Choosing the right coffee bag design starts with clarity on your brand positioning, whether you’re aiming for premium, artisanal, or high-volume accessibility. From there, select a bag format that matches how and where you sell, whether that’s retail shelves, e-commerce, or both. Material selection should come next, ensuring your packaging protects freshness while aligning with your sustainability and budget goals. Only then should you move into graphic decisions, where logo placement, typography, color, and visual hierarchy bring your brand story to life on the shelf or screen.

    If you’re ready to move from inspiration to production, CarePac offers fully custom coffee bags with flexible lead times and no minimum order headaches. Get a quote today.

    Lets Get Started

    Made In The USA

    Full PouchCustomization

    Scalable Printing Digital & Plate

  • How to Choose the Right Custom Pouch Configuration

    How to Choose the Right Custom Pouch Configuration

    3 Steps to Choosing the Right Stand-Up Pouch

    Choosing the right custom pouch configuration is about more than just selecting a size that fits your product. Every successful custom pouch relies on the right combination of dimensions, materials, and functional features working together to protect your product, support your brand, and meet customer expectations. In today’s flexible packaging market, factors like barrier protection, closure options, and package format all play a role in keeping products fresh and performing well throughout storage, shipping, and display.

    While size is an important consideration, it is only one part of the equation. Understanding how materials and pouch features impact product protection and usability will help you choose a custom pouch configuration that delivers the best results for your specific application.

    Three stand-up pouches in small, medium, and large sizes displayed side by side to illustrate how pouch dimensions vary based on product volume and fill weight.

    Step 1: Choose the Right Pouch Size

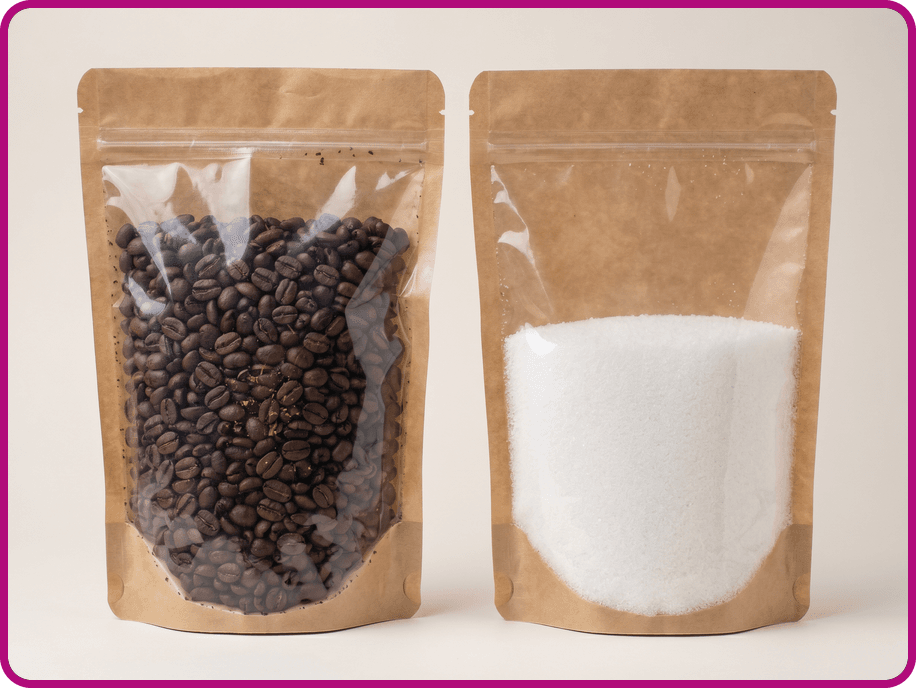
    Selecting the right pouch size is one of the most important decisions when building a custom pouch configuration. Many first-time buyers underestimate how much space their product requires, which can lead to costly packaging mistakes. Different products require different size configurations because volume varies significantly based on density and shape. For example, fine-grain salt takes up much less space than whole coffee beans, even when the weight is the same.

    We’ve seen some memorable sizing mishaps over the years. One customer selected a pouch they thought would work for popcorn, only to discover it was sized for unpopped kernels rather than fully popped popcorn. Choosing the correct pouch size from the start can save time, money, and frustration.

    Understanding Pouch Size Options

    Before selecting a custom-sized pouch, it’s important to understand how pouch dimensions are measured.

    For stand-up pouches, dimensions are listed in the following order:

    Width × Height × Gusset

    If a gusset measurement is not included, the package is not a stand-up pouch. Instead, it is likely a flat 2-seal or 3-seal pouch, which does not have the same shelf-standing capabilities.

    It’s also important to remember that pouch dimensions are measured from the outside of the package. Internal capacity will be slightly smaller because seams take up space within the pouch. Never assume your product will fit based solely on exterior dimensions without testing samples first.

    You should also account for any features included in your custom configuration, such as zippers, tear notches, or hang holes. These components occupy space in the package, reducing the usable fill area. The fillable area is the section below the zipper and should always be taken into account when calculating product capacity.

    Infographic comparing pouches that are too small, correctly sized, and too large, demonstrating the importance of proper fill volume and presentation.Person holding a sample stand-up pouch containing coffee beans while reviewing packaging options and product fit before production.

    Start by Ordering Samples of Different Sizes

    The best way to determine the right size options for your product is to order sample pouches before placing a production order.

    Fill each pouch with the intended amount of product and evaluate its performance. A well-sized pouch leaves enough room for fill weight, sealing, and natural product expansion without wasting material. Overfill a pouch, and it may burst at the seams during transport, storage, or while sitting on a retail shelf. On the other hand, an oversized pouch won’t stand properly and may wrinkle, which can negatively impact shelf presentation.

    Testing samples also helps you determine whether additional headspace is needed. Certain products release gases or naturally expand over time, making extra room essential. In these situations, you may also want to consider adding a degassing valve to your custom pouch configuration.

    What Size Pouch Do I Need?

    Now that you understand how pouch dimensions work, the next step is to determine how much product will fit in different pouch sizes.

    Capacity can vary considerably depending on the product being packaged. A pouch that comfortably holds coffee beans may not be suitable for snacks, powders, candies, pet treats, cannabis flower, or other products with different densities and shapes. Because of these variations, capacity charts should be used as general guidelines rather than exact measurements.

    For example, one ounce (28g) of cannabis flower may require a stand-up pouch measuring 6″ × 9″ × 3.5″, while a quarter ounce (7g) may fit comfortably in a much smaller pouch measuring 3.5″ × 4.5″.

    Before ordering packaging in bulk, test several sample sizes using your actual product. Order samples in multiple sizes until you find the one that works best for your fill weight, product type, and custom packaging requirements. This simple step can help ensure your final custom pouch delivers the appearance, functionality, and performance you’re looking for.

    Illustrated guide showing the three key steps to choosing custom packaging: selecting the correct size, choosing barrier materials, and selecting pouch features.

    Step 2: Choose the Right Pouch Material and Barrier Protection

    Once you’ve selected the right custom pouch size, the next step is choosing the material structure. The pouch materials you choose directly affect freshness, product protection, print quality, appearance, and overall package performance.

    Today’s flexible packaging market offers a wide range of options, including metalized, foil, clear, silver, kraft, recyclable, compostable, and biodegradable materials. Each material provides a different level of barrier protection, making it important to match the material to your product’s specific requirements.

    So how do you choose the right material?

    Consider the following:

    • How long your product will remain in the package
    • The level of freshness you need to maintain
    • How sensitive your product is to oxygen, moisture, light, or odors
    • Your desired brand image and package appearance
    • Sustainability goals for your packaging program

    The level of barrier protection you need depends on your product’s sensitivity to oxygen and moisture. Products that require long-lasting freshness typically benefit from high-barrier film structures that provide greater protection from environmental exposure. Products with shorter storage requirements may perform well using lower-barrier materials, offering a more economical solution.

    Infographic comparing metallized foil, clear barrier film, kraft paper, and recyclable packaging materials with recommended applications for each product category.Comparison chart showing metallized foil pouches versus clear film pouches, illustrating differences between maximum barrier protection and product visibility.

    Metalized Film vs. Clear Film: Which Barrier Is Right for Your Product?

    When comparing pouch materials, one of the most important decisions is whether you need a high-barrier metalized structure or a transparent package that showcases the product.

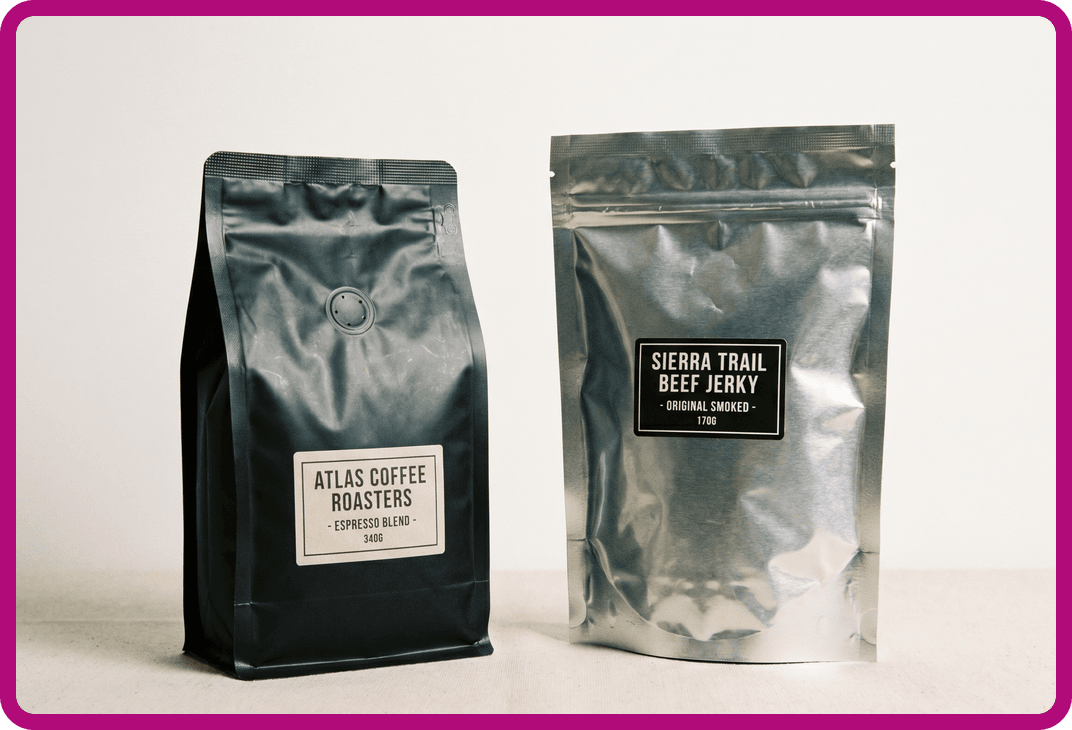
    Metalized film offers the highest barrier protection for oxygen and moisture-sensitive products like coffee, jerky, freeze-dried foods, supplements, and other products that need maximum freshness retention. These high-barrier film structures help protect flavor, aroma, texture, and product quality throughout storage and distribution.

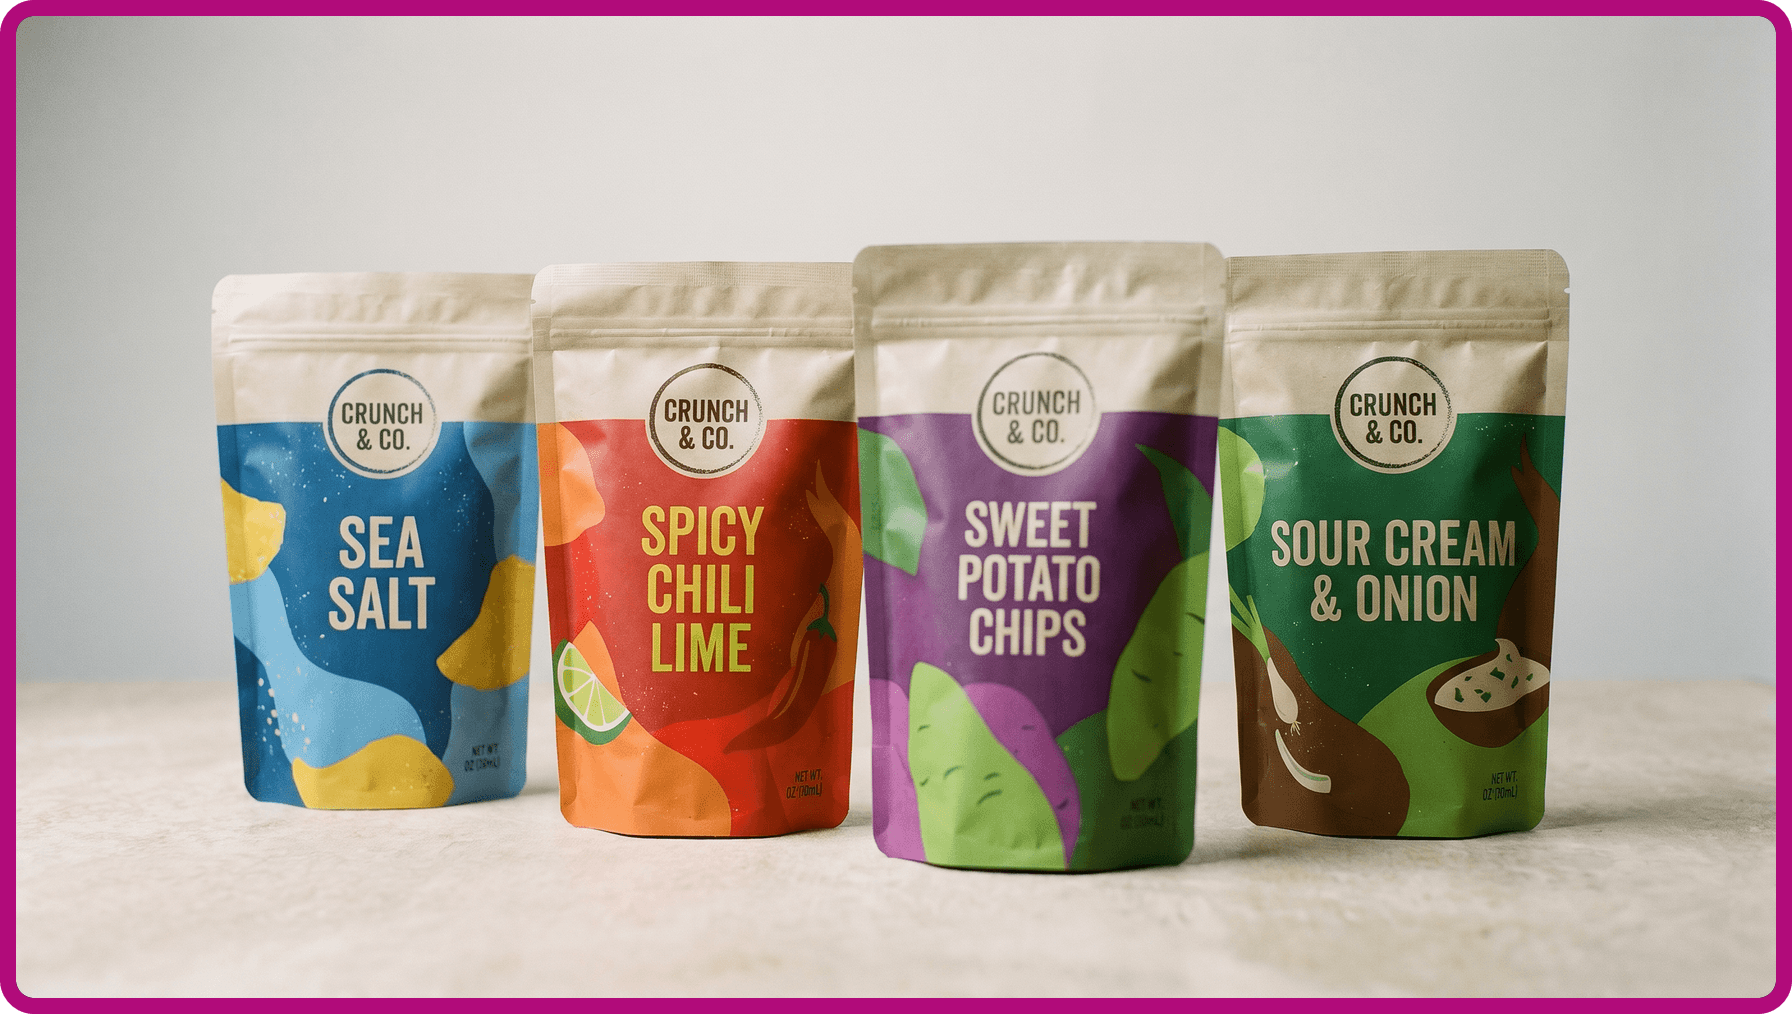
    Clear film is a strong choice for snacks, dried goods, candies, granola, and other products where visibility supports the purchase decision. Modern clear barrier film options can still provide excellent barrier protection while allowing customers to see the product before buying.

    Matching Materials to Your Product

    Different products require different levels of protection, which is why selecting the right barrier structure is so important.

    High-barrier foil and metalized film structures are commonly used for coffeejerkyfreeze-dried foodssupplements, and other products that need maximum protection from oxygen and moisture. These materials help keep products fresh longer and preserve quality throughout the supply chain.

    Clear barrier film is often used for snack foods, nuts, trail mix, dried fruit, candy, and other products where product visibility is an important part of the buying experience. These structures balance product protection with merchandising appeal.

    Kraft paper film structures are popular among natural, organic, and artisan brands. When paired with an appropriate barrier layer, kraft materials can provide the freshness and protection needed while supporting a more rustic package appearance.

    For brands focused on sustainability, recyclable, compostable, and biodegradable flexible packaging options continue to expand. These materials can provide varying levels of barrier protection depending on the structure selected, making it important to evaluate both environmental goals and product performance requirements.

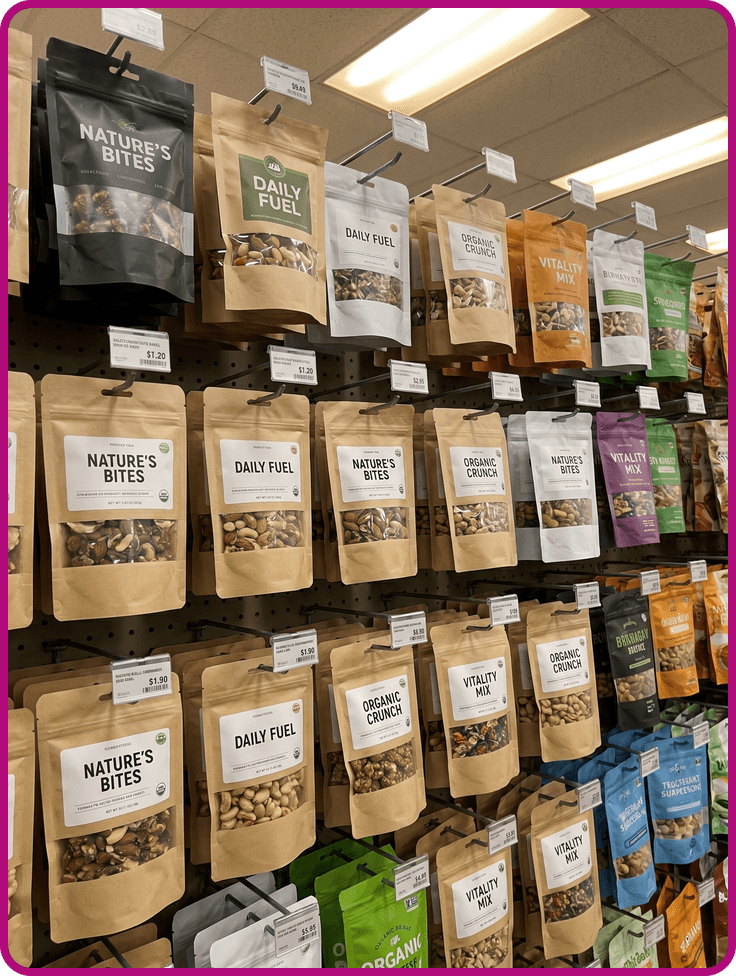
    Retail display featuring stand-up pouches with hang holes suspended on peg hooks, illustrating how hang holes improve merchandising flexibility and retail visibility.Two kraft stand-up pouches with clear windows displaying coffee beans and powdered ingredients, demonstrating how product windows improve shelf appeal and customer confidence.

    Additional Material Considerations

    The material structure you choose will also impact the overall cost of your custom pouch configuration. Higher levels of barrier protection generally require more specialized film constructions, which can increase packaging costs. Likewise, adding a clear window may limit the types of barrier film structures available for your package design.

    Because material selection plays such a critical role in freshness, product protection, and package performance, it’s worth evaluating several options before making a final decision. Testing sample pouches with your actual product is often the best way to determine which material structure delivers the right balance of protection, appearance, and cost for your custom packaging project.

    Step 3: Pick the Right Features for Your Custom Pouch Configuration

    Once you’ve chosen the size and material, it’s time to finalize the features that will complete your custom pouch configuration. This is where packaging becomes more than a container—it becomes part of the customer experience.

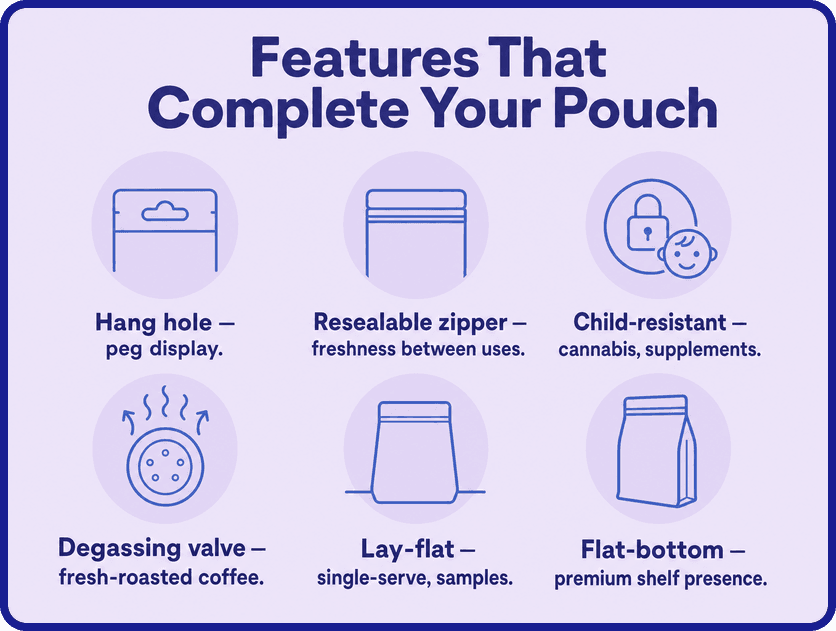
    The custom pouch configuration you build determines how customers interact with your product every time they pick it up, open it, store it, and use it. Features like hang holes, resealable closures, child-resistant zippers, and specialty valves can improve convenience, product protection, and retail performance while helping your brand stand out in a crowded marketplace.

    The Versatile Hang Hole

    A hang hole is one of the simplest yet most effective features available in flexible packaging.

    If your product will be displayed on peg racks in convenience stores, grocery stores, dispensaries, or specialty retail environments, a hang hole can significantly increase merchandising flexibility. While many people associate hang holes with lower-cost items, they’re commonly used for premium snack, supplements, nuts, candy, and other grab-and-go products positioned near checkout areas.

    Even if your package is designed for shelf display, it’s worth considering whether retailers may choose to merchandise it on a peg wall in certain locations. A hang hole gives retailers more display options without affecting package functionality.

    For brands looking to create a premium appearance, choosing an on-trend style such as a matte finish paired with a euro slot hang hole can help signal quality and improve shelf appeal.

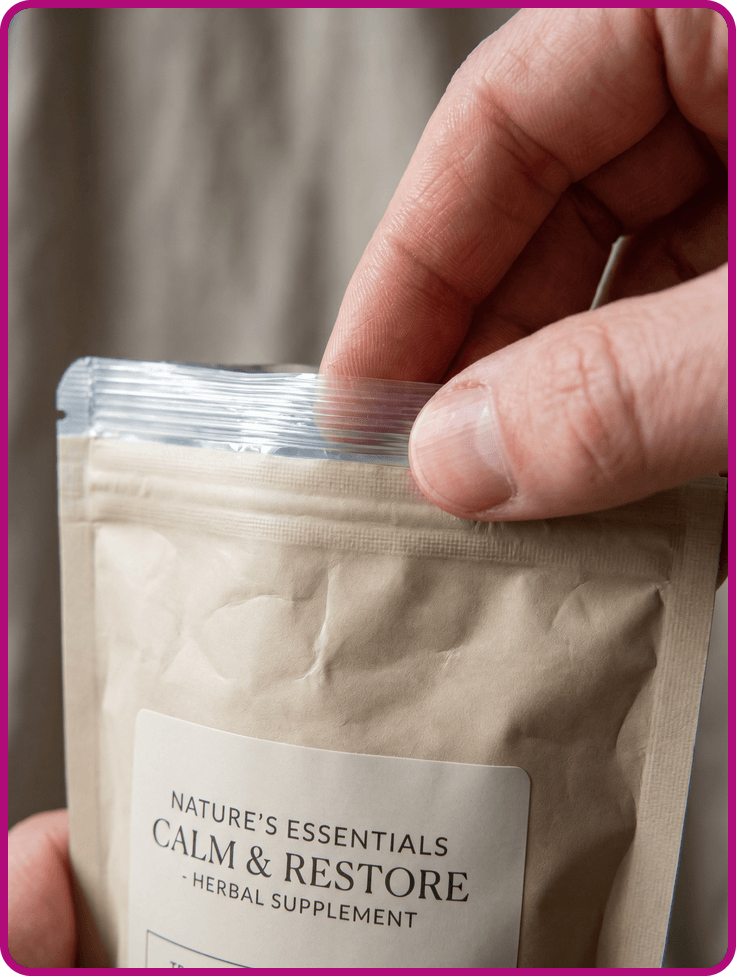
    Infographic showing popular stand-up pouch features including hang holes, resealable zippers, child-resistant closures, degassing valves, lay-flat designs, and flat-bottom pouches.Close-up of a resealable zipper on a custom stand-up pouch, showing how zip closures preserve freshness and allow repeated use.

    The Resealable Zipper

    Not all zipper closures are created equal.

    Different products require different closure styles, and selecting the right option can have a significant impact on customer satisfaction. Products with multiple-use consumption, such as coffee, snacks, supplements, pet treats, and powdered ingredients, often benefit from resealable packaging that helps maintain freshness between uses.

    For example, matcha green tea and other fine powders typically require a powder-resistant zipper design. Without the proper closure, product particles can become trapped in the seal, making it difficult to reclose the package properly. This can reduce freshness and create a frustrating user experience.

    Other specialty closures are available for products that release gas after packaging, such as freshly roasted coffee. In these situations, degassing valves can be incorporated into the custom configuration to preserve freshness while preventing package expansion.

    The Child-Resistant Configuration

    Some products require additional safety features to meet regulatory or consumer expectations.

    Cannabis packaging often requires child-resistant closures, although regulations vary by state. Child-resistant packaging may also be appropriate for supplements, detergents, fertilizers, and other products that could pose a risk if accessed by children.

    These configurations are designed to support child protection requirements while maintaining usability for adult consumers. Many child-resistant packages also include odor-control properties, opaque materials, and additional tamper protection features that improve both safety and product protection.

    When evaluating child-resistant options, it’s important to consider both compliance requirements and the overall customer experience to ensure the package remains functional and easy to use.

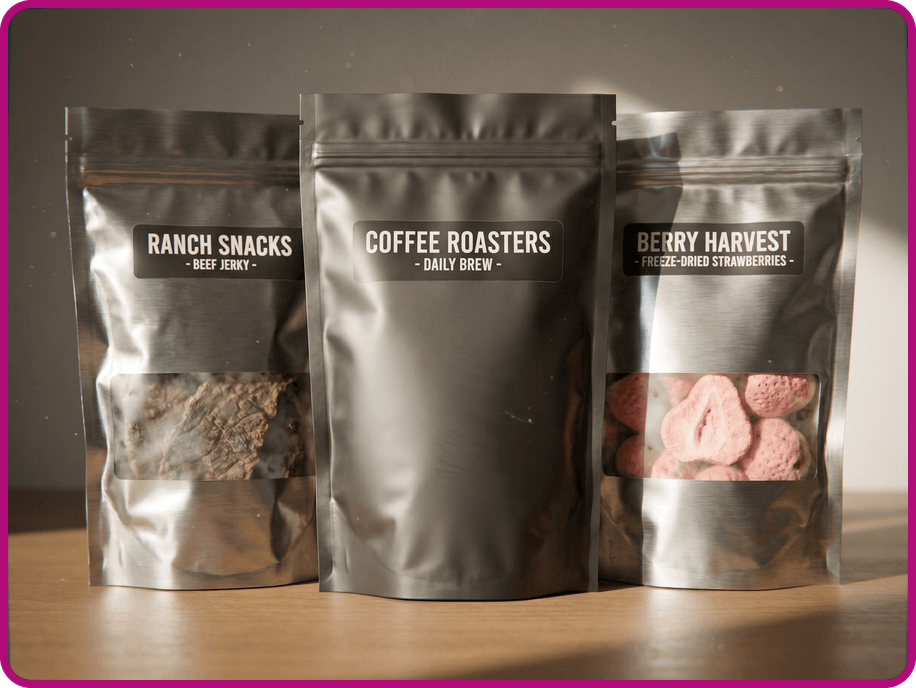
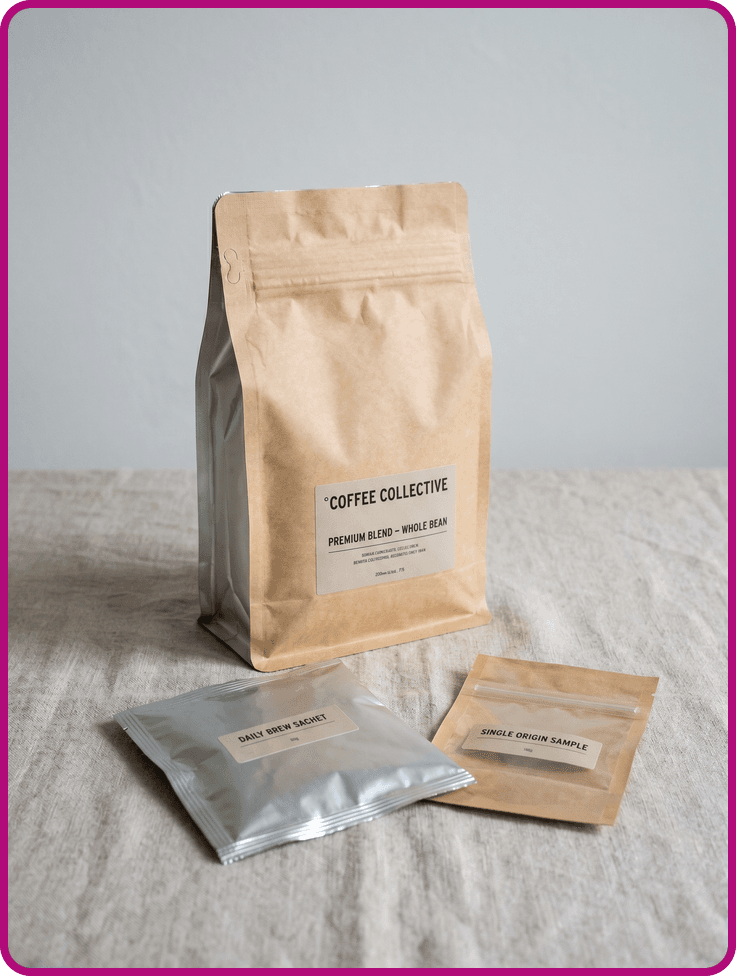
    Various stand-up pouches designed for coffee, jerky, and freeze-dried foods, highlighting how packaging requirements vary by product type and freshness needs.Custom coffee pouch displayed alongside single-serve sample packets, demonstrating how product format and serving size influence pouch selection.

    Lay-Flat Pouches and Other Format Configurations to Consider

    Not every product requires a stand-up format. Depending on your application, another packaging configuration may offer a better combination of cost, presentation, and functionality.

    Lay-flat pouches are a popular option for single-serve products, samples, travel sizes, and lightweight items. Because they do not include a bottom gusset, they typically use less material and can provide a more economical packaging solution.

    Flat-bottom pouches offer enhanced shelf stability and a premium, box-like appearance. They are commonly used for coffee, pet food, specialty foods, and other products where strong shelf presence is important.

    When selecting a custom pouch, consider how the package will be displayed, transported, and used. The right custom configuration should support your product, align with your brand positioning, and deliver the functionality customers expect. Evaluating multiple format options before production can help ensure your final packaging solution performs exactly as intended.

    Get an Instant Estimate

    There is a lot to discover about stand up pouch manufacturing, features, design and more- if you have never used them before. Your budget will also determine the style and the configuration of the pouches you choose. Visit CarePac today to get an instant online estimate and discover more on the benefits and configuration of stand up pouches and take advantage of their low minimum orders, free samples, and exceptional customer service.

  • How Packaging Buyers Can Reduce Cost Per Pouch at Higher Order Volumes

    How Packaging Buyers Can Reduce Cost Per Pouch at Higher Order Volumes

    How Custom Packaging Buyers Can Reduce Cost Per Pouch at Higher Order Volumes

    If you’re ordering pouches and packaging at high order volumes, you already know that volume discounts are available and that ordering more packaging can significantly reduce your total cost. The bigger opportunity, though, is one that most buyers miss.

    It’s the decisions you make before the order is finalized that can have the greatest impact on variable costs: film specs, SKU structure, specialty coatings, raw materials (including compostable materials), format choice, and reorder timing. All of these decisions are locked in with your packaging supplier by the time the quote comes back, which means learning how to reduce custom packaging cost per unit and cost optimization happens earlier than most buyers think.

    In this article, we’ll break down every lever that affects the cost per pouch, ranked by impact, so you can reduce packaging costs on your custom packaging solutions without lowering quality or impacting customer satisfaction.

    Where the Price Breaks Actually Happen in Custom Pouch Orders

    When it comes to identifying where the price breaks happen in the supply chain, there are three core packaging component areas to focus on:

    1

    The fixed cost spread

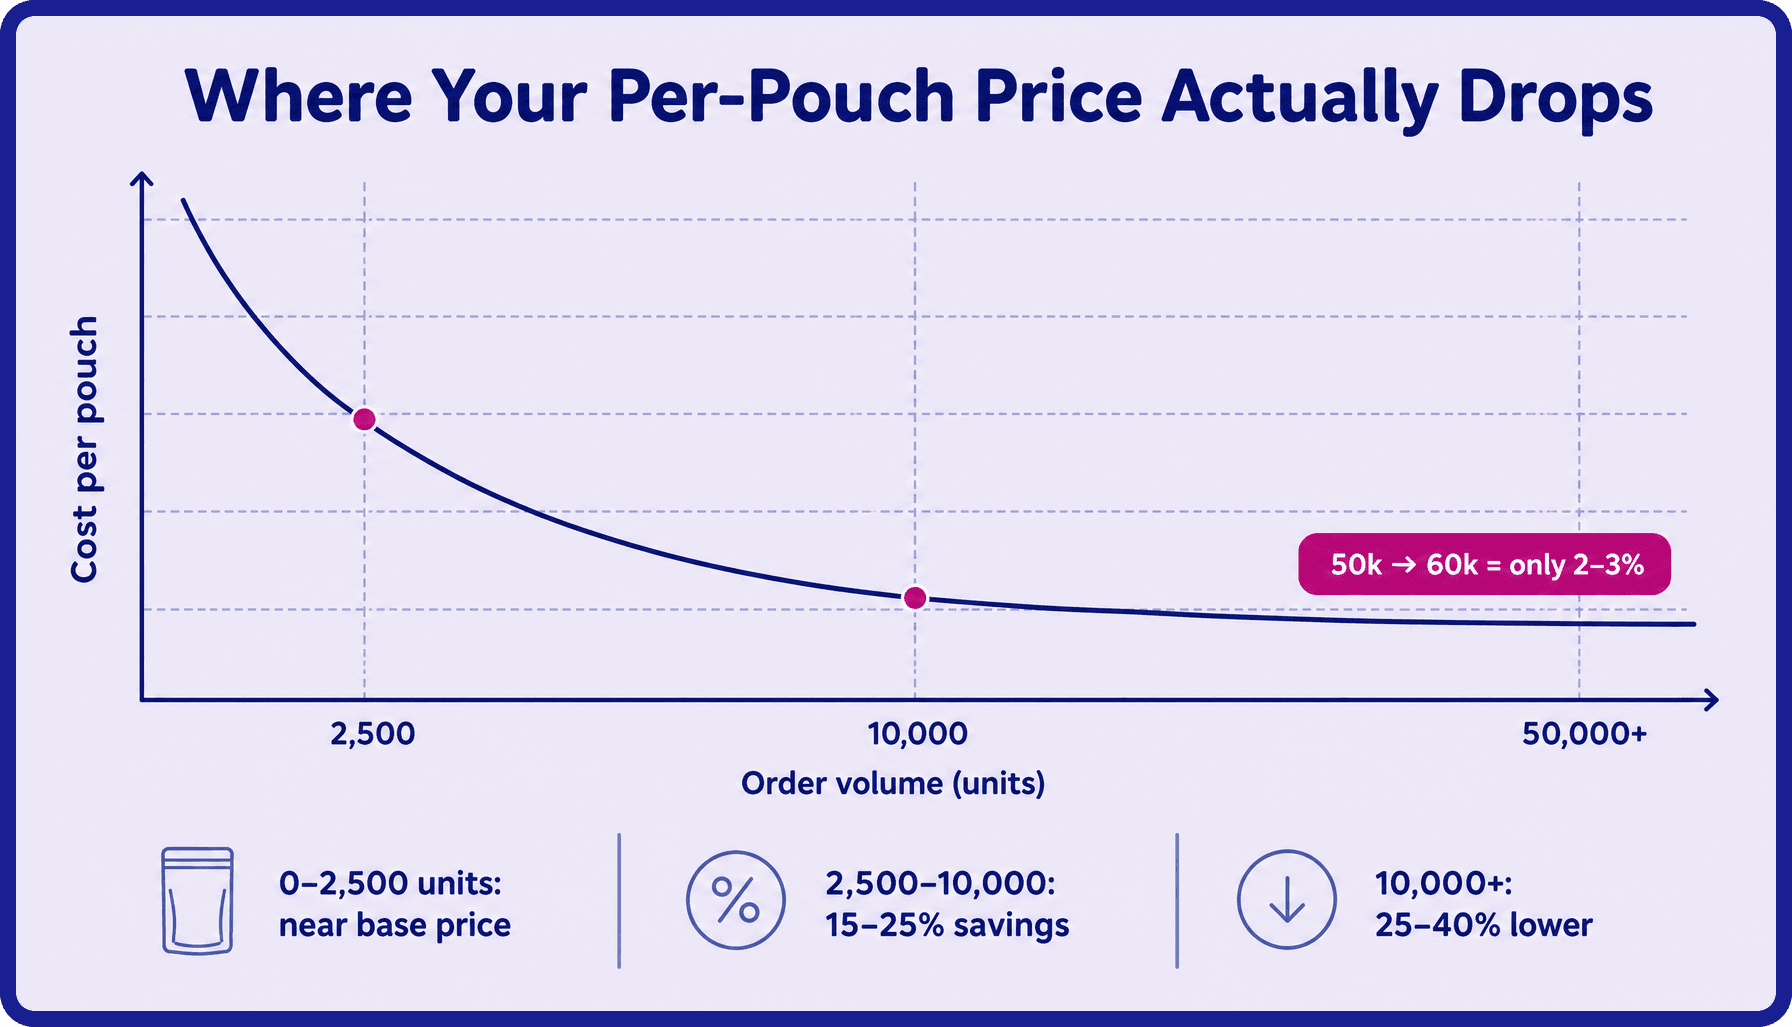
    Every custom pouch order carries fixed costs, including plate setup, press prep, and quality inspection. At low volumes and fewer units, those fixed costs are a large percentage of the per-unit price. At high volumes, they become negligible. The biggest per-unit savings happen in the jump from small runs to the first meaningful threshold (typically around 5,000–10,000 units). After that, savings continue but flatten.

    2

    The practical tier structure

    Industry pricing typically follows a pattern buyers can plan around. Orders in the 0–2,500-unit range pay near base price; 2,500–10,000 units start to return 15–25% savings; 10,000+ units can reach 25–40% per-unit reduction versus small runs. These aren’t CarePac-specific numbers; they reflect how flexible packaging economics work. The point is that buyers who are already at 10k+ are past the steepest part of the curve, which is why the other levers in this article matter more at that scale.

    3

    The diminishing-returns reality

    Jumping from 50,000 to 60,000 units might only reduce the per-unit price by 2–3%. At that scale, volume alone is no longer the main savings lever. The other packaging strategies in this article matter more.

    Choosing the Right Film Spec Is the Biggest Per-Unit Cost Lever You Have

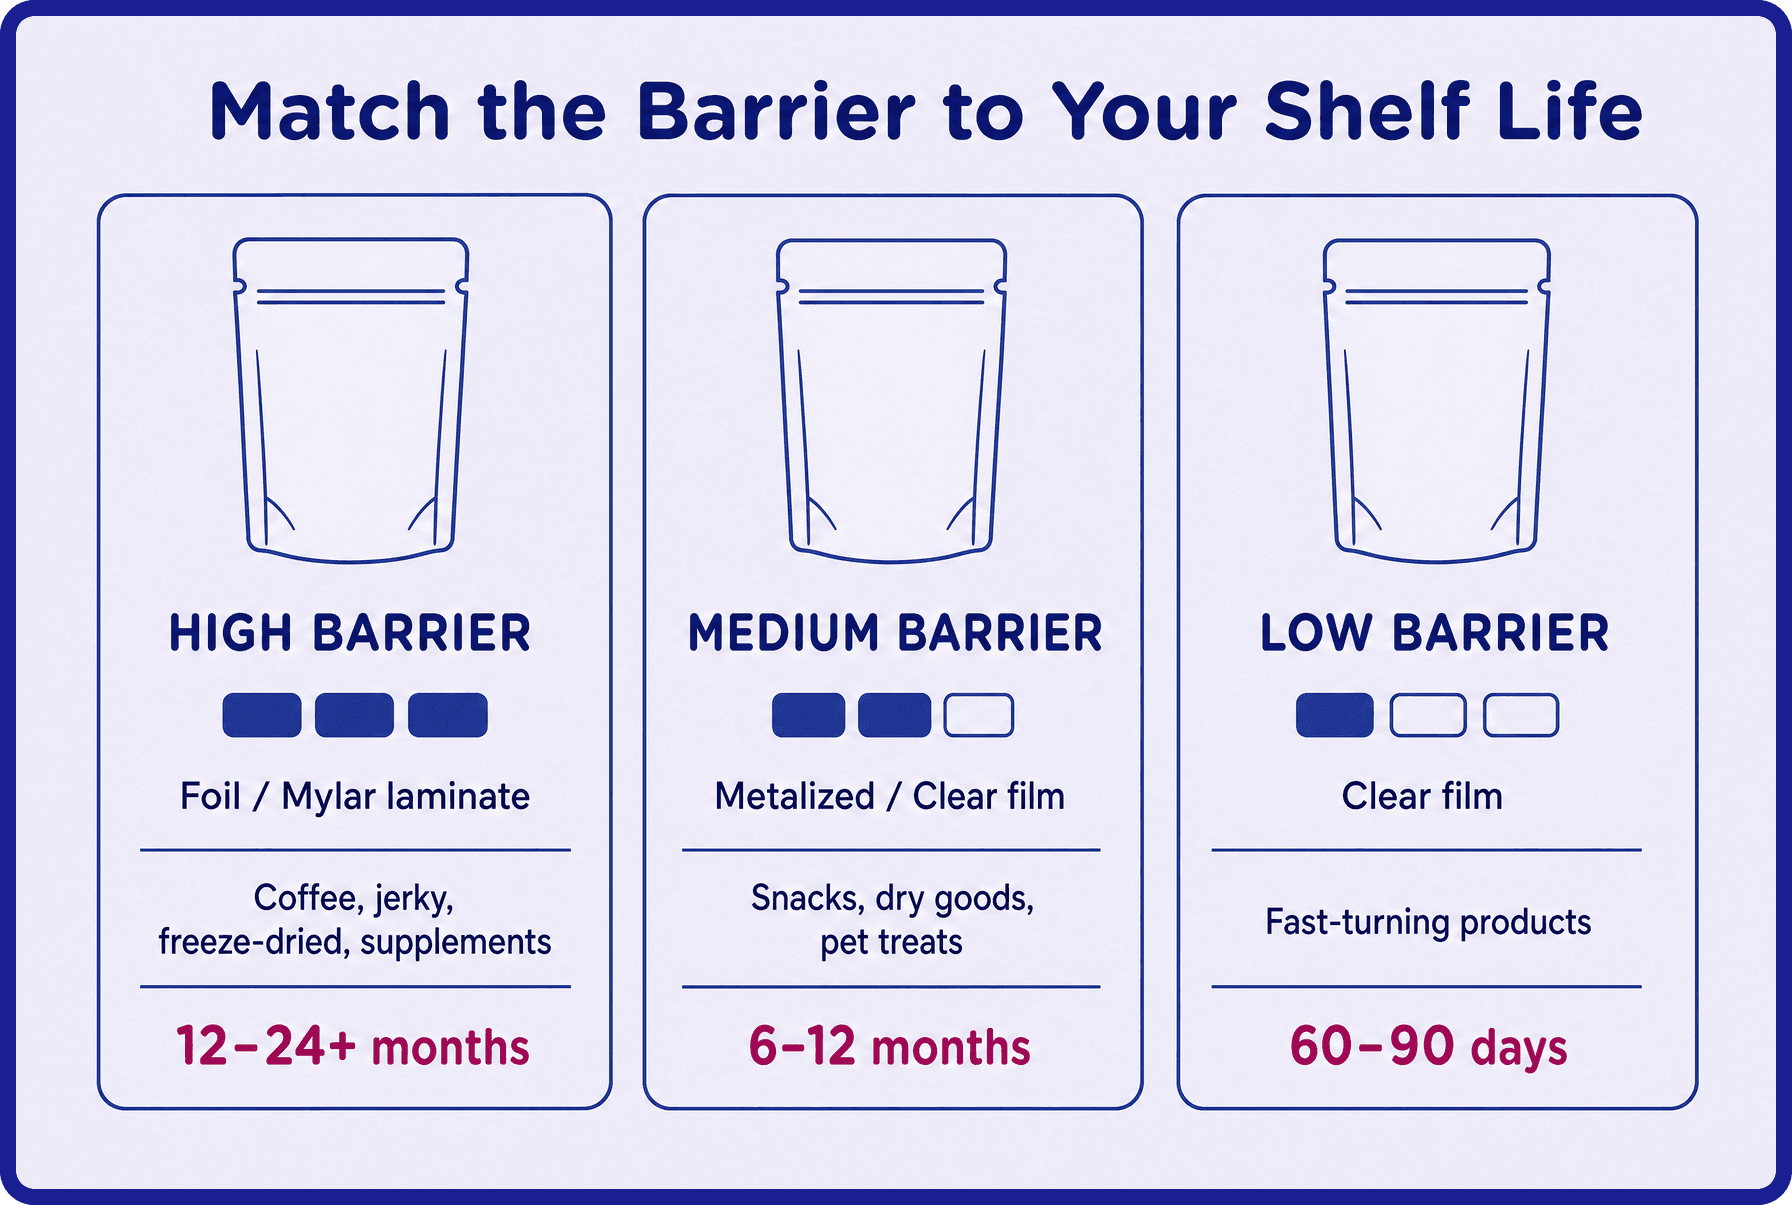
    Film structure is where most buyers either overspend or underspec, and at high volumes, both are expensive mistakes. Many buyers default to high-barrier foil laminate because it “feels safer.” For products that don’t require that barrier level (i.e., dry snacks with short shelf life, items that sell through in 60–90 days), they’re paying a premium that doesn’t deliver meaningful product benefit. At 50,000 units, the unnecessary material pricing is a significant cost line.

    Therefore, it’s important to match the barrier to the product’s actual shelf-life requirement. For oxygen- and moisture-sensitive products with a 12-24+ shelf life (coffee, jerky, freeze-dried products, supplements, pharmaceutical products), you’ll need to opt for a high-barrier foil or a mylar laminate. For medium-barrier products (snacks, dry goods, pet treats, items with a 6-12 month shelf life), a clear or metalized film will do the trick. Finally, a lower-barrier clear film is perfectly fine for fast-turning products or products with a short shelf life.

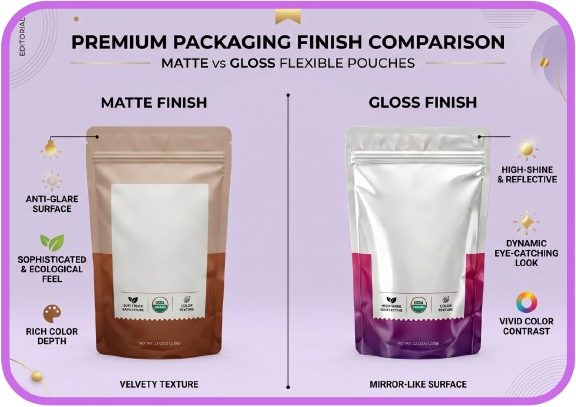
    You’ll also need to pay attention to finishes. Matte and soft-touch finishes add cost compared to standard gloss, and at high volumes, that premium quickly accumulates. If your product doesn’t require the perceived value that’s added by a premium finish to compete on the shelf, gloss is the most cost-efficient choice. So, before your next reorder, confirm your product’s actual shelf-life packaging requirements and purchase product packaging accordingly.

    Consolidate SKUs to Maximize Volume Pricing Across Your Product Line

    Another area where buyers can save on their production costs is by combining SKUs to maximize volume pricing. If two or more SKUs share the same film spec, format, and size, they can often be consolidated into a single production run. If material usage is the same, the production run is larger and per-unit economics improve across all three SKUs. This way, the buyer isn’t paying setup costs separately for each individual item.

    For this strategy to work, the size, film structure, format, and finish need to be identical across SKUs. Artwork can differ since it’s handled at the print stage, not the production process stage. Many brands end up with slightly different pouch sizes or film specs across their line because different SKUs were spec’d at different times. Doing a format audit and deliberately standardizing packaging sizes creates consolidation opportunities that didn’t exist before. The per-unit savings from this can be significant, and it can also reduce material waste by reusing the same material across different packaging elements.

    CarePac is proud to offer our customers this discount on multi-SKU orders where specs align. Please inquire about this when requesting a quote, and we’ll work those savings into your estimate.

    Rollstock vs. Premade Pouches: What High-Volume Buyers Need to Know

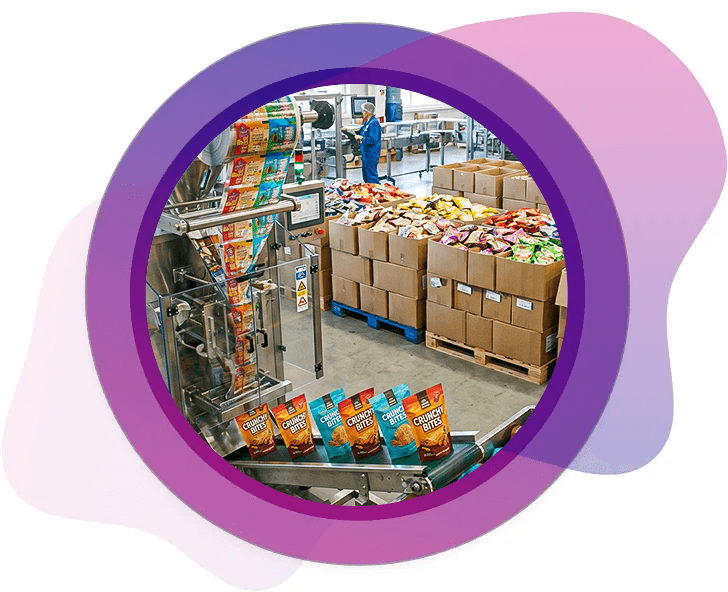
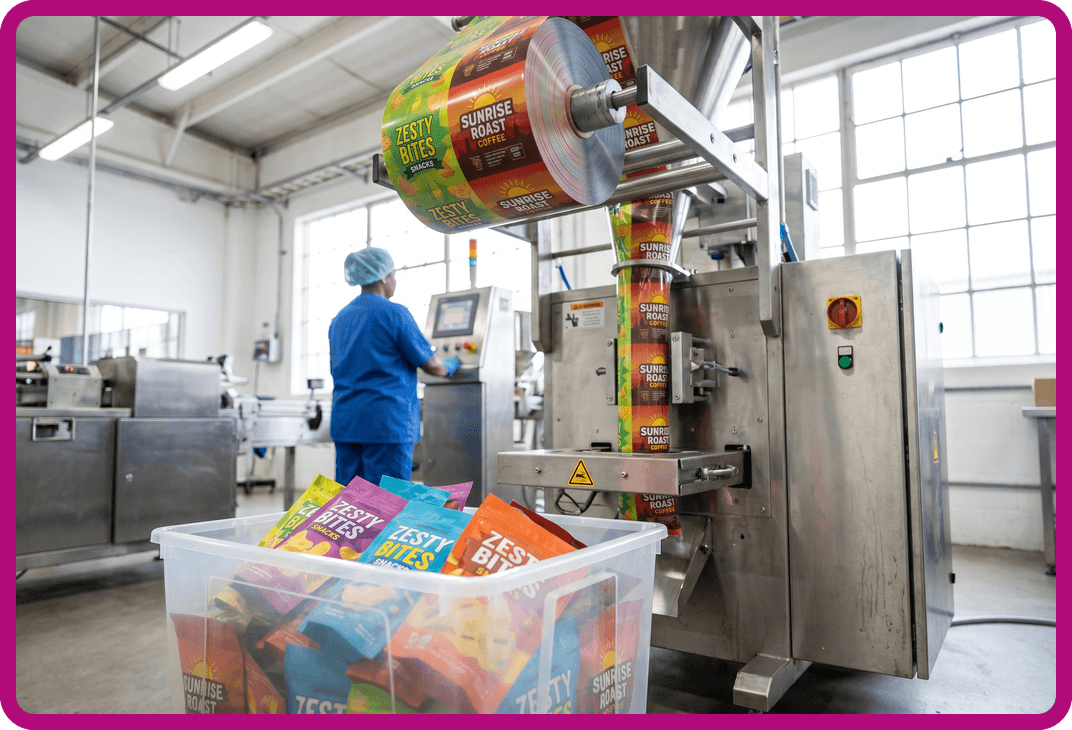
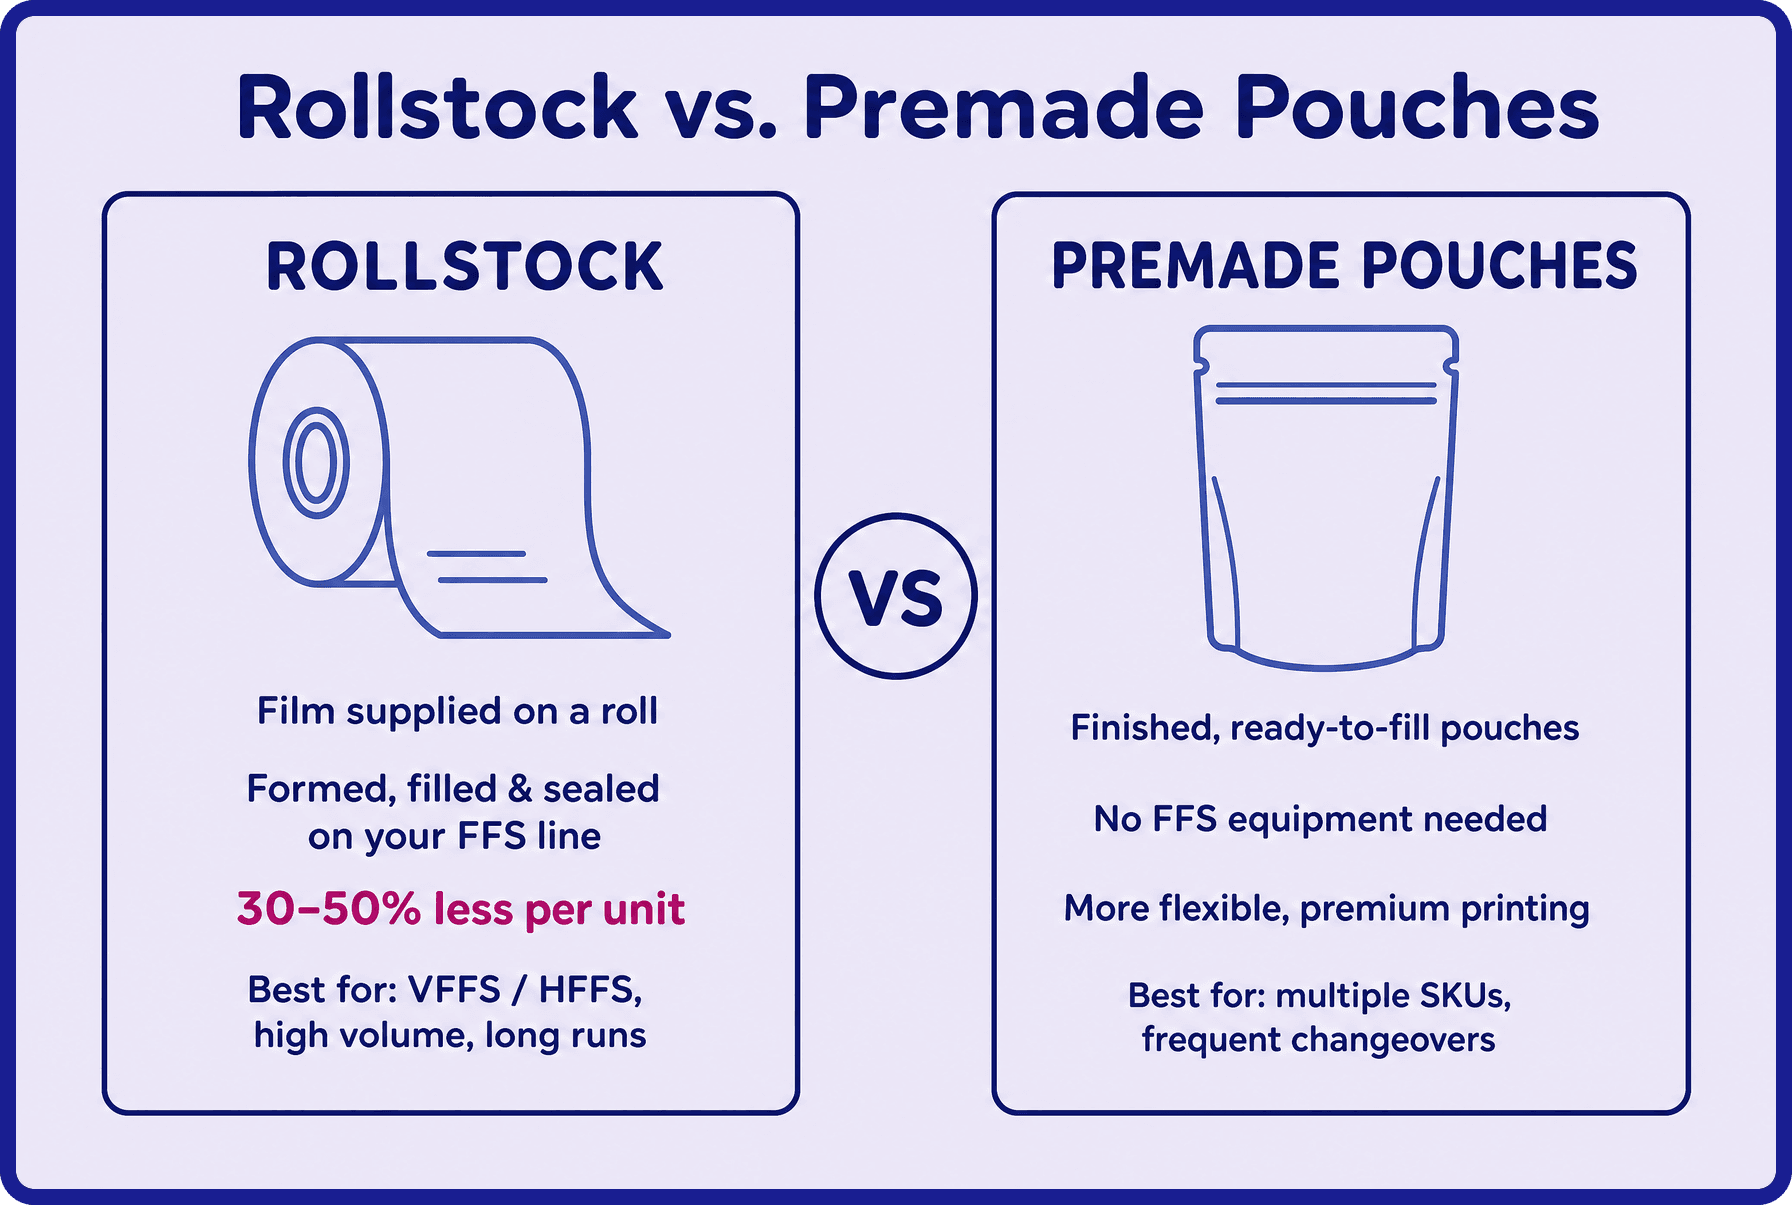
    For high-volume packaging operations, rollstock film can offer substantial cost savings compared to premade stock packaging. Because the film is supplied on a roll and formed, filled, and sealed on the buyer’s or co-packer’s equipment, rollstock typically costs 30–50% less per unit than premade pouches at equivalent volumes. For brands producing 50,000+ units, that difference can translate into meaningful material cost reductions. The lower retail price results from the supplier providing film rather than finished pouches, eliminating much of the conversion work and packaging waste required to create premade packaging.

    Rollstock is best suited for large and small businesses running VFFS (vertical form-fill-seal) or HFFS (horizontal form-fill-seal) equipment, either in-house or through a co-packer. It works particularly well for high-volume products with predictable production schedules and long, consistent production runs. In these environments, the efficiency of form-fill-seal equipment can significantly reduce packaging costs while maintaining production speed.

    Premade pouches may still be the better choice for brands managing multiple SKUs, frequent changeovers, or operations without access to FFS equipment. They also offer greater flexibility and often support premium printing and pouch aesthetics that some brands prioritize over maximum line efficiency. A simple question can help guide the decision: Does your co-packer run form-fill-seal equipment? If the answer is yes, comparing a rollstock quote alongside a premade pouch quote is well worth the exercise. CarePac offers both rollstock film and premade pouch solutions, allowing buyers to choose the format that best fits their operational and branding positioning goals.

    How Your Reorder Strategy Affects Per-Pouch Cost

    Most buyers focus on packaging and shipping costs when they’re ready to place an order. The buyers who consistently achieve the lowest per-unit pricing start planning their packaging budget and projects much earlier. Forecasting production needs, managing reorder timing, and understanding annual demand can have just as much impact on product cost as the specifications themselves. In many cases, the savings come from planning ahead rather than negotiating harder.

    Rush orders are the most obvious example. Express shipping methods carry a premium over standard or economy production schedules, and at higher volumes, that added cost can become significant, especially once transportation costs are factored in. Buyers who forecast demand accurately and place orders early enough to use standard lead times typically capture savings that rush-order customers leave on the table. The advantage comes from disciplined production planning, not simply ordering premium packaging more frequently.

    Reorders also tend to cost less than first production runs because the initial setup work—such as plate creation, custom inserts, press proofing, and approval processes—has already been completed. For buyers placing an initial order of 10,000 units or more, it’s important to understand that future reorders often become more cost-efficient when specifications remain unchanged.

    Brands with predictable annual demand may also benefit from discussing volume commitments with CarePac, which can unlock more favorable pricing across the year. At the same time, buyers should balance larger order quantities against storage costs and inventory risk. A lower per-unit price only creates real savings if excess inventory won’t become obsolete due to packaging redesigns, regulatory changes, or other product updates.

    Which Packaging Design Features Drive Up Fixed Costs (and Which Are Worth It)

    Certain packaging features can improve functionality, compliance, and shelf appeal, but not every feature delivers enough value to justify the product’s retail price. At high volumes, seemingly small upgrades can have a meaningful impact on per-unit pricing. The key is understanding which features genuinely support your product and sales channel—and which ones have simply become part of the spec by default.

    Among the highest-impact cost drivers are specialty closures. Standard zippers are typically the most economical option, while powder-resistant zippers, child-resistant (CR) zippers, and other specialty closures increase costs. CR zippers carry the largest premium but are essential when regulations require them. Degassing valves are another feature that adds meaningful cost and should generally be reserved for fresh-roasted coffee, where they play a critical role in product performance. Clear windows also increase costs because they require additional print setup and white ink layering. They are often worthwhile when customers want to see the product before purchase, but may provide little value when branding and graphics drive the buying decision.

    Finish options such as matte and soft-touch coatings add cost compared to standard gloss finishes and are best suited for products competing on premium shelf presentation. By contrast, hang holes have a negligible impact on pricing at high volumes and are often worth keeping because they provide flexibility across retail environments that use peg displays. When evaluating any feature, buyers should ask a simple question: Is this feature earning its cost in our specific sales channel? If the answer is yes, keep it. If not, it may be an opportunity to reduce costs on the next reorder without affecting product performance or sales.

    Ready to Reduce Packaging Costs Without Sacrificing Quality? Start With a Quote.

    Per-pouch cost at high volumes is influenced by far more than order quantity. Material selection (including sustainable packaging materials), pouch format, production method, feature choices, and reorder planning all play a role in determining what you ultimately pay. CarePac works with high-volume buyers to optimize these decisions early, helping ensure packaging specifications align with both operational requirements and cost goals.

    If you’re planning a large production run or evaluating ways to reduce your current packaging costs, the next step is to have a conversation about a quote. Request a quote to compare options, or contact our team for a free consultation to discuss specifications, production requirements, and cost-saving opportunities before pricing your project.

    Frequently Asked Questions

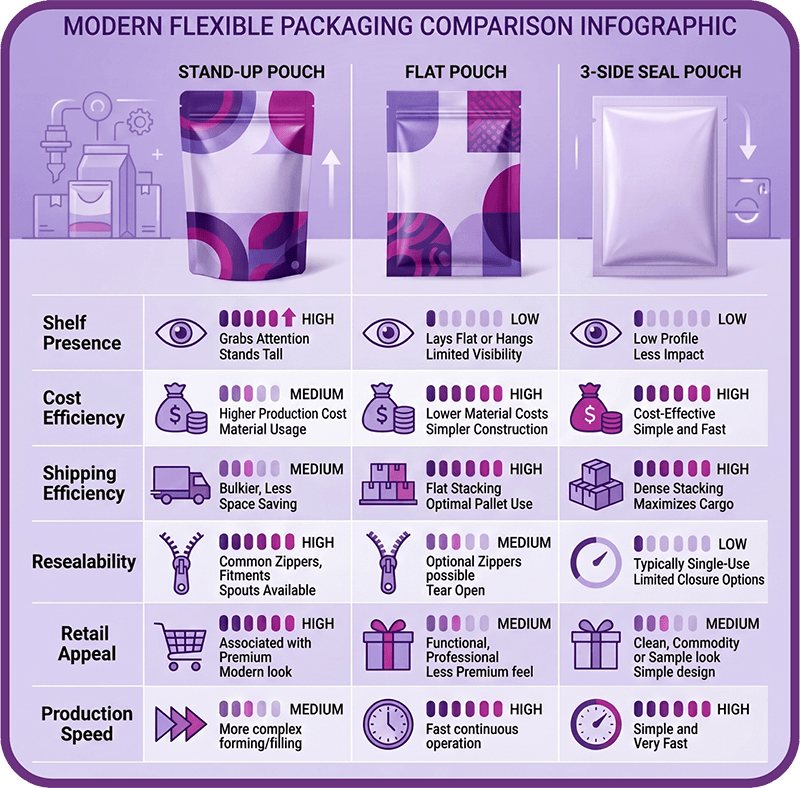
  • Stand-Up Pouch vs. Flat Pouch vs. 3-Side Seal Pouch

    Stand-Up Pouch vs. Flat Pouch vs. 3-Side Seal Pouch

    Stand-Up Pouch vs. Flat Pouch vs. 3-Side Seal Pouch: A Buyer’s Comparison

    Introduction to Pouch Packaging Types

    Choosing the wrong flexible pouch type isn’t a design issue. It’s an operational one that shows up in your margins, your line efficiency, and how easily you can scale. The decision between a stand-up pouch, a flat pouch, and a 3-side seal pouch directly impacts per-unit cost, production speed, shipping and storage density, retail shelf performance, consumer experience, and whether your packaging actually runs smoothly on existing filling equipment. In other words, this is less about packaging aesthetics and more about how your entire system performs from the production floor to the end user.

    Within the broader world of flexible packaging, custom pouch packaging, and flexible pouch formats, each structure solves a different operational problem. Stand-up pouches are often chosen for shelf presence and resealability, flat pouches for cost efficiency and compact distribution, and 3-side seal pouches for simplicity and high-speed filling. Understanding where each format creates friction (removes it) determines whether your packaging supports long-term scalability or quietly limits it.

    What Is a Stand-Up Pouch?

    A stand-up pouch is a type of flexible packaging that features a gusseted bottom designed to expand when filled, allowing the package to stand upright on a retailer’s shelf space. This structure creates a stable base that improves visibility and usability while maintaining the lightweight, efficient benefits of pouch packaging. Used for everything from pet food, liquid products, trail mix, and nutritional supplements to coffee packaging, powdered products, and baby food, it is an extremely popular packaging format in the packaging industry.

    From a buyer’s perspective, stand-up pouches are often chosen by many brands because they balance functionality and environmental impact with strong retail shelf presence. The upright structure creates a natural facing position that protects product integrity and maintains freshness, while enhancing visibility in competitive retail environments and improving the packaging’s overall “billboard effect.” The larger front and back panels also provide a significant printable surface area, giving brands more room for design, messaging, and regulatory information without compromising clarity.

    Functional features commonly associated with a stand-up pouch include a resealable zipper, tear notches for easy opening, and hang holes when peg display is required. Many formats also support high-barrier film structures, which help protect product freshness by blocking moisture, oxygen, and light—making them a strong option for food, supplement, and specialty product applications. These features combine to create a more premium, multi-use consumer experience, especially for various products intended to be opened and resealed multiple times.

    Compared to flat base pouches or 3-side seal formats, stand-up pouches often carry a higher unit cost due to the added material required for the gusset and the additional manufacturing steps involved in forming the base. That added complexity is typically offset by stronger shelf impact and improved consumer usability.

    Best-fit use cases for stand-up pouches

    Stand-up pouches are often a strong fit for:

    • Snacks
    • Coffee
    • Pet treats
    • Supplements
    • Powders
    • Granola
    • Dried fruit
    • Candy
    • Protein products
    • Specialty food packaging
    • Products sold primarily in retail environments
    • Multi-use products where resealing matters
    • Premium products where packaging is part of the brand identity or experience

    Overall, the stand-up pouch format is typically selected when retail shelf presence, branding impact, and resealable closures are higher priorities than the absolute lowest per-unit cost.

    What Is a Flat Bottom Pouch (3-Side Seal)?

    Flat bottom bags and 3-side seal pouches (three-side seal pouches) are often used interchangeably, but there are several key differences between them. They refer to a simple flexible packaging format made from film sealed on three sides, with one side left open for filling and then heat-sealed closed. Some suppliers may define the terms slightly differently, but in practice, they describe the same core structure in flexible packaging.

    This format is valued for its simplicity and efficiency. Lay flat pouches typically offer lower per-unit cost, efficient shipping and storage due to their flat profile, and strong compatibility with form-fill-seal systems. They are widely used in high-volume packaging because they are easy to produce, easy to fill, and highly space-efficient in transit.

    However, they do not stand upright and have limited shelf presence on their own, often requiring cartons, display boxes, or hang holes for retail presentation. They are also less suited for multi-use products unless additional features are added.

    Best-fit use cases

    Flat / 3-side seal pouches are often a strong fit for:

    • Single-serve packaging
    • Samples and test SKUs
    • Seasonings, spices, and condiments
    • Tea and coffee samples
    • Powdered drink mixes and supplements
    • High-volume, thin-margin products
    • Products packaged into cartons or display boxes

    In short, flat and 3-side seal pouches are best for cost efficiency, scalability, and single-use applications where retail presence is handled outside the pouch itself.

    Stand-Up Pouch vs. Lay Flat Pouch: Key Differences

    The two most common flexible pouch formats—stand-up pouches and flat pouches—solve very different operational and commercial needs. This comparison breaks down how each format performs across cost, shelf presence, production efficiency, and use case so buyers can quickly identify which structure best aligns with their product strategy, volume requirements, and retail goals.

    Comparison Point

    Stand-Up Pouch

    Flat Pouch / 3-Side Seal Pouch

    Best for

    Retail products, premium branding, multi-use products

    Single-serve, sample-size, bulk, high-volume, or cost-sensitive products

    Shelf presence

    Strong; stands upright on shelf

    Limited unless used with hang hole, carton, or display box

    Typical cost

    Usually higher due to bottom gusset and added manufacturing steps

    Usually lower due to simpler structure

    Shipping and storage

    Less compact than flat formats

    Very efficient; stacks and ships flat

    Resealability

    Strong fit for zippers and multi-use features

    Possible in some cases, but less common for single-serve applications

    Filling compatibility

    May require specific equipment depending on operation

    Often compatible with simpler or faster form-fill-seal lines

    Barrier protection

    Depends on film structure, not just pouch format

    Depends on film structure, not just pouch format

    Best product examples

    Coffee, snacks, pet treats, supplements, powders

    Seasonings, samples, condiments, single-serve powders, tea, kits

    Best buyer profile

    Brand prioritizing shelf appeal and consumer experience

    Brand prioritizing cost, efficiency, and high-volume production

    Stand-Up Pouch vs. Flat Pouch: How They Compare

    Cost Per Unit

    In a stand up pouch vs flat pouch comparison, flat (3-side seal) pouches usually win on per-unit cost because they use a simpler structure without a gusset or extra forming steps. This makes them more cost-efficient, especially for high-volume or thin-margin products.

    Stand-up pouches typically cost more, but the added cost can be justified when stronger shelf presence, branding, or resealability helps drive sales.

    Key idea: Flat wins on cost; stand-up wins when presentation supports higher perceived value.

    Shelf Display and Retail Presence

    Stand-up pouches win for retail shelf presence because the gusset allows them to stand upright and creates a strong “billboard effect” for branding.

    Flat pouches can work in retail but usually need hang holes, cartons, or display packaging to achieve visibility.

    Key idea: Stand-up is better for competing on shelf.

    Shipping and Storage Efficiency

    Flat pouches win on shipping and storage because they pack completely flat and maximize space efficiency in cartons, pallets, and warehouses.

    This is especially valuable for high-volume and cost-sensitive products. Stand-up pouches take up more space before filling.

    Key idea: Flat formats are more efficient for logistics and storage.

    Filling Line Compatibility

    Both formats can work with standard equipment, but flat pouches often run more easily on form-fill-seal lines. Stand-up pouches may require more specific setup depending on the system.

    Buyers should confirm compatibility with their co-packer or production team before choosing. CarePac can help evaluate this early.

    Key idea: Fit depends on equipment, not just format.

    Barrier and Product Protection

    Barrier protection comes from the film, not the pouch format. Both stand-up and flat pouches can be built with high-barrier structures for moisture, oxygen, light, and aroma protection.

    Key idea: Choose material structure, not pouch shape, for barrier performance.

    Consumer Experience and Resealability

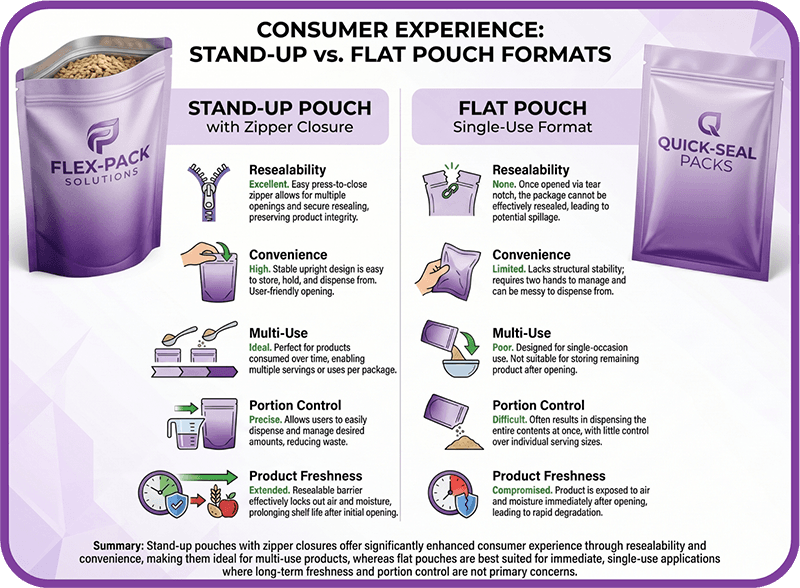
    Stand-up pouches win for multi-use products because they pair well with zippers and resealability features.

    Flat pouches are better for single-use items where simplicity matters more than resealing.

    Key idea: Stand-up for multi-use; flat for single-use efficiency.

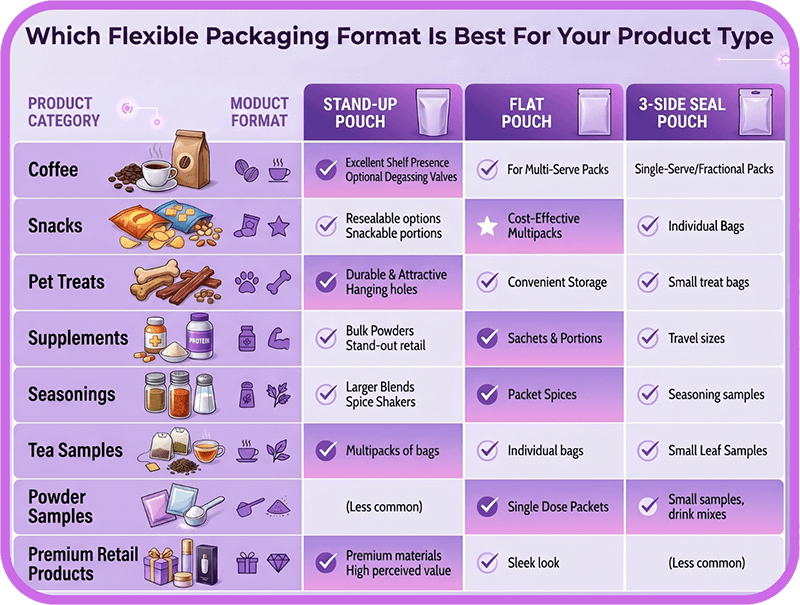
    Which Flexible Packaging Format Is Best for Your Product Type?

    The two most common flexible pouch formats—stand-up pouches and flat pouches—solve very different operational and commercial needs. This comparison breaks down how each format performs across cost, shelf presence, production efficiency, and use case so buyers can quickly identify which structure best aligns with their product strategy, volume requirements, and retail goals.

    Product Type

    Recommended Format

    Why

    Coffee

    Stand-up pouch or flat-bottom pouch

    Strong shelf presence, resealability, and freshness features such as high-barrier films and degassing valve options

    Snacks

    Stand-up pouch

    Better shelf presence and resealable options for multi-use products

    Seasonings

    Flat pouch / 3-side seal pouch

    Cost-effective for single-serve packets, samples, and high-volume runs

    Condiments

    Flat pouch / 3-side seal pouch

    Efficient for portion packs and single-use applications; requires less space

    Supplements

    Stand-up pouch or flat pouch depending on use case

    Stand-up works for multi-use powders; flat works for samples or single-serve packets

    Pet treats

    Stand-up pouch

    Better retail presence, visual appeal, and resealability

    Tea samples

    Flat pouch / 3-side seal pouch

    Compact, efficient, and suitable for sample-size and lightweight products

    Powder samples

    Flat pouch / 3-side seal pouch

    Lower cost and efficient for single-use servings

    Premium retail products

    Stand-up pouch

    Better branding surface and shelf impact

    Bulk or display-box products

    Flat pouch / 3-side seal pouch

    Packs efficiently and works well inside cartons or display boxes

    Who Should Use a Stand-Up Pouch?

    Stand-up pouches are usually a good fit for brands that:

    • Sell products in retail environments
    • Need strong shelf presence
    • Want the package to stand upright without a display box
    • Have multi-use products that benefit from resealability
    • Use packaging as a brand billboard
    • Sell premium or specialty products
    • Need larger printable panels for branding and design impact
    • Want a more consumer-friendly, easy-to-handle pouch format
    • Sell products like coffee, snacks, supplements, powders, pet treats, or specialty foods

    CarePac can help brands customize stand-up pouch size, material structure, finish, zipper, and barrier performance based on the product and sales channel.

    Who Should Use a Flat Pouch or 3-Side Seal Pouch?

    Flat pouches or 3-side seal pouches are usually a good fit for brands that:

    • Package single-serve products
    • Need sample-size packaging
    • Run high volumes on tight margins
    • Ship products in bulk cases, cartons, kits, or display boxes
    • Want to reduce storage and freight inefficiency
    • Are testing a new SKU before scaling
    • Need simple heat-sealed packaging
    • Use form-fill-seal lines suited to flat formats
    • Sell products like spice packets, seasoning sachets, tea samples, condiment portions, supplement samples, or powder packets

    CarePac can help buyers confirm whether flat or 3-side-seal packaging fits their product size, filling process, barrier requirements, and order volume.

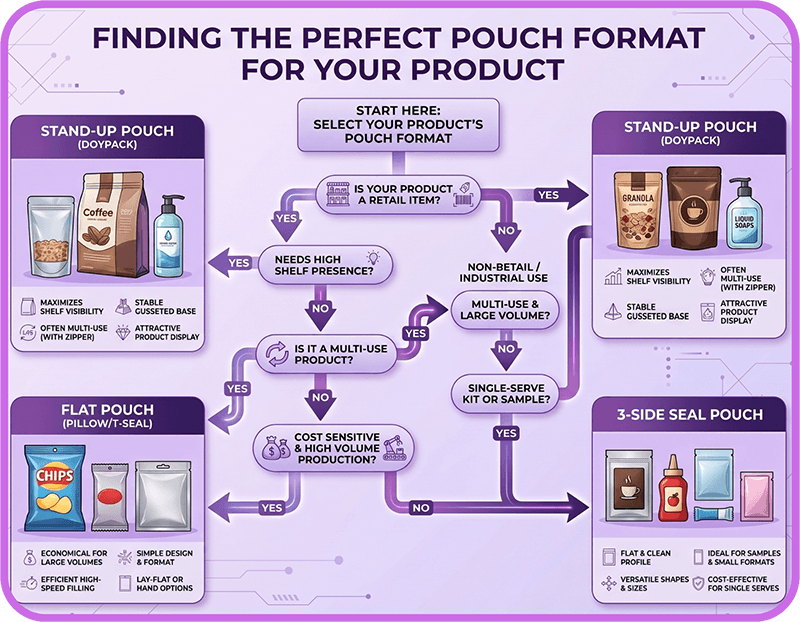
    Which Pouch Format Is Right for Your Product?

    Here’s how we typically walk buyers through this decision at CarePac—less theory, more “what actually works in your operation.”

    Choose a stand-up pouch if:

    • Your product sells in retail environments
    • Shelf presence is a major factor in purchase decisions
    • You need the package to stand upright on its own
    • The product is designed for multi-use consumption
    • Resealability (like a zipper) improves user experience
    • Your brand relies on premium packaging and strong visual impact
    • You sell products like coffee, snacks, pet treats, supplements, powders, or specialty foods

    Choose a flat pouch or 3-side seal pouch if:

    • Your product is single-serve or portion-controlled
    • You are packaging samples or trial sizes
    • Products ship in bulk cases, cartons, kits, or display boxes
    • Cost efficiency and tight margins are a priority
    • You are launching or testing a new SKU before scaling
    • You need a compact, space-efficient packaging format
    • Shelf standing is not required for the product

    If you are not sure which format fits your fill line, order volume, and distribution setup, CarePac’s team can walk you through the options before you commit to a production run. Request a quote today.

    Common Mistakes to Avoid When Choosing a Flexible Pouch Format

    Choosing between pouch formats isn’t just a design decision—it’s an operational one. These are the mistakes we most often see when buyers select flexible packaging.

    Mistake 1: Choosing Based on Looks Alone

    It’s easy to default to what looks best on shelf, but appearance is only one part of the equation. The pouch also has to work with your fill line, shipping model, barrier requirements, and overall budget. A format that looks great but slows production or increases costs will create problems later.

    Mistake 2: Assuming Stand-Up Pouches Always Have Better Barrier Protection

    Barrier performance is determined by the film structure, not whether the pouch is stand-up or flat. Both formats can be engineered with high-barrier materials depending on what the product needs to protect against, including moisture, oxygen, light, and aroma loss.

    Mistake 3: Forgetting About Filling Compatibility

    A pouch can look perfect on paper but still create bottlenecks on the production floor. Different structures may require different handling or machinery, especially when working with co-packers or automated form-fill-seal systems. Always confirm compatibility before committing.

    Mistake 4: Ignoring Freight and Storage Costs

    Unit cost is only part of the picture. Storage efficiency, carton configuration, pallet density, and shipping volume all impact total landed cost. Flat pouches often outperform here because they pack more efficiently than gusseted formats.

    Mistake 5: Choosing a Format That Doesn’t Match the Consumer Use Case

    Packaging should match how the product is actually used. Multi-use products typically need resealability and better handling, while single-use products often benefit from simpler, lower-cost formats that prioritize efficiency over reusability.

    Verdict: Stand-Up Pouch vs. Flat Pouch vs. 3-Side Seal Pouch

    There is no single “best” pouch format—only the format that best fits your product and operation.

    Stand-up pouches are typically the stronger choice when shelf presence, resealability, branding, and consumer experience are priorities. Their ability to stand upright and showcase a larger branded surface area makes them especially effective for retail products and premium product lines.

    Flat pouches and 3-side seal pouches are usually the stronger choice when cost efficiency, compact shipping, single-serve applications, or high-volume production matter most. Their simple structure helps reduce costs while maximizing storage and distribution efficiency.

    Ultimately, the right choice depends on your product, filling process, order volume, distribution channel, barrier requirements, and how customers will interact with the package after purchase.

    CarePac can help brands compare pouch formats, materials, features, and custom configurations before placing a packaging order, ensuring the final solution aligns with both operational requirements and brand goals.

    Frequently Asked Questions 

    Lets Get Started

    Made In The USA

    Full PouchCustomization
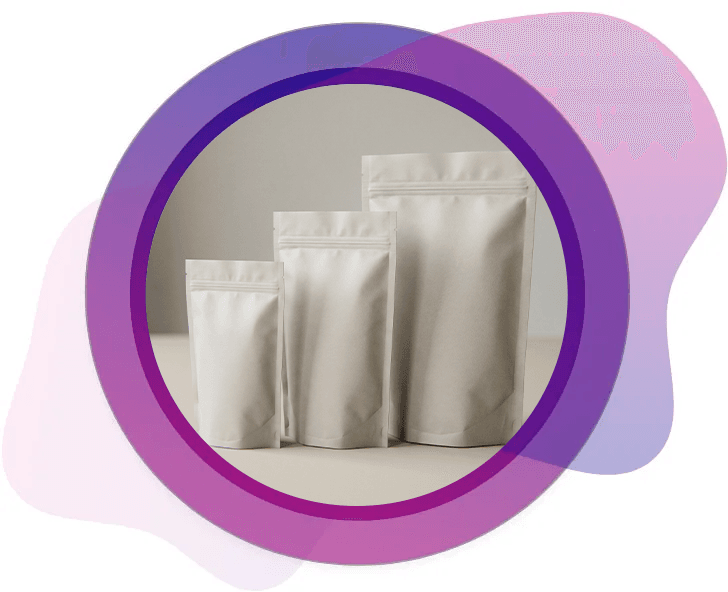
    Scalable Printing Digital & Plate

  • What to Know Before Ordering 10k+ Custom Pouch Bags

    What to Know Before Ordering 10k+ Custom Pouch Bags

    What to Know Before Ordering 10,000+ Custom Pouch Bags

    Ordering Custom Pouches in Bulk

    As you already know, a lot more is on the line with high-volume, bulk orders than with smaller quantities. At this volume, mistakes are expensive and a wrong film spec, an artwork or design file that isn’t production-ready or a missed lead time window doesn’t just cost companies a few hundred dollars – it costs you weeks, hundreds of thousands of dollars and potentially a production shutdown.

    In this blog, we’ll walk you through what you need to know before you order 10,000+ custom pouches, so you’re happy with the finished product.

    Comparison of stand-up pouches, pillow pouches, side gusset bags, and three-side seal bags, illustrating common flexible packaging formats used for large-volume custom packaging orders.

    Lock In Your Stand Up Pouch Specs Before You Request a Quote

    At 10,000+ units, every decision is a cost decision, so it’s beneficial to be confident in your choices. From whether to use sustainable materials to whether to include resealable zippers or tear notches, there’s a lot to consider. In this section, we’ll walk you through the five things that must be finalized before a quote can be accurate and explain why each one matters at scale.

    Diagram showing multilayer flexible packaging construction, including printable, barrier, and sealant layers designed to provide oxygen, moisture, and light protection for packaged products.

    1. Format and Size

    Before you worry about the specifics of your packaging, you’ll need to decide on which pouch configuration you need. Popular options include stand-up pouches, flat pouch, side-gusset, and 3-side-seal bags. Dimensions are always listed as width x height x gusset, and fill volume (not product weight!) determines the right size. Since a wrong size at 10,000+ units means 10,000+ unusable pouches, we recommend ordering samples from our website if there’s any doubt.

    2. Film and Barrier Structure

    This is the area where most high-volume buyers underspec. The film you choose determines barrier performance, print quality, finish options, and shelf life. These are extremely important considerations if you’re packaging food, powders, or liquids that can leak or spoil while in transit and storage. Here’s a quick breakdown:

    • High-barrier and durable foil/mylar laminates are the best choice for oxygen and moisture-sensitive products (coffee, jerky, freeze-dried foods, supplements)
    • Clear barrier film is ideal for products where visibility at retail matters (snacks, dry goods)
    • Kraft is suitable for natural/organic brand positioning
    • Recyclable mono-material for sustainability-driven brands or retailers with eco requirements

    3. Features and Closures

    Depending on what you’re packaging and shipping, you might need to customize special features or closure options into your pouch, including zippers, hang holes, tear notches, degassing valves, or a window. Each feature adds to the unit cost, and some (such as child-resistant zippers) may be required for compliance. At 10,000+ units, you should know exactly which features you need before ordering, as changing a specification or feature mid-quote adds time.

    4. Quantity and SKU count

    Are all 10k units one SKU, or are SKUs split across multiple sizes and designs? Because multiple SKUs at the same spec can often be consolidated into a single production run, buyers should ask about this before finalizing their order. Different specs mean separate runs and separate pricing.

    5. Finish

    This is the fun part! Once you’ve settled on a format, size, material, barrier structure, and special features, you can decide which finishing touches to add to your bag. From matte and gloss to soft-touch and holographic finishes, the finish affects both the appearance and per-unit cost of your bags. Again, this should all be confirmed before the artwork file is made and finalized.

    Side-by-side comparison of matte and gloss custom pouch finishes, highlighting differences in appearance, texture, shelf impact, color vibrancy, and branding presentation.

    Your Artwork File Needs to Be Print-Ready Before You Order Pouches

    Artwork delays are the single most common reason large orders run late. At 10k+ units, the print process differs from a digital short run, and files that “look fine” in a design app will fail in production if they’re not set up correctly. In this section, we’ll walk you through what “production-ready” actually means so you can brief your designer correctly before submitting your files.

    File Format

    Adobe Illustrator (.ai) is the standard. PDFs are acceptable if saved correctly. We do not accept Canva exports or low-resolution JPEGs. Supplying the correct file type helps avoid production delays and ensures that your artwork is processed accurately by our prepress team.

    Use the Dieline

    We provide downloadable dieline templates for every pouch format and style. The artwork must be built on the correct dieline with the front, back, and gusset panel details laid out accurately. Using the proper template ensures that graphics, text, and packaging features align correctly once the pouch is formed and sealed.

    Resolution

    All embedded images must be 300 dpi CMYK. Vector art (logos, text, line graphics) must be outlined and linked correctly. Low-resolution artwork may appear blurry or pixelated in print, especially on larger pouch formats or high-volume production runs. If you need help, we offer design support.

    Color Mode

    CMYK throughout. Any Pantone/PMS colors should be explicitly called out. RGB files will shift in print at 10k units; that shift is locked in. Converting files to CMYK before submission gives you a more accurate representation of how colors will reproduce on the final package.

    Bleed and Safe Zones

    Artwork must extend beyond the cut line (bleed), and critical elements, text, and business logos must remain within the safe zone. Getting this wrong at scale means reprints. Even slight movement during cutting or pouch conversion can affect placement, so following bleed and safe zone guidelines is essential for professional results.

    White Ink Layer

    If you’re ordering on clear film, a white ink base layer is required in the file. This is a common miss for buyers new to clear film. Without a properly defined white ink layer, colors can appear translucent, muted, or different from expected when printed on transparent material.

    Hidden Layers

    Remove all unused or hidden layers before submitting. Production teams work from the file as submitted. Cleaning up your file reduces the risk of unintended artwork appearing in production and helps streamline the prepress review process.

    Plan Around Lead Times Especially for First Runs

    Lead time is the most misunderstood element of a large pouch order, especially for buyers who have only done short digital runs before. In this section, we’ll help you set realistic expectations and explain what affects lead times so you can plan your production calendar correctly.

    • First run vs. reorder: A first-time production run at 10k+ units takes longer than a reorder. The supplier needs to setup plates, create a proof, and get approval before production starts. Reorders are faster because specs and artwork are already in the system.
    • Three lead time tiers: CarePac offers express, standard, and economy lead times. Buyers should know what they need and factor the cost difference into their budget before requesting a quote from our store. Don’t request economy pricing and then need express delivery.
    • Artwork approval is part of the lead time: The production clock doesn’t start until the buyer approves the proof. Buyers who take two weeks to review a proof have added two weeks to their order. Have a stakeholder identified and ready to approve before the order is uploaded and placed.
    • Plan for your fill line schedule: Large pouch orders need to land before the buyer’s fill line run, not the day of. Build in a buffer for receiving, inspection, and resolution of any quality issues before filling begins.
    • Regulatory lead time (if applicable): Child-resistant pouches, food-contact compliance, and certain barrier film certifications may require additional documentation review. Flag these early and leave time to review and reflect the features.

    Production timeline infographic outlining the custom pouch ordering process, including quote request, artwork proofing, approval, manufacturing, shipping, and final delivery.

    Compliance Requirements That Affect Your Pouch Order

    Compliance issues discovered after production are extremely expensive. Though there are a wide range of compliance requirements your packaging will need to meet depending on your industry, here are some of the most common compliance areas we run into:

    Food-contact compliance: Any pouch used for food products must be made from FDA CFR-compliant materials. CarePac’s materials are FDA CFR 73, BPA-free, and phthalate-free. Buyers should confirm that this is documented on their order before checkout.

    Child-resistant requirements: Child-resistant packaging requirements for cannabis, supplements, detergent pods, and other potentially hazardous products vary by state and category. Buyers need to know their requirements before specifying features. Important note: Child-resistant zippers are not interchangeable with standard zippers. 

    Kosher/TSE/other certifications: Some buyers’ customers or retail partners require specific material certifications. CarePac materials are Kosher and TSE-free, but buyers should confirm what their retailer or co-packer requires and verify against their spec sheet.

    Sustainability/recyclability claims: If the buyer intends to print recyclability claims on the pouch, the film structure must support those claims. Confirm the film certification before finalizing artwork printing, as a claim on a non-certified structure creates a compliance liability.

    What to Have Ready When You Request a Quote from CarePac

    Before requesting a quote, make sure you’ve confirmed the key details of your project. That includes your pouch format, finished dimensions based on fill testing, film structure and barrier requirements, desired features such as zippers, tear notches, valves, windows, hang holes, and finishes, as well as your total order quantity and number of SKUs. You should also know whether your artwork is production-ready on the correct dieline or if you’ll need design support; your required in-hands date and preferred lead time tier; and any compliance requirements, such as FDA, child-resistant, or recyclability.

    Once you have those details, you’re ready to request a custom packaging quote. Visit CarePac’s quote page to submit your project requirements and receive pricing tailored to your specifications. If you still have questions about pouch formats, materials, artwork setup, or production timelines, schedule a free consultation with the CarePac team and get expert guidance before you’re ready to quote.

    Warehouse storing large quantities of finished custom stand-up pouches on pallets, demonstrating inventory management, bulk purchasing advantages, and production efficiency for high-volume orders.

    Frequently Asked Questions 

    Lets Get Started

    Made In The USA

    Full PouchCustomization
    Scalable Printing Digital & Plate

  • Doypack Configurations: What They Are & When to Use

    Doypack Configurations: What They Are & When to Use

    Doypack Configurations: What They Are & When to Use Them

    Intro to Doypack Plastic Packaging

    A doypack stand up pouch is one of the most widely used flexible packaging formats in the world. Known for its curved bottom gusset and ability to stand erect on store shelves, this pouch style is popular for products ranging from snacks and coffee to pet food and supplements.

    Doypacks are one of several stand up pouch configurations used in flexible packaging. Understanding how they compare to alternatives like plow bottom pouches and K-Seal pouches can help brands choose the right format for their product, filling process, and shelf display needs.

    Originally developed in 1963 by French inventor Louis Doyen, the doypack design consists of two flat sheets sealed along the sides with a rounded gusset at the bottom. Today, billions of doypacks are used globally each year because they provide an excellent balance of cost efficiency, shelf presence, and packaging performance.

    In this article, we’ll explain how doypack packaging works, when they’re the best option, and how they compare with other common standing pouch structures.

    Key Features of Doypack Flexible Packaging

    One of the key advantages of a doypack pouch is its flexibility in design and functionality. Manufacturers can customize these pouches to match specific packaging needs and branding goals. They can be manufactured in different shapes and various sizes and can also be made from eco friendly materials.

    Common doypack configurations include:

    Because the structure of these packaging solutions are relatively simple compared to other stand up pouch designs, doypacks work well across a wide range of industries while remaining cost-effective to manufacture and fill.

    Common Applications of Doypack Packaging Solutions

    Doypack pouches appear in nearly every business and retail category because they offer a good balance between protection, presentation, and cost. They also have a lesser environmental impact than some other packaging solutions.

    Liquids

    Spouted doypacks are commonly used for products like soups, sauces, baby food, and drink mixes. Compared to rigid containers, flexible pouches reduce shipping weight and storage space.

    Pet Food

    Fresh pet food brands frequently use doypack pouches because the sealed barrier films help protect against moisture and oxygen exposure.

    Snacks, Coffee, and Confectionery

    Many snack brands choose doypacks because the resealable zipper keeps nuts, supplements, and other products fresh after opening. Coffee brands also use doypacks with degassing valves to release CO₂ produced by freshly roasted beans.

    Doypack Pouches vs Other Stand Up Pouch Configurations

    While doypacks are extremely common, they are not the only stand up pouch option available. Other popular configurations include plow bottom pouches and K-Seal pouches.

    Each structure has advantages depending on the product weight, filling method, and retail presentation.

    Feature

    Doypack (Doyen Seal)

    Plow Bottom Pouch

    K-Seal Stand Up Pouch

    Bottom Construction

    Rounded bottom gusset (U-shaped seal)

    Fold-over bottom with simple cinches forming a gusset

    Angled bottom created by angled seals

    Stands on Shelf?

    Yes, generally acceptable

    Only with powder or granular products

    Yes – most stable

    Shelf Stability

    Good for most products

    Depends on product density

    Excellent (most stable)

    Visual Shape

    Soft, rounded base

    Pillow-like

    lat base with angled corners

    Blow Outs

    Balanced performance

    Usually lowest with powder products

    Heavy products may experience blow outs due to gusset complexity

    Premium Look

    Moderate

    Lower

    High / premium

    Common Use Cases

    Coffee, tea, snacks, pet food

    Powder products, granular snacks

    Snacks, supplements, premium food

    Wrinkle Resistance

    Moderate

    Moderate to low depending on fill

    Highest

    Fill Tolerance

    4 star

    5 star

    3 star

    Cost (Relative)

    $$

    $

    $$$

    Best For

    General use stand-up packaging

    Heavy powder products

    Premium shelf presentation

    Alternate Names

    Doyen pouch, doypack

    Square bottom pouch, flat bottom pouch

    K-Seal pouch

    Benefits of a Doypack Bags

    Doypack pouches are popular because they strike a balance between cost, performance, and shelf display in the market. When compared to other stand up pouch structures, several advantages stand out for both consumers and businesses.

    Cost Efficiency

    Compared to K-Seal pouches, doypacks typically use less material and require simpler sealing patterns. This often makes them more economical for brands scaling production.

    Lightweight Transportation

    Like most flexible packaging formats, doypacks are extremely lightweight. Compared to rigid containers, they reduce shipping costs and warehouse storage space.

    Versatile Across Product Types

    Compared to plow bottom pouches, doypacks perform better across a wider range of products. While plow bottom structures work best for powders or granular fills, doypacks can handle liquids, snacks, coffee, supplements, and pet food.

    Customization Options

    Doypack pouches can include a wide variety of features, including:

    • Zippers
    • Tear notches
    • Degassing valves
    • Windows
    • Spouts
    • Hang holes

    This makes them adaptable for both retail and e-commerce packaging.

    How to Choose the Right

    Stand Up Pouch for Your Product

    Choosing the right pouch configuration depends on several factors including product weight, fill method, and how the product will appear on the shelf.

    Choose a Doypack if:

    • You need versatile packaging for multiple product types
    • You want a cost-effective stand up pouch
    • Your product ranges from light to moderately heavy
    • You want a balance of performance and shelf presence

    Choose a Plow Bottom Pouch if:

    • Your product is powder, granules, or loose fill
    • You want maximum fill tolerance
    • Cost efficiency is the primary concern
    • Shelf presentation is less important

    Choose a Doypack if:

    • Shelf stability is critical
    • You want a premium retail appearance
    • Your product requires a flat base display
    • Packaging aesthetics are a major part of branding

    CarePac: Your Stand Up Pouch Packaging Partner

    Choosing the right pouch configuration can significantly impact product protection, shelf presentation, and packaging costs.

    If you’re unsure which stand up pouch style is right for your product, our team can help you evaluate the best option based on your product type, filling method, and retail goals.

    Not sure which stand up pouch configuration is right for your product?

    Our packaging experts can help you compare doypack, plow bottom, and K-Seal pouch options before you commit.

    Get started with a quote today.

    FAQ: Doypack Stand Up Pouches

    Lets Get Started

    Made In The USA

    Full PouchCustomization
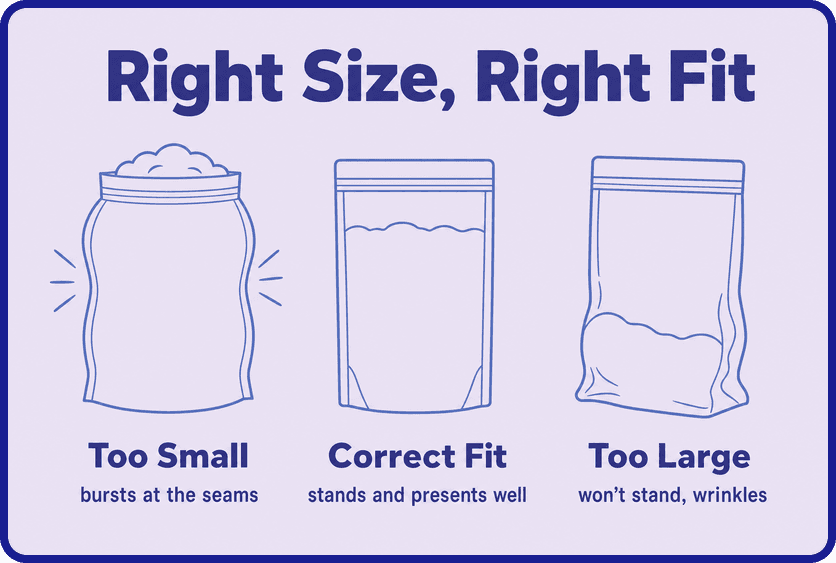
    Scalable Printing Digital & Plate

  • Which Countries Have the Best Prices on Packaging

    Which Countries Have the Best Prices on Packaging

    Countries With Lowest Packaging Prices

    The Global Landscape: Why Custom Packaging Prices Vary by Country

    Packaging prices are rarely uniform across the globe. While it can be tempting to many consumers to chase the lowest per unit cost, the true price of cheap packaging is a complex calculation of packaging material, labor costs, freight, and logistics. Price differences are very real, but so are significant variations in quality, lead times, and reputational risk to your brand.

    CarePac brings extensive, hands-on experience navigating these global differences and, in this blog, we’ll break down the primary drivers causing packaging prices to vary by country and by packaging company. If you’re looking to reduce packaging costs by outsourcing overseas, this guide is for you.

    World trade map with custom flexible packaging pouches highlighting global packaging suppliers, international pouch manufacturing, overseas sourcing strategies, and competitive packaging pricing options.

    China — Lowest Unit Prices, Highest Hidden Cost Structures

    China is the often the cheapest option for lower to mid-volume orders, particularly if you’re ordering 100,000 units or less. If you’re ordering more units than that, other countries actually have a better cost advantage because the price for labor in China has actually skyrocketed in the last decade due to the increase in their skilled workforce. Here are some quick pros and cons of ordering your flexible packaging from a packaging company in China.

    Pros:

    • Lower cost per unit 
    • Huge manufacturing capacity
    • Wide selection of cheap packaging materials, including recycled materials

    Cons:

    • Quality inconsistencies 
    • Freight volatility 
    • Tariffs, duties, port fees
    • Miscommunication
    • Delays (CNY, congestion) 
    • High MOQs

    Ultimately, ordering packaging components from an Asian country like China can appear to be cheap at checkout but expensive once issues begin to surface.

    Shipping boxes labeled “Made in China” representing overseas packaging manufacturing, bulk flexible packaging sourcing, lower production costs, and international packaging supply chains.

    Vietnam — Cost Effective Pricing, Improved Quality, Longer Lead Times

    Vietnam has established itself as one of the lowest-cost manufacturing companies in the world because of its extremely low labor costs, which tend to be 40-60% lower than those in China. While the country is officially under a Communist government, it is highly proactive in promoting business and signing trade agreements. Though Vietnam lacks some of the newest technology and doesn’t excel at digital printing, they’re a great solution if you’re looking for high volume and low pricing.

    Pros:

    • Growing packaging industry, including food packaging 
    • Slightly more stable quality than some Chinese factories
    • Good for larger runs

    Cons:

    • Longer lead times
    • Limited customization compared to China
    • Still requires overseas logistics & import fees
    • Smaller vendor base, i.e., raw materials and plastic packaging can be harder to source

    In essence, Vietnam is a good middle ground when it comes to quality packaging, but still has plenty of overseas unpredictability to take into consideration.

    Shipping package on top of a global map representing international freight logistics, overseas packaging procurement, export packaging solutions, and global packaging distribution strategies.

    India — Low Flexible Packaging Cost, Compromising Quality

    India was briefly seen as the next major hub for affordable packaging manufacturing because it avoided the heavy tariffs placed on countries like China and Vietnam during the Trump administration. That changed when trade tensions between the U.S. and India resulted in significantly higher tariffs on Indian goods as well. India remains highly business-friendly, but sourcing packaging there is often more relationship-driven than in many other countries on this list. When purchasing low-cost packaging from India, having a trusted local partner on the ground can be invaluable for maintaining quality and ensuring smooth production.

    Pros:

    • Very low per-unit price
    • Strong for certain substrates

    Cons:

    • Quality variability
    • Ink and film consistency issues
    • Communication barriers
    • Very long lead times

    When it comes to the packaging industry in India, you’ll have to ask yourself this question: “Savings vs reliability – which matters more?”

    Open cardboard shipping box placed on a world map illustrating international packaging sourcing, global logistics, overseas packaging suppliers, and worldwide shipping distribution networks.

    Mexico — Moderate Pricing + Faster Shipping

    Mexico usually isn’t a good solution for most packaging buyers because it’s a very specialized manufacturing country. It doesn’t focus on cheap packaging and its packaging supplies primarily come from other countries. For example, in many cases, if you’re buying your packaging from Mexico it was probably originally sourced from Vietnam.

    Pros:

    • Shorter shipping timelines (land freight)
    • Lower freight cost
    • NAFTA/USMCA tariff benefits

    Cons:

    • Higher unit cost than Asia
    • Smaller supplier pool
    • Limited highly-specialized materials/effects

    Although Mexico isn’t often the first choice for packaging, it can be a good choice for brands needing more predictable timelines.

    Mexican flag symbolizing packaging manufacturing and sourcing opportunities in Mexico for affordable custom packaging, shorter lead times, and North American supply chain advantages.

    United States — Higher Unit Price, Lowest Total Risk

    With the ongoing shifts in globalization many companies are rethinking how to reduce supply chain risk. One of the most effective strategies is keeping production as close to home as possible, which is a major advantage of manufacturing in the United States.

    In addition, increased automation and relatively low petroleum costs help make U.S.-based production more economically viable than many businesses assume. While we may be somewhat biased as a U.S.-based company, we believe domestic manufacturing offers a practical and resilient solution for companies looking to strengthen their supply chains.

    Pros:

    • Fastest communication
    • Highest quality oversight
    • No import fees / freight simplicity
    • Lowest risk of misprints
    • Predictable timelines

    Cons:

    • Higher per-unit packaging cost
    • Potentially higher MOQs than new brands want

    Stacked shipping boxes labeled “Made in USA” representing domestic packaging manufacturing, faster turnaround times, lower freight risks, and reliable packaging supply chain solutions.

    The Hidden Cost Equation (Where Brands Miscalculate “Cheap” Packaging)

    What looks inexpensive on paper often becomes far more costly once the full picture is considered. Many brands focus on unit price alone and overlook the additional expenses that accumulate throughout the sourcing process.

    Common hidden packaging costs include:

    • Freight variability – Ocean and air shipping rates can fluctuate significantly, making landed costs unpredictable.
    • Duties and tariffs – Import fees can add substantial percentage increases to your total cost.
    • Customs brokerage – Required services that many buyers forget to factor into budgets.
    • Port and storage fees – Delays at ports can lead to unexpected storage and demurrage charges.
    • Quality control failures – Defects may not be discovered until inventory arrives, when it’s too late to fix cheaply.
    • Reprints and remanufacturing – Errors in different materials or artwork can require full production runs to be repeated.
    • MOQ waste – Large minimum orders often force brands to purchase more inventory than they actually need.
    • Communication delays – Time zone differences slow decision-making and problem resolution.
    • Missed retailer deadlines – Late shipments can result in lost shelf space, penalties, or canceled orders.

    When these important factors are added together, the lowest quoted price is often not the lowest total cost. Brands that account for the full cost equation tend to make more sustainable sourcing decisions.

    So Which Country Has the “Best Prices”? The Answer Depends on Consumer Preferences

    The “best price” isn’t just about the lowest per-unit packaging cost — it’s about the lowest end-to-end cost. When you factor in freight, delays, quality risks, and inventory waste, the cheapest quote doesn’t always translate into the most affordable outcome.

    Here’s how the equation often breaks down:

    Chinese flag

    Lowest unit packaging cost — China

    China frequently offers the lowest per-unit pricing, especially for high-volume production. However, the total cost can rise quickly once freight, tariffs, longer lead times, and risk are included.

    Mexican Flag

    Best balance — Mexico

    Mexico often provides a middle ground: competitive pricing combined with shorter transit times and easier communication. For many brands, this balance can reduce overall costs and improve reliability.

    United States of America Flag

    Lowest risk and most predictable total cost — United States

    Domestic production typically has higher upfront pricing but fewer surprises. Faster turnaround times, easier quality control, and lower logistics complexity often make total costs more predictable.

    The reality is simple: cheap is only cheap when nothing goes wrong — and something almost always goes wrong in overseas production.

    The smartest sourcing decisions come from evaluating the full cost picture, not just the number on the initial quote.

    How CarePac Helps You Navigate Pricing Without Surprises

    If you’ve sourced cheap packaging before, you’ve likely encountered unexpected costs, confusing quotes, or production delays. The goal isn’t just to find a lower price — it’s to make sure the price you see is the price you can rely on. CarePac focuses on making the process clearer and more predictable so you can make confident decisions.

    Business team reviewing custom flexible packaging pouch samples and discussing international packaging suppliers, pricing strategies, and cost-effective packaging solutions for global sourcing.

    Here’s how we help reduce uncertainty:

    U.S.-based communication and predictable timelines

    Work with a responsive team in your time zone, with realistic schedules you can plan around.

    Transparent pricing structure

    Quotes are designed to reflect true project costs — not teaser prices that grow later through hidden fees.

    Lower MOQs for growing brands

    Order quantities that match your current stage, so you’re not forced into excess inventory.

    Accurate proofs and strong quality control

    Clear proofs and careful review processes help prevent costly errors before production begins.

    Guidance on materials and specifications

    Get practical input on substrates, sizing, and technical details so your packaging works the first time.

    Experience across domestic and overseas production

    Advice is based on real-world experience managing both U.S. and international supply chains, helping you choose what actually makes sense for your situation.

    You’ve seen the pitfalls — this is how to avoid them.

    Want clarity around your quality packaging costs?

    Get expert guidance with your first quote — no pressure, no surprises.

    Lets Get Started

    Made In The USA

    Full PouchCustomization
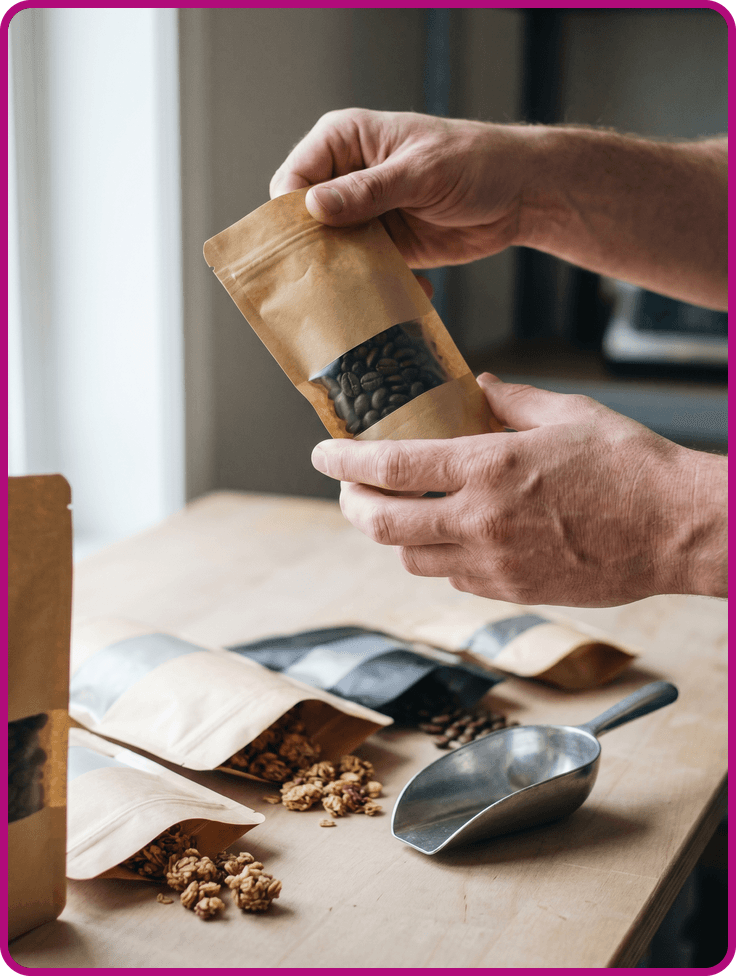
    Scalable Printing Digital & Plate

  • How to Manage Lead Time for Overseas Packaging

    How to Manage Lead Time for Overseas Packaging

    How to Manage Lead Times for Overseas Packaging

    Why Lead Time Management Is So Hard for Growing Brands

    Overseas packaging lead times and production times are rarely a single, linear countdown. In reality, they’re made up of multiple parallel timelines happening at once: artwork development and approval, supplier production, freight booking, customs clearance, and even co-packer scheduling on the receiving end. New and scaling brands often assume these steps happen one after another, when in fact many overlap and depend on each other to stay on track.

    Because of that overlap, most delays in the packaging industry don’t start on the factory floor. They start much earlier. A late artwork revision, a missed proof approval, or a misunderstanding about print methods (like plate printing versus digital) can quietly stall everything. Once production is ready, shipping introduces its own variables: express air freight, fast ocean, or slow ocean options each have different timelines, costs per pound or kilogram, and duty or tariff considerations that vary by product and origin.

    Comparison of air freight and sea freight options showing speed, cost, and volume differences, highlighting trade-offs between faster delivery and lower costs when managing overseas packaging lead times.Container ship navigating rough ocean waters, symbolizing shipping delays, port congestion, weather disruptions, and extended transit times affecting overseas packaging delivery schedules.

    Then come the factors no supplier can control: weather disruptions across the Pacific, port delays or labor strikes, and multiple levels of customs inspection can all stretch timelines without warning. The key takeaway is simple: packaging lead time is not just manufacturing time, and even a small delay early in the process can ripple across the entire chain. 

    With experience managing these moving parts, CarePac helps brands identify risks early, align timelines realistically, and avoid the costly surprises that derail overseas packaging projects.

    The Full Imported Packaging Timeline

    If you’re curious about what a typical timeline breakdown looks like, here’s a step-by-step look at what you can expect at each phase.

    Artwork prep – Here, your team will actually finalize a design and your final design is turned into a technical file that can actually be used to print your final packaging. 

    Proof approval – Unfortunately, many customers only notice errors the first time they look at an actual proof they have to sign. Fortunately, we catch a lot of errors that might not be caught by foreign producers because we speak English as a first language and engage in routine quality checks. 

    Production window – Timelines vary by the type of printing and style of bag and how busy the factory is. We offer three production schedules: express, standard, and economy. We try to group projects by type and how quickly customers need their packaging, and in doing so we’re able to provide customers with lower prices through more efficient production. 

    Freight (air vs sea) – Overseas packaging can ship via express carriers, air freight, or several types of ocean shipping, with faster transportation options costing more. International shipments require a freight broker and a customs bond, and while vendors may recommend their own brokers, you remain the importer of record and responsible for any issues. 

    Customs clearance – Custom clearance can be a swift process or a long, laborious process. Customs may open up corrugated boxes and products can get lost in customs clearance stage.

    Deliver to co-packer- Last mile delivery is often a logistical challenge because once it arrives in the United States, you have to get it to the final destination. The boxes your product comes in are not made of metal, and depending on the shipping method, they may arrive damaged.

    As you can see, there are many stages to importing packaging from overseas and it’s best to prepare for compounding potential delays (ex: if artwork is late, nothing can move forward).

    How to DIY Overseas Packaging Lead Time Management (The Reality Check Guide)

    If you do decide to do it on your own and aren’t partnering with a local supplier like CarePac, here is a complete walkthrough of what brands must manage on their own. If it feels overwhelming, that’s because it is. The complexity of handling this in-house cannot be underestimated and partnering with a company that understands the supply chain and focuses on customer satisfaction can give you a competitive advantage.

    Workflow infographic showing steps like gathering inputs, backward planning timelines, managing parallel workflows, and identifying red flags to optimize overseas packaging lead time management.

    Step 1 — Gather All Core Inputs Before You Start

    Before you can build a realistic overseas packaging timeline, you need to plan ahead and ensure all critical inputs are locked or clearly defined. This includes artwork status (not started, in progress, or press-ready), regulatory readiness (final formulation and completed FDA or compliance label approvals), your co-packer’s next available production window and blackout dates, supplier production lead times (often 4–8 weeks), chosen shipping method (air or sea with realistic transit times), and your true in-market target date. Miss even one of these details, and every downstream estimate becomes a guess—setting the project up for delays before it even begins.

    Step 2 — Build a Backwards-Planning Timeline

    The most reliable way to manage overseas packaging is to plan backward from your launch date. Start with the in-market date, then subtract shipping time (plus a 1–2 week buffer), supplier production lead time, proofing and revision cycles (often 1–3 weeks), and finally the time required to fully finalize artwork—often longer than brands anticipate. The key takeaway: if artwork isn’t press-ready when this chain begins, every downstream milestone shifts, and delays tend to add weeks, not just business days.

    Step 3 — Manage Each Workflow in Parallel

    Overseas packaging stays on schedule only when every workflow moves in parallel, not in isolation. That means locking in artwork readiness with clear file requirements, setting expectations for proofing and revision cycles, aligning co-packer availability with supplier production timelines, and making informed air vs. sea freight decisions early. Add in active customs clearance tracking and a consistent communication cadence across all vendors, and it becomes clear: on-time packaging depends on multiple parties moving in sync, not waiting on one another.

    Step 4 — Watch for These Red Flags

    Certain signals almost always indicate a delay is coming. If artwork is still “in progress” with less than 8–10 weeks before launch, the co-packer can’t confirm a run date, or regulatory labels aren’t finalized, timelines are already at risk. Choosing sea freight against tight retail deadlines or planning for multiple proofing rounds are additional warning signs that packaging may miss its target date.

    Step 5 — Where CarePac Makes This Entire Process Easier

    CarePac helps brands gut-check their assumptions and validate timelines before costly mistakes are locked in. We guide clients through backward planning to keep launch dates realistic, drawing on experience that shows artwork and proofing are almost always underestimated. By centralizing communication between suppliers, co-packers, and designers, CarePac reduces misalignment and risk—making the process far more efficient than DIY, which is possible but time-intensive, easy to misjudge, and prone to delays.

    Alarm clock next to flexible packaging pouch representing tight production schedules, lead time delays, and the importance of timeline management when ordering custom packaging from overseas suppliers.

    Final Thoughts: Plan Early, Communicate Often, and Don’t Go It Alone

    Managing overseas packaging lead times is one of the biggest operational challenges brands face, because even small delays early in the process ripple across every step. The key to staying on track is to start earlier than you think, keep all parties aligned, engage in open communication, and actively manage every parallel workflow. While it’s possible to do it yourself, working with an experienced partner like CarePac can save time, reduce stress, and prevent costly delays—reach out for guidance or support to make your next launch smoother.

    Start your journey on the right foot. Talk with a packaging expert today!

    Team reviewing global supply chain map and packaging samples during a planning meeting, highlighting collaboration, lead time forecasting, and international logistics coordination for overseas packaging orders.

    FAQs: Overseas Packaging Lead Times

    Lets Get Started

    Made In The USA

    Full PouchCustomization
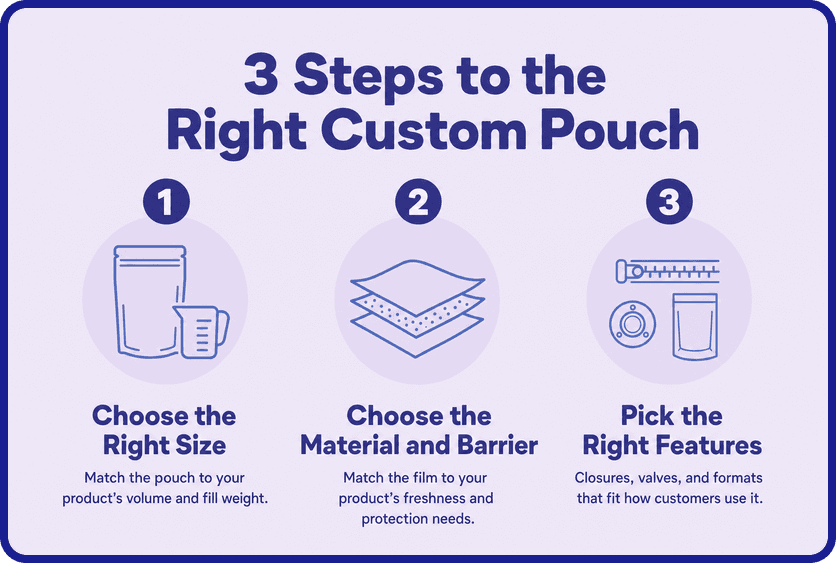
    Scalable Printing Digital & Plate

  • Costs to Watch for When Ordering Packaging From Overseas

    Costs to Watch for When Ordering Packaging From Overseas

    Costs to Watch for When Ordering Packaging From Overseas

    Why Overseas Packaging Looks Cheaper (Until You Add Everything Up)

    While overseas packaging might seem appealing initially, the lower unit price, high-volume factors, and tempting MOQs come with hidden costs and fees nobody likes to talk about. Many brands only budget for per-unit cost and ignore everything else, but it’s important to note that ordering packaging materials overseas can be more expensive than purchasing domestically once all the fees are included. These fees including customs forms, international shipping costs, insurance (especially for fragile items), international shipment delays, and inventory loss.

    Airplane model on stacked cardboard boxes representing international shipping logistics, highlighting freight costs, air shipping fees, and global supply chain expenses when ordering packaging from overseas suppliers.Illustration of global shipping network with boxes and location markers, symbolizing international logistics, customs clearance, import duties, and supply chain risks in overseas packaging procurement.

    If you’re considering shipping overseas packaging materials to your destination country, here are some hidden costs to watch for when ordering packaging overseas. From customs forms to shipping fragile items internationally with bubble wrap, this comprehensive list can help you manage your expectations and decide if purchasing packaging overseas is right for you.

    Cost #1 — Freight Costs (and Why They Fluctuate Constantly)

    The number one cost to keep in mind actually isn’t that hidden (or so you’d think.) Unfortunately, freight costs for international shipments can vary wildly and the price you’re given upfront for global shipping isn’t always the price you’ll pay. Here are some of the reasons your final commercial invoice for international shipping services might be higher than what you initially anticipated:

    • Peak season surcharges 
    • Fuel adjustments 
    • DIM weight for bulky products 
    • Unexpected rate hikes 
    • Port congestion delays leading to hefty storage fees

    It is not uncommon for brands to budget $800 for freight but end up paying $2,100 because of peak season or DIM weight when they ship internationally.

    Upward trending cost graph showing fuel surcharges, port congestion, and peak season pricing alongside warehouse worker managing shipments, illustrating rising overseas packaging costs and supply chain disruptions.

    Cost #2 — Duties, Tariffs & Customs Forms Fees

    The second hidden international shipping cost for packaging that often gets forgotten about are duties, tariffs, and customs fees. See below for some of the more common fees that fall into this category, plus an explanation of each to help determine if these international shipping costs relate to you:

    Country of origin tariffs- Import taxes that vary based on important information, like the product’s manufacturing country, not necessarily where it ships from or its destination country, significantly affect the global shipping costs and trade policy application.

    Formal entry fees- A mandatory charge for sending packages, like the U.S. Customs Merchandise Processing Fee (MPF) for processing commercial imports valued above a certain threshold. 

    Custom brokerage fees- A charge by a licensed professional or courier (like UPS/ FedEx) for handling the complex process of clearing imported goods through a country’s customs. This fee covers paperwork, duty/tax calculation and payment, and coordination with authorities. 

    Agricultural or FDA inspection fees- These fees vary widely by service, commodity, and agency, and cover the import/export certifications, grading, and facility reinspection. 

    Delays causing additional charges- Both expected and unexpected delays can cause additional charges in the form of storage fees.

    Cost #3 — Quality Control Failures (The Most Expensive Hidden Cost)

    Issues with packaging quality control is where the real costs explode. From not choosing the right packaging materials to skipping the QA process to save time and resources, here’s all the things that can go wrong with your order, impacting the final amount of your commercial invoice:

    • Packaging arriving with poor color match 
    • Zipper failures 
    • Incorrect size or gusset 
    • Film thickness off-spec 
    • Ink smudging or lamination issues

    Remakes, replacements, and emergency domestic runs caused by these packaging issues often cost 2-5x more than if you would have purchased the packaging in your home country. Don’t create more problems for yourself by outsourcing critical things like your packaging. For example, our client had to overnight 5,000 replacement bags because their overseas shipment arrived with broken zippers – the replacement fees ended up costing more than the entire original order.

    Custom flexible packaging pouches displayed above a magnified dollar bill, representing total cost analysis beyond unit price, including hidden expenses like logistics, defects, and reorders from overseas suppliers.Stacked flexible plastic pouches filled with product, illustrating risks of ordering incorrect packaging specifications overseas leading to unusable inventory, waste, and additional replacement costs.

    Cost #4 — Extra Sample Rounds & Reproofing Fees

    This is one item that most brands don’t plan for and one that can have extremely high costs is those associated with extra sample rounds and reproofing fees. For example, samples that don’t match production may require resampling, artwork that’s misunderstood can lead to more proof cycles, color drift can cause more ink drawdowns, and each one of these has its own fees and time delays. 

    This is one area that’s extremely difficult to plan or schedule for as well. You may not even encounter these with the right shipping service, but with the wrong one, this can be extremely messy, complicated, and expensive.

    Cost #5 — Incorrect Sizing or Packaging Material Specs (And the Domino Effect)

    Packaging mistakes rarely stay contained. A small miscalculation in sizing or materials on a form can quietly trigger a chain reaction of operational and financial costs that compound over time.

    • Bags that are too large waste valuable space, driving up dimensional weight and shipping costs on every order.
    • Bags that are too small can render finished inventory unusable, forcing last-minute workarounds or full reprints.
    • The wrong substrate can shorten shelf life, degrade product quality, or lead to customer complaints and returns.
    • Insufficient thickness increases the risk of punctures, leaks, and transit damage—often discovered only after product has already shipped.

    We’ve seen this play out in the real world. In one case, a founder ordered 20,000 bags that couldn’t be used at all because a vendor made assumptions about material layering instead of validating the specs. What looked like a simple packaging order turned into a costly delay, a full reorder, and lost momentum at a critical stage of growth.

    When packaging specs are wrong, the cost isn’t just the bags—it’s the wasted inventory, higher logistics spend, missed timelines, and avoidable stress on the business.

    Unbranded coffee bags and opened pouch with contents visible, highlighting packaging quality control issues, seal integrity problems, and product contamination risks from overseas manufacturing.Infographic showing wrong bag size leading to unusable inventory, emergency reorders, missed product launches, and lost revenue, emphasizing hidden costs of incorrect overseas packaging orders.

    Cost #6 — MOQ Waste & Inventory Loss

    High minimum order quantities—especially from overseas vendors—can lock brands into major financial risk long before a product is fully validated. What looks like a “better unit price” on paper often creates hidden costs that surface months later.

    • Ordering 10,000–50,000 bags upfront forces brands to commit capital before demand, product-market fit, or distribution is proven.
    • Rebrands, regulatory updates, or formula changes can instantly make existing packaging obsolete.
    • Leftover inventory doesn’t just sit idle—it racks up ongoing storage and warehousing fees.
    • Correcting a mistake means paying again for new packaging, often on an accelerated timeline with higher per-unit costs.

    We’ve seen brands launch strong, only to realize six months in that their positioning needed to change. In one case, a rebrand made sense strategically—but it also meant scrapping $12,000 worth of unused bags that could never be recovered or repurposed.

    When MOQs are too high, packaging stops being a flexible tool and becomes a sunk cost. The risk isn’t just overordering—it’s paying multiple times for packaging that should have evolved with the business.

    Cost #7 — Delays (The Silent Profit Killer)

    Delays are the most underreported—and often the most financially painful—hidden cost in packaging and production. They don’t always show up as a single line item, but they quietly erode margins across the entire operation.

    • Missed retailer windows can mean losing shelf space, launch momentum, or entire purchase orders.
    • Overlapping batch production forces teams to rush or reschedule runs, increasing labor costs and error rates.
    • Last-minute air freight upgrades quickly erase any savings gained from lower unit pricing.
    • Co-packer downtime means paying for idle capacity while waiting on packaging to arrive or be corrected.
    • Slow supplier communication, especially with a 12–15 hour time zone lag, stretches simple decisions into multi-day delays.

    Individually, each delay may seem manageable. Combined, they create a compounding effect that stalls growth, strains cash flow, and pushes teams into reactive, expensive decisions.

    When timelines slip, the real cost isn’t just time—it’s lost revenue, higher logistics spend, and opportunities that don’t come back.

    Comparison graphic of planned packaging timeline versus real-world delays like time zone lag, air freight upgrades, co-packer downtime, and missed retailer deadlines when sourcing overseas.Risk concept with frayed rope and stacked boxes labeled made in China alongside comparison of expected vs damaged shipment, highlighting quality inconsistencies and transit damage risks in overseas packaging.

    Cost #8 — Lack of Accountability & Zero Recourse

    When something goes wrong with overseas packaging vendors, brands often discover there’s little to no real accountability—and even less recourse. The risk doesn’t just lie in the mistake itself, but in who ultimately absorbs the fallout.

    • Refunds are rare, even when errors are clear or documented.
    • Replacement runs typically take 6–10+ weeks, pushing launches and restocks even further out.
    • Brands absorb 100% of the financial impact, from scrapped inventory to expedited logistics.
    • No local support or escalation path means issues stall in inboxes instead of getting resolved.

    We’ve seen situations where a founder flagged a clear misprint, only to be told it was “close enough”—and then watched communication from the supplier slow to a stop. With no leverage, no refund, and no timeline for correction, the brand was forced to move forward at their own expense.

    Without accountability, mistakes don’t just cost money—they cost momentum. And in fast-moving consumer brands, lost momentum can be harder to recover than lost dollars.

    When Overseas Isn’t Worth It: The True Cost Comparison

    At first glance, overseas packaging looks cheaper. The unit price is lower, the quotes are attractive, and the savings feel obvious. But unit price alone doesn’t reflect total cost—or total risk.

    Overseas vendors:

    Low unit price

    High hidden costs from mistakes, delays, reprints, storage, and freight upgrades

    Long lead times with limited accountability

    Higher operational and financial risk absorbed entirely by the brand

    CarePac:

    Higher unit price

    Predictable total cost with fewer surprises

    Faster timelines and real accountability

    Lower overall risk and better control as your business evolves

    When you factor in errors, delays, reprints, and lost momentum, overseas packaging often ends up costing more—not just in dollars, but in time, cash flow, and missed opportunities.

    The real question isn’t “What’s the cheapest bag?” It’s “What’s the lowest-risk way to scale?”

    How CarePac Helps You Avoid These Hidden Costs

    If you’ve dealt with packaging surprises before, you already know the damage they cause—missed timelines, wasted spend, and unnecessary stress. CarePac exists to remove those variables, not introduce new ones.

    Our company works as a transition partner for growing brands that want clarity, control, and fewer “unknowns” as they scale.

    • U.S.-based communication means faster answers, real conversations, and no 12-hour time zone delays.
    • Predictable timelines allow our customers to plan production and launches with confidence.
    • Quality control matched to approved proofs, so what you sign off on is what arrives.
    • Real-time artwork support to catch issues before they become expensive mistakes.
    • Regulatory checks built into the process, reducing the risk of reprints or compliance issues.
    • MOQs sized for real growth, not premature overcommitment.
    • No surprise fees, no last-minute “adjustments,” and no hidden costs buried after the fact.

    You’ve already dealt with surprises. This is how you eliminate them.

    Want clarity around your packaging costs? Contact us today to learn more.

    Comparison graphic showing overseas packaging challenges like delays and cost increases versus streamlined domestic supply with faster turnaround, reliable logistics, and consistent packaging quality.

    FAQs: International Shipping Costs

    If you still have more questions about whether or not to ship internationally, here are some frequently asked questions our business receives from our customers: 

    Lets Get Started

    Made In The USA

    Full PouchCustomization
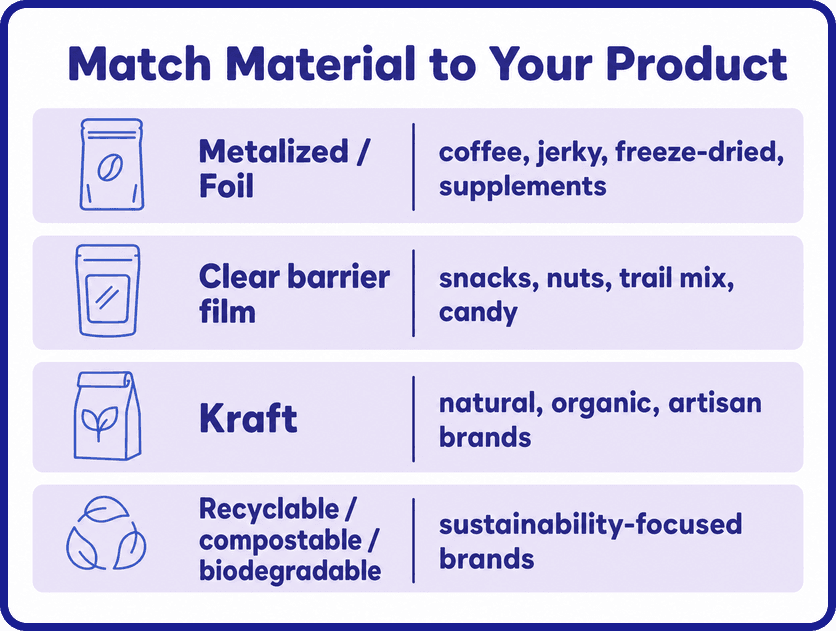
    Scalable Printing Digital & Plate

  • The Realities of Ordering Packaging From China

    The Realities of Ordering Packaging From China

    The Realities of Ordering Packaging From China (What Experienced Brands Already Know)

    Why So Many E-Commerce Brands Start With Chinese Companies— And Why They End Up Switching

    For many e-commerce brands, especially those who are just getting their feet wet in the packaging industry, starting with overseas packaging suppliers in China makes complete sense. Between lower costs per unit, wide material options, and massive production capabilities, overseas manufacturing does have some advantages, particularly if you’re scaling fast or focused on cost savings. And to be clear: overseas vendors CAN deliver great results and reduce costs, but the production process can quickly break down, especially as your business needs change or grow.

    A cardboard shipping box on a warehouse conveyor belt alongside a silver mylar stand-up pouch branded with the CarePac logo, illustrating the end-to-end custom packaging fulfillment process.A row of vibrant, custom-printed flat-bottom coffee pouches with tropical botanical designs displayed on a retail counter, next to a white CarePac-branded stand-up zipper pouch with geometric purple accents and a tear notch.

    As product packaging orders grow more complex, brands can run into critical communication issues, long response times, shifting product offerings, and quality control concerns. Small changes can turn into big delays and proofs often get misinterpreted. Logistics timelines slip, and when something goes wrong, it’s hard to course correct from halfway around the world. Between destination time zones and language barriers, working with Chinese suppliers isn’t always the best choice in the industry.

    If you’re looking for a different kind of manufacturing partner, CarePac can help. Many of our clients turn to us after experiencing the growing pains outlined above. Not because their overseas supplier was “bad”, but because they wanted tighter oversight, clearer communication, and a reputable supplier who deeply understands the intricacies of branded packaging. 

    If you’re curious about what downsides to expect when outsourcing your branded packaging overseas, here is some detailed information about what you can look out for. If you have specific questions about the various advantages working with us can offer you, contact us today to learn more.

    Pain Point #1 — Quality Inconsistency (Even After Approving Product Packaging Proofs)

    If you’ve ever opened pre-production samples and thought, “This isn’t what I approved”, you aren’t alone. It’s not uncommon for there to be inconsistency in the product or components, even after approving the essential packaging proofs. The root cause isn’t carelessness or volume. It’s the reality of overseas production without premium hands-on oversight. Materials are often swapped based on availability, and different machinery is used from one run to the next. Without someone keeping an eye on the specs or dimensions during production, small deviations can quickly add up into big problems. 

    If this happened to you, it doesn’t mean you chose the wrong supplier or didn’t do your homework. It just means the production process lacked the controls needed to ensure consistency at scale.

    Pain Point #2 — Miscommunication, Quality Control Issues, & Time Zone Delays

    Most businesses don’t understand how fragile the production process is until something goes wrong. Artwork gets misunderstood, bag sizes aren’t quite right, and simple questions take days to get answered. On paper everything looks fine, but technical packaging details leave a lot of room for interpretation, especially with language barriers and time zones to contend with. One of the things our customers rely on us for is translation. Not just of language, but of the entire packaging process. We’ll explain what decision matters and will call out issues before they turn into expensive surprises. 

    If you’ve felt stuck waiting for replies or blindsided by decisions you didn’t know were being made, these issues are for more common than most small businesses realize.

    Pain Point #3 — Production Delays, Freight Surprises & Missed Launches

    When brands plan packaging around overseas production, timelines can look solid at first. Then the scope creep begins. Production slips a few days, and those days turn into weeks. Before you know it, your freight schedules shift and your launch date is completely unknown. Much of this is predictable. Although China runs on a six-day work week, this is balanced by a few large, extended holidays when the entire country shuts down completely. Golden Week, Chinese New Year, and National Week aren’t minor slowdowns – they are complete stops. This, coupled with port congestion, port slowdowns, labor strikes, inspections, and paperwork errors can all add unpredictable delays. 

    These aren’t rare cases; they are patterns. And once you’ve missed the launch window, the cost isn’t just higher freight or delayed packaging; it’s lost momentum, lost revenue, and a detriment to your brand identity.

    Pain Point #4 — Hidden Costs That Make Overseas Packaging Suppliers Not-So-Cheap

    On the surface, overseas pricing often looks unbeatable. The unit cost is low, the quote is clean, and everything feels efficient. That is, until the real production costs start showing up. One of the biggest hidden costs is shipping container duties and tariffs. Historically, these were relatively minor but today they’ve spiked as high as 157%. Then there’s sea freight brokerage fees and custom bond requirements, which most first-time importers don’t even think about. Replacement and reprint costs are another harsh reality. When production runs late, brands often end up paying for air freight upgrades just to hit launch date. 

    These product packaging costs don’t show up in the initial quote. But together, they’re why so many brands eventually realize that overseas manufacturing isn’t cheaper – it’s just harder to see the full price until it’s too late.

    Pain Point #5 — No Accountability When Something Goes Wrong

    This part is uncomfortable, but it’s important to note. When you wire money overseas, there’s no rewind button. When errors happen, many companies simply end up eating the cost. While some suppliers suggest there are remedies, we have very rarely seen true accountability play out in practice. Communication often degrades at this stage, too. Responses slow down and messages go unanswered. A common quality issue we see involves non-functioning degassing valves. Suppliers will often offer a partial credit, but only after you send physical samples back for verification. 

    None of this is surprising if you’ve lived through it, and it’s exactly why so many brands eventually decide they need a partner who’s accountable, available, and standing on the same side of the transaction when something goes wrong.

    Pain Point #6 — Compliance Issues (FDA, Labeling, Claims)

    Compliance problems are rarely obvious until they are suddenly urgent. Brands come to us after discovering issues like incorrect weight formatting, allergen statements placed incorrectly (or completely missing), and required material disclosures that are ignored or misrepresented. These aren’t design details, they are specific requirements and not meeting them can put your brand in hot water. 

    None of this means overseas manufacturing is automatically non-compliant. But it does mean the burden of compliance will almost always fall on you. Without a partner that actively checks labeling rules, material disclosures, and facility standards, it’s easy to end up with packaging that looks good but can’t legally be used, leading to packaging waste that can be detrimental to e-commerce brands.

    How CarePac Helps Switch Buyers Transition Smoothly

    If you’re switching suppliers, it’s usually because you’ve dealt with enough headaches. The last thing you want is another complicated transition. That’s where we come in. CarePac is built for brands that are mid-stream; already selling, scaling, and ready for packaging that simply works. Communication is fast and because we’re U.S.- based, questions get answered in real time and issues are resolved quickly. We take a hands-on approach to artwork and file checks, which means fewer assumptions, fewer interpretations, and far fewer surprises when the bags arrive. What you approve is what you receive. 

    We also support lower MOQs, which gives growing brands flexibility without forcing massive upfront costs onto them. Our onboarding process is clear and guided, designed specifically to avoid downtime while you transition away from your existing supplier. 

    Stacked cardboard boxes labeled "Made in China" in a warehouse above a split-path decision diagram comparing overseas packaging suppliers — showing risks like rising costs and delays — against CarePac's solution featuring quality assurance, reliable delivery, and streamlined fulfillment.

    Final Takeaway — Overseas Isn’t “Cheap” If It Costs You Time, Quality, or Credibility

    For many brands, the journey follows a specific type of pattern. Overseas manufacturing works—until it doesn’t. Early savings get offset by quality inconsistencies, miscommunication, missed timelines, surprise costs, and compliance concerns. What starts as a smart cost-saving move slowly turns into a drain on time, focus, and trust—both internally and with your customers.

    Most brands don’t switch because of one big failure. They switch after a series of small, avoidable problems that add up. Delayed launches. Reprints that shouldn’t have been necessary. Inventory you can’t use. Stress you didn’t plan for. At a certain point, the question stops being “Is this cheaper?” and becomes “Is this sustainable?”

    If you’re ready for packaging that’s predictable, accountable, and built to support your growth—not complicate it—there is an easier path forward.

    Curious what a stress-free switch looks like? Get expert guidance with your first quote.

    Lets Get Started

    Made In The USA

    Full PouchCustomization
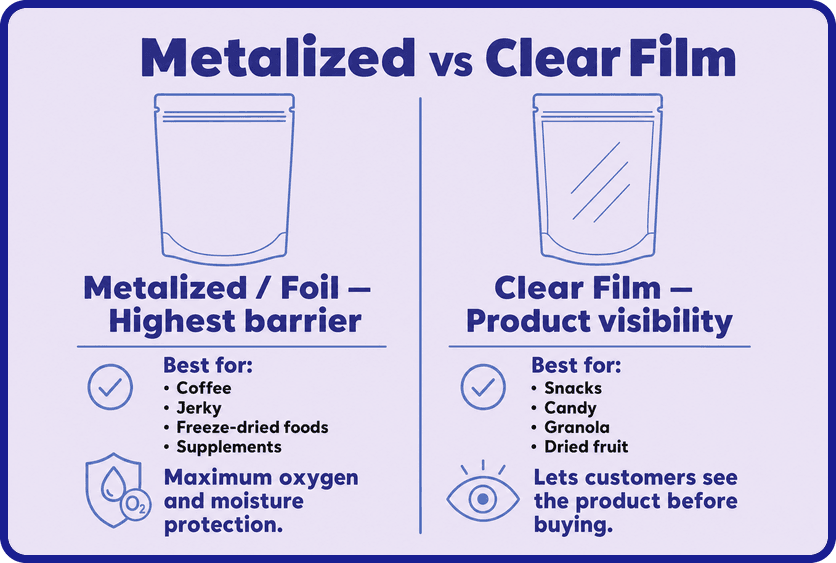
    Scalable Printing Digital & Plate